To use Zoom and implement the service in your work you need to enable Zoom Conference Addon. For this, from your dashboard panel go to STM LMS > Addons.
Find there Zoom Conference Addon and enable it. Click on the Settings icon in the top right corner to open the new page, where you will be offered to Install eRoom - Zoom Meetings & Webinar plugin.
Click on the Install Plugin button.
Once the plugin is installed you can open the Zoom settings. On your dashboard panel, you now can find the eRoom menu. Click on the Zoom Settings option to set it up (eRoom > Zoom Settings).
You will be required to enter some credentials: API Key and API Secret Key. You can collect these credentials on Zoom App Marketplace. Follow this link: https://marketplace.zoom.us/ to obtain your API Key/Secret.
To obtain API credentials, visit the Zoom App Marketplace at https://marketplace.zoom.us/ and sign in with your Zoom account. If you don't have a Zoom account, you can create one using this link.
Our plugin requires Server-to-Server OAuth and Meeting SDK APIs to connect with Zoom and use its functionalities.
To make the Zoom Credentials work, the SSL should be activated on your domain.
On the Zoom App Marketplace page, click Develop and select Build App from the dropdown menu.
In the popup window, choose Server-to-Server OAuth App and click on the Create button:
Give a name to your App and click on Create:
After completing this step, the system will automatically create API credentials, available in the App Credentials section.
After selecting Continue, you will be taken to the Information page. On this page, you are required to enter essential details for your app, including your email and a description. Please ensure you accurately complete the following fields in the Information section:
Company Name
Developer Contact Name
Developer Contact Email
You can skip the next step Feature.
Next, to ensure the plugin functions correctly, navigate to the Scopes tab and select Add Scopes.
Permission issue error notices may appear while creating the meetings or webinars when any of the listed Scopes are not enabled.
You can use the searchbar of the scopes menu to fasten the process:
Below you can see all required scopes:
Account
View account info
View an account's settings (account:read:account_setting:admin)
View an account's settings (account:read:account_setting:master)
View an account's settings (account:read:settings:admin)
View and manage account info
Update an account's settings (account:update:settings:admin)
View and manage sub accounts
Update an account's options (account:update:options:admin)
Update an account's owner (account:update:owner:master)
Update an account's settings (account:update:settings:master)
Meeting
View all user meeting summaries
View a meeting's summary (meeting:read:summary:admin)
View all user meetings
View a meeting's chat message (meeting:read:chat_message:admin)
View a meeting's invitation (meeting:read:invitation:admin)
View a user's meetings (meeting:read:list_meetings:admin)
View a user's upcoming meetings (meeting:read:list_upcoming_meetings:admin)
View a meeting (meeting:read:meeting:admin)
View and manage all user meetings
Delete a meeting (meeting:delete:meeting:admin)
Update a meeting (meeting:update:meeting:admin)
Update a meeting's status (meeting:update:status:admin)
Create invite links for a meeting (meeting:write:invite_links:admin)
Create a meeting for a user (meeting:write:meeting:admin)
View live streaming meeting token information
View a meeting live streaming join token (meeting:read:live_streaming_token:admin)
View local archiving meeting token information
View a meeting local archiving join token (meeting:read:local_archiving_token:admin)
User
View all user information
Verify a user's email (user:read:email:admin)
View a user's assistants (user:read:list_assistants:admin)
View a user's permissions (user:read:list_permissions:admin)
View users (user:read:list_users:admin)
View a user's settings (user:read:settings:admin)
View a user's token (user:read:token:admin)
View a user (user:read:user:admin)
View user's zak token
View a user's Zoom Access Key (user:read:zak:admin)
View users information and manage users
Delete a user (user:delete:user:admin)
Update a user (user:update:user:admin)
Create a user (user:write:user:admin)
Zoom Events
Manage event speaker information
Remove an event's speaker (zoom_events:delete:speaker:admin)
Update an event's speaker (zoom_events:update:speaker:admin)
Add a speaker to an event (zoom_events:write:speaker:admin)
View all events information
View an event (zoom_events:read:event:admin)
View events (zoom_events:read:list_events:admin)
View event's Access Link
View zoom event access links (zoom_events:read:list_access_links:admin)
Webinar
View all user Webinars
View a webinar's participant (webinar:read:participant:admin)
View a webinar (webinar:read:webinar:admin)
View and manage all user Webinars
Delete a webinar (webinar:delete:webinar:admin)
Update a webinar's status (webinar:update:status:admin)
Update a webinar (webinar:update:webinar:admin)
Create invite links for a webinars (webinar:write:invite_links:admin)
Create a webinar for a user (webinar:write:webinar:admin)
View and manage sub account's user webinars
Delete a webinar (webinar:delete:webinar:master)
View a webinar (webinar:read:webinar:master)
Update a webinar (webinar:update:webinar:master)
Create invite links for a webinars (webinar:write:invite_links:master)
Create a webinar for a user (webinar:write:webinar:master)
Once you've added all the necessary Scopes, click on the Done button.
To learn more about scopes and expand the functionality of the app, read Zoom's doc about OATH Scopes.
Click Continue to go to the final step.
Finally, activate the Server-to-Server App:
Copy the Account ID, Client ID, and Client Secret and paste them into the respective fields on the Zoom Settings page in your dashboard and save the settings:
Zoom Meeting SDK offers video-conferencing features that mirror the meeting experience in the Zoom Client. Meeting SDK is required to make Join In Browser work.
Go to the Zoom App Marketplace at https://marketplace.zoom.us/
On the Zoom App Marketplace page, click Develop and select Build App from the dropdown menu
In the popup window, choose General App:
On the opened page, name the App according to your needs:
In the Basic Information page choose Admin-managed as the app management type and Save it:
Indicate your site URL (including https part) to OAuth Redirect URL field on the same - Basic Information page (e.g: https://yourwebsite.com):
Jump to the Embed tab and enable Meeting SDK:
Move to the Scopes page and click on Add Scopes:
Add the following scope and click on Done:
User > View user's zak token (user:read:zak:admin)
Copy the App Credentials and paste them to the designated area in eRoom settings and save the changes:
To make sure the instructors can select a lesson type Zoom Conference in the Frontend Course Builder, go to Users > Select user > Edit User. Scroll down to the Zoom Settings, find there Meeting Host section and Select Host from the dropdown menu.
Zoom addon allows you to easily add new users. Those users can be added as Hosts, which means that they will be able to host and create their own meetings.
Please note for each Instructor on the website the admin should specify the Host. Multiple instructors can be applied to the same Host if you have a free Zoom account with only one Host available. In that case, those instructors can add and conduct video sessions themselves. But they can't stream conferences at the same time.
If there are many instructors and there is a possibility of having conferences at the same time, you need to purchase a premium Zoom plan with a bigger number of hosts: https://zoom.us/pricing
To add a new user, go to eRoom > Add User, and on the new page fill in the necessary information and save.
On the Users page, you can see all the users in your account.
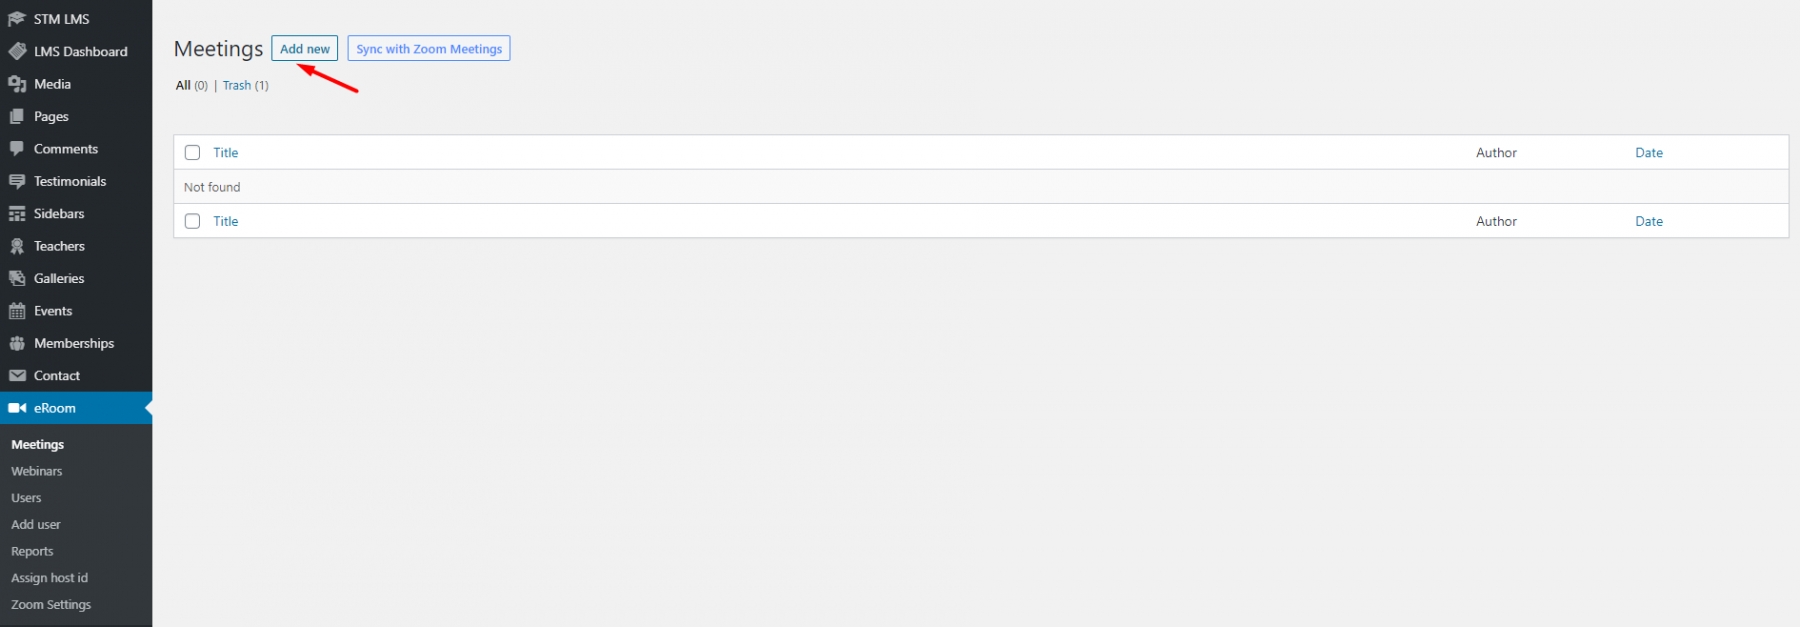
From the Meetings (eRoom > Meetings) menu, you can open the meeting page and create a new meeting or edit the existing one.
The plugin allows you to submit all the information about the meeting, such as title, meeting date and time, host and agenda, specifications about the timezone and meeting duration.
Instructors can add meetings via the frontend page builder. Go to Course Curriculum, find the needed lesson, go to Lesson Settings > Lesson Type and select Zoom Conference type from the options available in the dropdown menu.
You can specify the start date and time, and timezone and enable the following functions: Join before Host, Host join started.
There is also a shortcode that you can add to any page on your website.
Just copy the shortcode and paste it into the page.
In that case, on this particular page will appear a countdown for the planning meeting.
Please pay attention that the correctness of a countdown depends on the Time Zone you set. For a meeting, you can set a time zone when creating one.
If the meeting has already started, instead of a countdown there will be meeting details provided on the page along with the Join Meeting buttons where users have two options, either to join the meeting in the browser or access the session via the Zoom app.
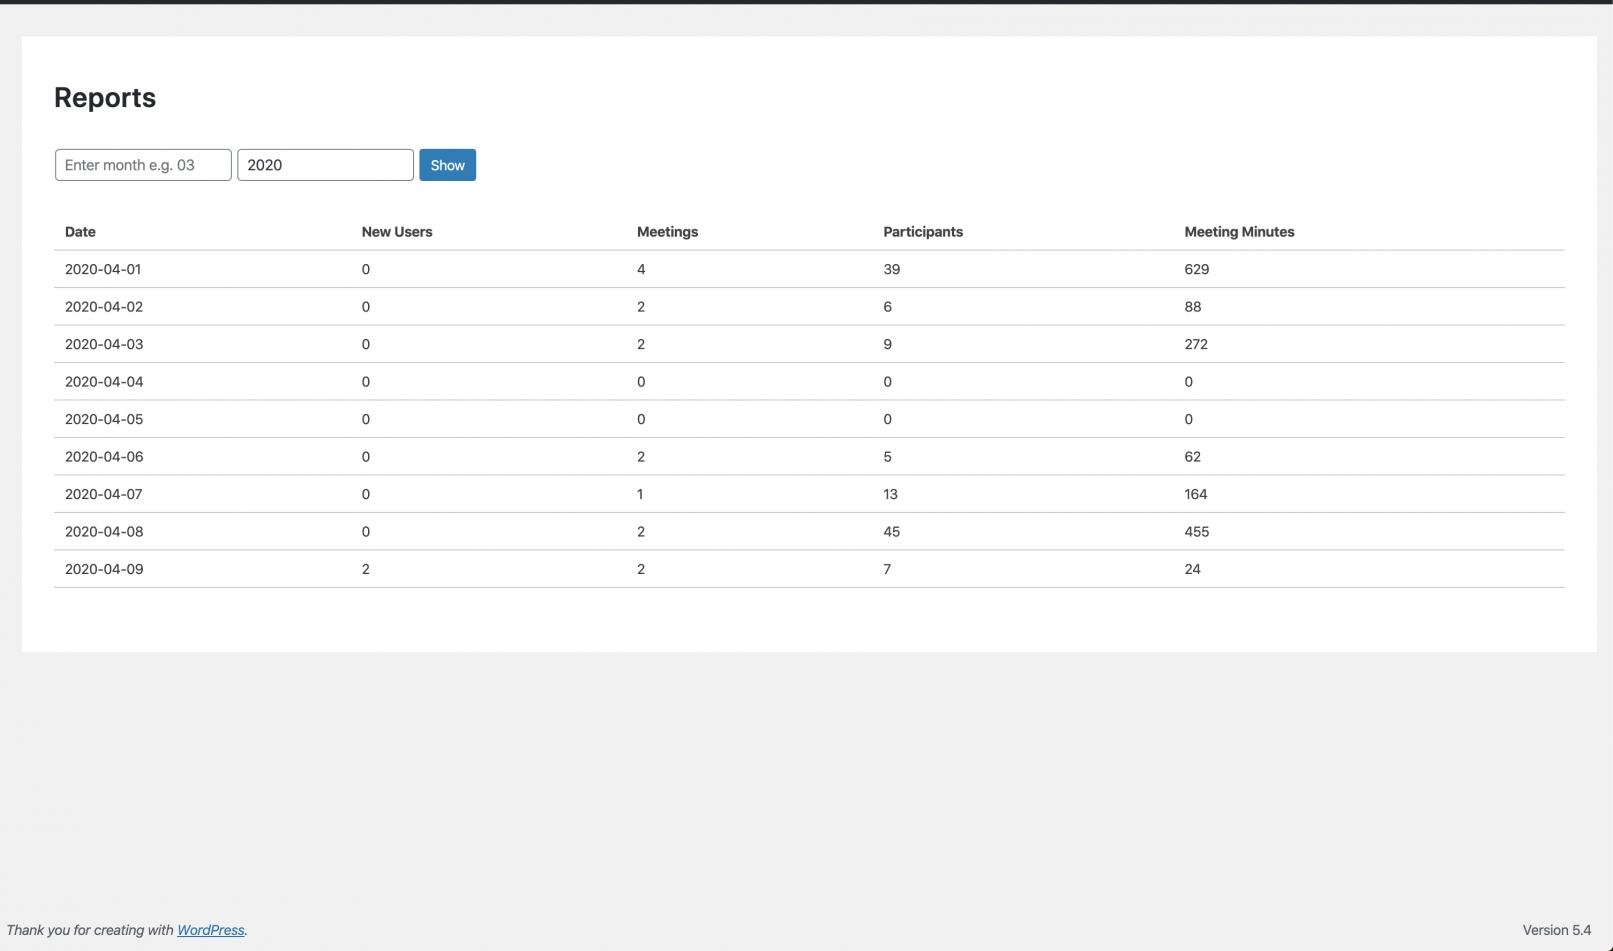
Zoom addon also lets you collect the Reports.
Go to eRoom > Reports menu and access the Reports page. Specify month and year for the data you want to see and you will get your meetings statistics such as the number of meetings, participants and new users.
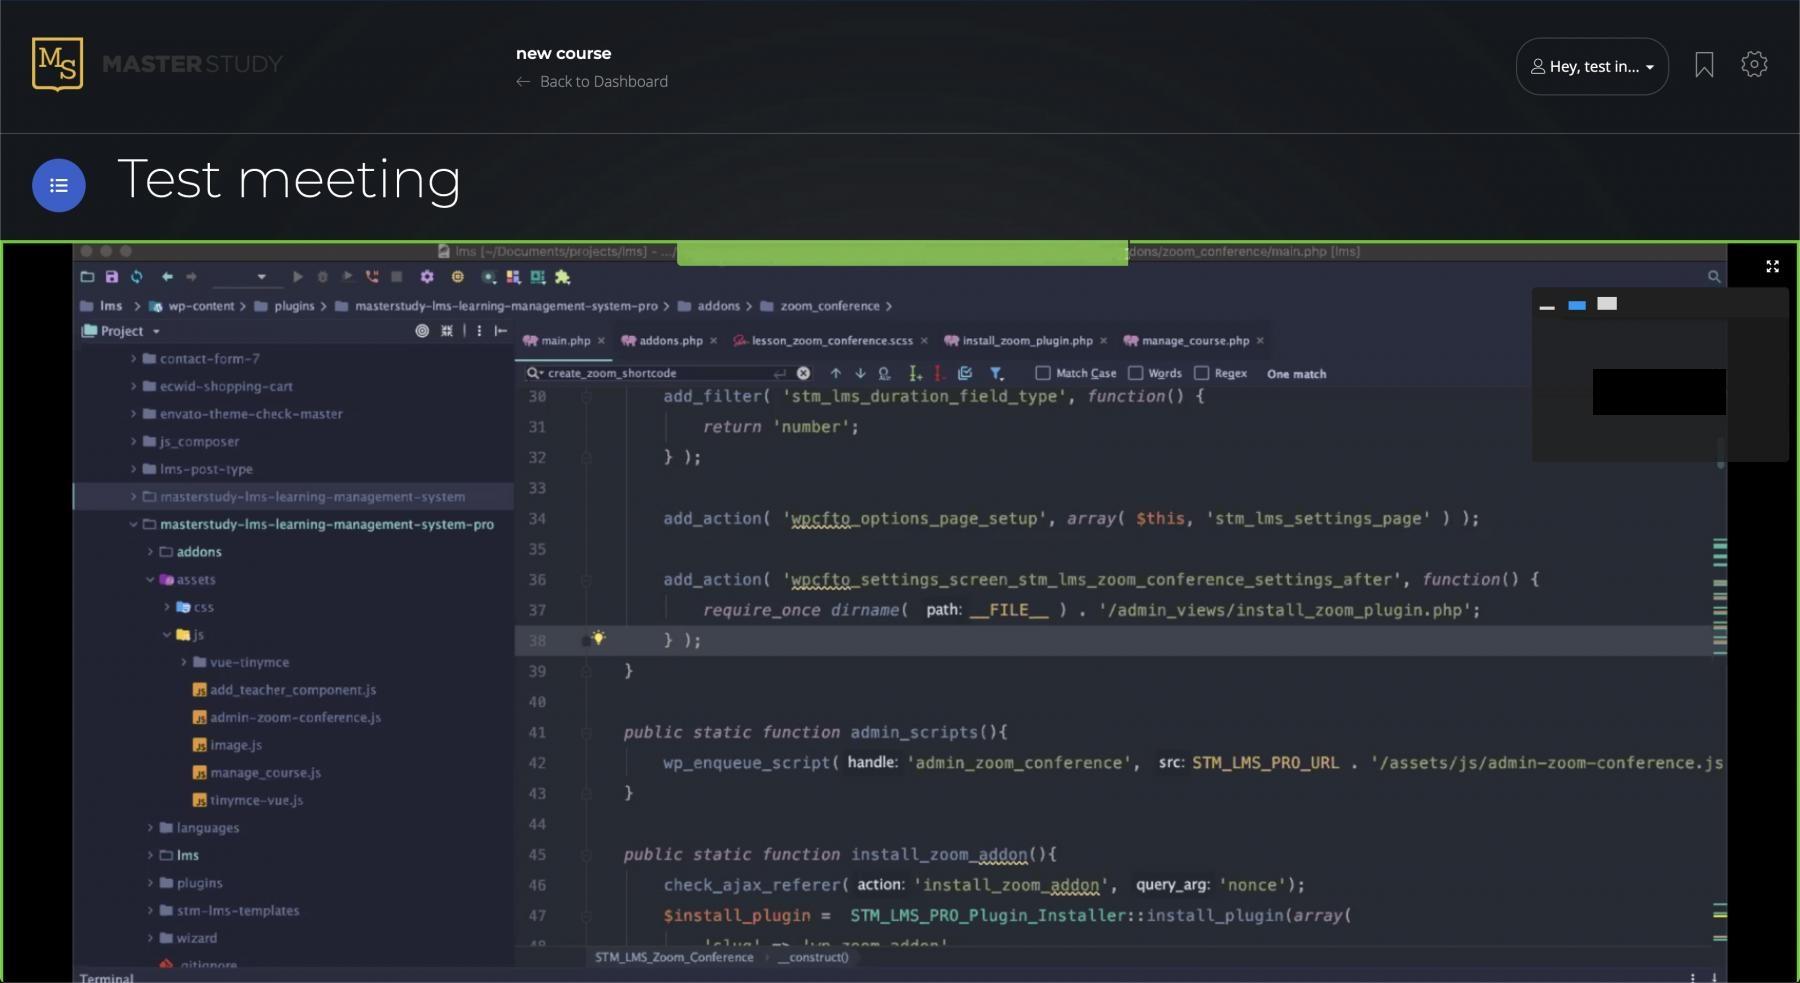
Let’s have a look at the live meetings page. The image below showcases the meeting page of the Zoom App for macOS.
Please note there are different Zoom Clients/Extensions/Apps for different systems and platforms. You can download the needed client version browser extension here: https://zoom.us/download
This is how it should look from the student's perspective.
During the session, you can enable screen viewing mode. When the meeting is over you will see the overall time spent on the video session and will be able to complete it.


