
Loading...
Loading...
Loading...
Loading...
Loading...
Loading...
Loading...
Loading...
Loading...
Loading...
Loading...
Loading...
Loading...
Loading...
Loading...
Loading...
Loading...
Loading...
Loading...
Loading...
Loading...
Loading...
Loading...
Loading...
Loading...
Loading...
Loading...
Loading...
Loading...
Loading...
Loading...
Loading...
Loading...
Loading...
Loading...
Loading...
Loading...
Loading...
Loading...
Loading...
Loading...
Loading...
Loading...
Loading...
Loading...
Loading...
Loading...
Loading...
Loading...
Loading...
Loading...
Loading...
Loading...
Loading...
Loading...
Loading...
Loading...
Loading...
Loading...
Loading...
Loading...
Loading...
Loading...
Loading...
Loading...
Loading...
Loading...
Loading...
Loading...
Loading...
Loading...
Loading...
Loading...
Loading...
Loading...
Loading...
Loading...
Loading...
Loading...
Loading...
Loading...
Loading...
Loading...
Loading...
Loading...
Loading...
Loading...
Under the Socials, you can add the links for the respective social accounts. Enter the link to your Facebook page, Twitter account, etc.
You can change the order of the social networks by dragging the fields.
The order that was set here will not affect the socials appearing order on the website.
The drag-and-drop option has been enabled so you can drag the required fields up for further editing.
In the theme, you can also sell the listings by loan. Display the auto loan calculator on the single listing page to allows users to estimate monthly payments, see how much total interest should be paid and the loan amortization schedule.
On the Calculator section, you can set the loan calculator default values.
Enter the interest rate and month period on the Default Interest Rate and Month Period fields respectively. Then indicate the Down payment settings on the appropriate fields.
The loan amount calculated via the following formula:
Where:
EMI = Equated Monthly Installment
P = Down payment amount
r = Default Interest Rate
n = Default Month Period
To display the calculator on the Dealer One/Two and Aircrafts layouts first enable the Show Calculator option on the Single Listing > Main section. Then add the STM Single Car Calculator element to the page template.
On the Classified One/Two/Three/Four, Boats and Magazine layouts there is no Show Calculator option. Just include the STM Single Car Calculator element o the page template as above or include the STM Single Car Calculator widget to the single listing sidebar under the Appearance > Widgets section to display the loan calculator.
On the Motorcycles and Equipment layouts, it is enough to enable the Show Calculator option on the Single Listing > Main section. The loan calculator button will be added automatically and displays as a pop-up modal, there is no need to add any widget to display it.
Also, there is an STM Auto Loan Calculator element. This is a simple calculator that calculates auto loans. You can write the required price of the product and calculate the loan conditions.
The typography tab includes settings related to font adjustments for the whole website.
You can specify here body font family, indicate font-size and color, adjust text-transform and the line-height on appropriate fields. Also, select the Backup Font Family as the fallback if the main font will not be loaded.
Configure the basic font settings of the headings as Font Family, Font Color, Text transform, and Backup Font Family under the Headings Font Settings area.
After setting the main font configurations of the Headings, you can define H1 - H6 font settings more specifically. Adjust the Font Weight & Style, Font Subsets, Text Align, Font size, Line height, Word spacing, Letter spacing, Font Color, and the Text transform options on the H1-H6 Font sections.
Login to your ThemeForest account and navigate to the Downloads menu in the profile icon at the top-right corner.
Find Motors - Car Dealer, Rental & Classifieds WordPress theme on your download list and reveal the download options. Click License certificate & purchase code (available as PDF or text file).
When you purchase Motors from ThemeForest you can download the theme package through the menu on your . You have two download options to choose All Files & Documentation or the Installable WordPress File Only.
Login to your account and navigate to the Downloads menu in the profile icon at the top-right corner.
A common issue that can occur when installing WordPress themes is “The package could not be installed. The theme is missing the style.css stylesheet.” error message being displayed when uploading or activating the theme.
One of the reasons you may receive this error is if you have uploaded the incorrect file. You have 2 options for downloading your theme.
1. Installable WordPress file only.
There is a System Status tab in Motors Dashboard that gives you access to main server indicators:
Server Environment information shows which requirements are met on your server:
Active Plugins shows information about plugins used, version and authors:
Since we develop only premium themes to meet the high standards and expectations of our customers, the theme is a bit more demanding on resources than the average basic theme. The Motors Theme is designed and developed for use with WordPress 6.0 or higher.
In order to use all the options of Motors, you need to make sure that your hosting supports the following requirements:
We clearly understand that most of our customers (freelancers and creative agencies) create a website for their clients. And for one project you have to create more than one staging website. If you have used the one Purchased code for the staging website and can not register it for the primary website, follow these steps to reset the Purchase code from the staging website:
1. Backup/Clone the staging website files and the database.
2. Make a site migration. We recommend using the , to apply cloning and migration of the websites. You can find more .
3. After the migration, walk through the site and make sure everything is displaying and functioning correctly.
4. Click on the Deactivate button in the staging site dashboard. You will receive a notification that you agree to deactivate, press the Ok button and the system deletes the theme automatically
After purchasing the Motors on ThemeForest, you'll need to from your ThemeForest account. Login to your account and navigate to the Downloads menu in the profile icon at the top-right corner. On the opened page, find the Motors purchase, click the Download button, and from the dropdown, choose Installable WordPress File Only.
There are hundreds of thousands of web hosts out there, the vast majority of which meet the , and choosing one from the crowd can be a chore. Just like flowers need the right environment to grow, Motors works best when it’s in a rich hosting environment.
Bearing in mind the points provided above, we recommend using our special .
Other recommended hosting services:
In most cases, such an error appears if the Purchase Code was registered through another support account. If you do not have access to this your account follow these steps to handle the case:
Log out from the current account on the support website (skip this if you is not logged)
Motors theme comes with 17 unique demos and if you are new to design and developing websites, importing a demo can be the perfect starting point.
The easiest way to import one of the available demos is to use the One-Click Demo Import tool. The Demo Importer tool will be available only after you have
Important! If you updated the theme to the 5.0 version or higher from older versions, it is required to go through this post carefully.
We always try to improve the theme features and functionality in every update of the theme. This requires us to add complicated options under the Customize area of WordPress. However the Customize area of WordPress is limited to add such functionality, we made the decision to develop our Nuxy framework to move the theme settings to the Theme Options area in the WordPress Dashboard.
Once you have installed Motors, you have to activate the theme through our support portal.
NOTE:
The theme activation is required to unlock demo import, premium and core plugins installation.
You can influence the Motors Theme roadmap by taking part in our .
The features with the most votes will be preferred on the theme development roadmap.
On the Blog Page tab of the Theme Options panel are located the basic settings of the Posts.
On the Blog Archive Page Layout area, you can choose the layout type of archive page: Grid or List view
Important: Each theme layout contains a unique structure and complex functionality. Therefore, the settings and sections of the Theme Options may differ depending on the installed layout.
The Theme options panel has been specially created to make your workflow faster and easier. Using it is very easy, and in just a few minutes, you can change a lot of things on your website.
Let's start our acquaintance with the General section settings.
The Import/Export options allow you to apply the same settings configured in the theme options setting on your other websites where the Motors theme is active.
Click the Copy Settings button to export the settings. The settings will be copied to the buffer:
To import the Theme Options settings, paste the copied settings on the Import Options area and click the Import Settings button.
There are two licensing options to choose from when you . The Regular License, and the Extended License. The billing process and licensing term are fully managed by Envato Ltd. and we don’t have any control over this matter.
If your end product (a website where Motors has been installed) is going to be free to the end-user then a is what you need. An is required if you are planning to sell the end product.
Note to creative agencies and freelancers: The theme purchased under the Regular License can be used only on one project - one live website and one staging website. You may offer paid services for your clients to create an end product, even under the Regular License. However, you can’t use one Standard License for multiple clients or jobs.
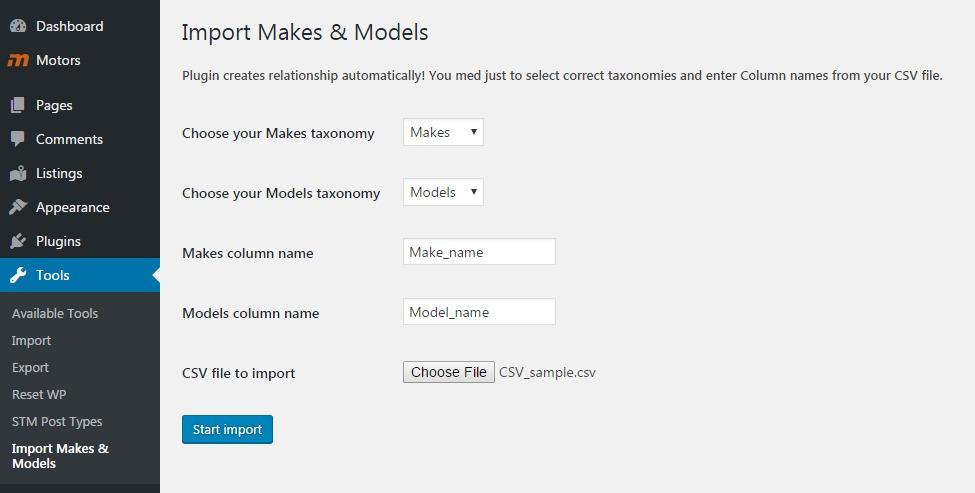
Main theme package includes archive file of the plugin named STM Import Makes & Models. This plugin allows you easily import Make and Model categories in your site. This plugin automatically sets up categories relationship. It only needs to upload CSV import file (with your own categories) and set up a few options. Here you can download the latest version of this plugin.
After installing this addon plugin, you need to go Tools -> Import Makes & Models and upload your own import file.
Please check and be sure that you are setting correct Column Name from your import file.
Example CSV file is located in the plugin folder - CSV_sample.csv or you can download it here.
Here is the Nuxy framework repository on GitHub where you can browse the source and keep track of development.
Theme Options is a new step in turning the Motors into an even more flexible, customizable theme. Now you can customize, even more, making every part of your template unique and manageable!
If you are using the Motors theme version lower than 5.0 to trigger the Theme Options, you just need to update the theme first. After, go to the Appearance > Install plugins section and update the STM Motors Extends plugin.
All your configured settings under the Appearance > Customize setting will be automatically transferred to the Theme Options.
If I want to use Motors on a second website, do I need to buy another license? Yes. Themeforest license allows you to use Motors only on one ended website. In order to use it on a second website, it requires you to buy another license.
Can I use Motors on a test website, then move it to a live website when finished? Sure, you can keep the theme on a test/staging website to build it, then move it to the live website once you’re finished.
Can I keep a test website and a live website with one Regular License purchase? Yes, you are allowed to keep one test/staging website and one live website with one Regular License.
Can I use WordPress Multisite with a single Regular License? Yes. Since the multisite websites are located under one domain, it is allowed to use WordPress Multisite under a Regular License.
NOTE: Licence code for WPBakery Page Builder, Slider Revolution, and Subscriptio is not included. However, you can use them freely or activate your personal license (if you have one) to get plugins updates. This is the Envato policy, also authors of these plugins do not allow any theme developer to provide Purchase Code for third-party plugins. Some of them might have messages requiring activation, but they are already activated on our side. Anyway, we provide plugins' latest version within theme update so your website will always be updated and secure.
Bundled Plugins. This folder contains all the included plugins
Motors Listing Types
Slider Revolution
STM Importer
STM Post Type
STM Motors Events
STM Motors Review
STM Vehicles Listing
STM MegaMenu
STM GDPR Compliance
STM Motors Car Rental
STM Motors Classified Five
STM Motors Classified Six
STM Motors Equipment
STM Motors Extends
STM WooCommerce Motors Auto Parts
Subscriptio
Design. This folder includes all the PSD files of the theme layouts and brands images
Documentation. The Motors theme manual
Licensing. This folder contains the theme license
motors.zip - This is the Motors theme installable WordPress file that you need to upload and install
motors-child.zip - This is the child theme you can upload and activate to apply custom modifications to the core Motors theme files.
NOTE: Some of the bundled plugins work only in a particular layout (i.e. STM Motors Equipment works in the Equipment layout). It is not recommended to install such kinds of plugins in other layouts.
NOTE: Please make sure you are uploading only the installable theme which is called NameOf Theme.zip. If you upload ALL these files you will receive an error.
The quickest way to fix "The link you followed has expired" error is by increasing the file upload size, PHP memory, and execution time limits for your website.
There are multiple ways to do that. We will show you all of them, and you can choose the one that looks easier or the one that works on your hosting environment.
For this method, you will need to edit the .htaccess file by using an FTP client or the File Manager app in cPanel.
Simply connect to your website using FTP and edit the .htaccess file.
Now, you need to add the following code at the bottom of your .htaccess file.
Don’t forget to save your changes and upload the file back to your website.
The php.ini file is a configuration file used by PHP and WordPress. You'll need to connect to your WordPress site using an FTP client and look for php.ini file in your site’s root folder.
Most users are on a shared hosting account, so they may not find it in their site’s root folder. In that case, you need to create a blank php.ini file using a plain text editor like Notepad and upload it to your website.
Now edit the php.ini file and add the following code inside it.
Don’t forget to save your changes and upload the file back to your website.
You can now visit your website and try to upload the theme or plugin file. The error would disappear, and you should be able to upload the file.
If it doesn’t, then try to increase file limits to match the file size you are trying to upload.
PHP version: 7.4 or higher
MySQL version: 5.6 or higher
Verify that your Web Hosting meets the WordPress minimum requirements
PHP Post Max Size: 64 MB
PHP Memory Limit: 256 MB
PHP Time Limit: 300
PHP Max Input Vars: 2004
Max Upload Size: 64 MB
GZip: enabled
ZipArchive: enabled
WP Remote Get: enabled
There is a System Status tab in Motors Dashboard that gives you access to main server indicators:
The server Environment section shows which minimum requirements are met on your server:
You can change the required parameters and PHP version under the Hosting account, cPanel, or contact your hosting provider to set the right parameters for you.
Step 1 - Navigate to Appearance > Themes
Step 2 - Click Add New and click the Upload Theme button
Step 3 - Browse to find the motors.zip file on your computer and click Install Now
Step 4 - Navigate to Appearance > Themes and click the Activate button to activate the newly installed theme
Before you begin the install, there are a few things you need to have and do.
These are:
Access to your web server (via FTP or shell)
An FTP Client
Your web browser of choice
Step 1 – Log into your FTP client to access your host web server
Step 2 – Browse to find the motors.zip file on your computer (located in the downloader folder from ThemeForest) and unzip it.
Step 3 – Upload the folder you extracted from the zip file to yourdomain/wp-content/themes/ folder
Step 4 – Activate the newly installed theme by going to WordPress > Appearance > Themes and clicking the Activate button.
Login with Envato account
Thus, our system verifies the owner of the license and binds the purchase code to the email that is linked to the Envato account. For previous support accounts, the purchase code will be reset.
NOTE:
The license deactivation process will automatically remove the theme from the website
To reset the license key from the website, go to the Motors > Product Registration section on the WordPress dashboard. Click Deactivate button, you will receive a notification that you agree to deactivate, press the Ok button and the system reset the license key from the website and deletes the theme automatically.
Yes. According to the ThemeForest license terms, one license key is allowed to be used on one project. One Project contains one live website and one staging website. If you wish to use Motors on an additional project, it requires you to buy another license.
Yes. You can keep the theme on a staging site to build it, then move it to the live site once you have finished. See the following page about the license key transferring:
Before importing one of the demos available in Motors it is advisable to check the following list. All these queues are important and will ensure that the import of a demo ends successfully.
Theme Activation – Please make sure to activate your Motors copy to be able to access the demo import tool
Theme Update – Ensure that you are running the most recent version of the theme
Core Plugins – If Motors core plugins are active on your website, make sure they are up to date
Plugins – Is recommended to disable all plugins such as plugins to manage the cache, plugins to manage SEO, etc … You will reactivate your personal plugins later as soon as the import process is finished
To correctly import a demo please make sure that your hosting is running the required features.
Motors come with the One-Click Demo Import tool so easily start with content in the right way.
Step-1. Navigate to Motors > Demo Import section
Step-2. Hover over the demo thumbnail to launch the demo import tool.
NOTE: All demo site images are replaced with placeholder images due to licensing restrictions.
Each demo layout requires a number of plugins to function properly. Fortunately, StylemixThemes has made it easy for you to install the plugins and they will be installed automatically during demo setup proceed.
Step-3. Click Import Demo and select the items you want to be imported.
There are two sections: Used Plugins and Demo Content. Check the options you want to import.
Step-4. Click the Start Import button in order to start the import process.
Depending on the speed of your Internet connection, it may take some time to install all the plugins and import the demo content.
Once the import progress reaches 100% you can start to edit your content and set up the theme settings in Theme Options.
If the import stalls and fails to respond after a few minutes You are suffering from PHP configuration limits that are set too low to complete the process. You should contact your hosting provider and ask them to increase those limits to a minimum as follows:
max_execution_time 600
memory_limit 128M
post_max_size 32M
upload_max_filesize 32M
You can verify your PHP configuration limits by navigating to Motors Dashboard > System Status section.
Navigate to Motors section in your WordPress admin menu to open the theme dashboard. Then click Activate via Envato.
The Activate via Envato button redirects you to the StylemixThemes Support official website, where you will be asked to login/register.
Simple click the Login with Envato button to automatically verify your theme license.
If you have signed in via Login with Envato, all the available Purchase codes related to the Motors will be listed on the My Purchases Codes section.
Just activate your website by selecting one of the displayed Purchase codes and your website link will be included in one of the available slots.
The Activate button with the gray background means that this Purchase code was already used on two websites, and it is can not be used again. On the Used domains section, you can see which domains the Purchase code was activated.
You can add new purchase codes using the Add New form on the My Purchase codes page
Here, on the Add new area, enter the theme's Purchase Code and click the Add button.
Once you hit the Add button, the Purchase code will appear on the My Purchase codes section. Now you can activate the theme on your website with that purchase code.
After clicking the Activate button on the My Purchase codes page, you will be redirected to the Motors Dashboard area.
Congratulations! You have just activated the Motors theme on your website. Now you can import your wished demo layout.
For detailed info on importing the demo layout visit the Import the Demo Content page below:
What is an archive page?
Briefly said, the archive pages are the pages where the list of posts is displayed. The archive pages are generated to collect post pages under a certain post type, category, or tag. WordPress creates archive page content automatically and uses the default template to display the list of post types. It means that you can not edit archive pages as simple pages. You can only set the Layout view and the Sidebar position.
Select which sidebar to display on the blog archive page on the Archive Page Sidebar field:
Also, you can indicate the single post page sidebar under the Blog Post Sidebar area:
The sidebars can be created on the Sidebars section
Only the Primary sidebar from the sidebars list can be set under the Appearance > Widgets section
Select where to display the sidebar on the post page on the Left or Right side via the Sidebar Position section
For the Grid View of the Blog archive page, the posts Excerpt can be disabled/enabled on the Show Excerpt (for Grid View) field.
On the Icon For Best Selling Products field, upload the icon to indicate the best-selling product on your website. The best-selling product will be determined by the selling number. You can specify after how many sales the product will be designated as the best selling product on the Best Seller Product Minimum Amount field.
Here you need to define the number of times a product has been sold to mark this product as the best seller.
Here you can upload the icon to specify the Top Rated Product. The product will be labeled as rated according to the product's ratings. On the Best Rated Minimum Average field, indicate the minimum number of rate after what the product will be assigned as Top Rated.
Enter here the minimum average mark after which the product will be recognized as the best in the rating.
On this field, you can upload the icon to define t the sale products:
Enter the sale price of the product to designate a product for sale:
In the Single Product Template area, select a template to display the product page. There are two templates are available: Template With Sidebar and Template Without Sidebar. On the screenshots below see their appearance:
Indicate which sidebar should be displayed on the single product page on the Single Product Sidebar field:
The sidebars are located under the Sidebars section of the WordPress admin dashboard or under the Appearance > Widgets section:
Define on which side of the single product page to display the sidebar, on the Left or Right side:
Here you can indicate or disable the Prefooter for the Shop and Single Product pages.
Here you can select the overall color styling for your website from the predefined skins:
If you want to use your own color scheme, you can select the Custom Colors option and apply the Custom Base Car Dealer Color and Custom Secondary Car Dealer Color respectively.
Depending on the using layout the Custom Base Car Dealer Color and Custom Secondary Car Dealer Color affects the color of the different elements.
You can display the website in the boxed layout view by turning on the Enable Boxed Layout option.
Once the option is enabled related settings will be displayed:
Select one of the provided images or upload your own image as a background image of boxed layout
Enable or Disable the preloader on your website by turning on/off the Enable preloader option.
The theme preloader appears like this:
Enable this option if you want the scrolling of the pages in the theme to roll smoothly. When this option is disabled, the scrolling will stop as soon as the user lets go of the mouse roller.
Insert the Google Maps API key to display the Google Maps on your website.
Enable the reCAPTCHA v3 for the built-in forms in the theme. Then enter the Public and Secret keys on appropriate fields.
Note: the reCAPTCHA appears on the following built-in forms: Trade In Form, Make An Offer Price, Schedule Test Drive, Add a Car, Sell a Car.
Here is an example of how correctly fill the page fields:
One license can be applied in a multisite installation. The only requirement is that the sub-domains, sub-folders of this site should belong to one single end product.
Create a domain (website.com), which becomes be your primary (parent) domain. Then attach subdomains (sub-domain.website.com) or subfolders (website.com/sub-domain) and use the same license key to register the Motors instances on the primary domain.
Or use feature to create Motors theme instances and register them using one license key.
Welcome to Motors - The Best Car Dealer WordPress Theme
Welcome to a guide that will help you get to know your new Motors theme. Above all, We would like to thank you for purchasing this theme, your contribution is very much appreciated.
Motors is the Best Seller car dealership and classified WordPress theme on the ThemeForest. Motors theme layouts provide a full set of options to showcase your vehicle for sale. Our enhanced inventory manager does all the work for you to make your listings irresistible to buyers.
Motors integrated with Dealer Management System to host your inventory which will help you reduce manual entry and optimize the user experience.
This document covers the installation and use of this theme and reveals answers to common problems and issues. We encourage you to read this document thoroughly if you are experiencing any difficulties.
On the Custom JS section, you can insert and apply additional JavaScript scripts to the theme without editing theme files.
Configure the footer settings on the Footer section. Let's walk through the available settings:
Set the footer background color on the Background Color field.
The Widgets Area makes it possible to specify the number of columns on the widgets section (max - 4). Or you can even remove the widgets section via Disable Widget Area Option:
The widgets can be added in the Appearance > Widgets section on the Footer area.
If the number of added widgets exceeds the number of specified columns, then the widgets will go to the next line:
Enable the copyright area on the footer and enter the copyright text on the appropriate field.
Also, you can change the copyright section background color via Copyright Area Background Color
On the Socials section, you can select which socials to display on the Copyright section of the Footer.
The social networks buttons will be displayed only if the links to these social networks are provided in the Socials tab ()
If you'd like to change the installed demo on your website, you'll need to agree with resetting your WordPress. All settings, pages, posts, custom posts, categories, menus, etc. will be removed.
Navigate to Motors > Demo Import and select the new demo from the list.
When you click on the Import Demo a popup window will appear with the message that you have to verify that you "Understand that there is NO UNDO" (mark the relative option) and click Reset Now.
After completing the reset you can proceed with the Demo Import tool and start to import the demo content.
The Shop archive page will be available if the WooCommerce plugin is installed and configured.
On the Shop tab, you can select the WooCommerce Shop page Sidebar and define its position.
There is a custom post type to describe listings your company offer via any element visual composer offers you:
For each listing you can specify description, standard Singe Car Page Options and customizable Car Options.
For the Description we use standard Content area with Visual Composer, where you can insert any shortcode you would like to display.
All car options are available under Car Manager settings:
Details: Here you can set up Static car options and see their position via Preview link.
Options: You can set and add Listing Categories under this tab.
Features: Additional features for Single Car and Compare pages.
Prices: All Price options can be set up here.
Specials: Special car for the special offers carousel module and Featured Listing on Classified layout can be set up under this tab.
Images & Videos: Here possible to set additional images and videos for the Listing.
Here You can see the difference between VC and Classic Editor:
The copy of Motors includes 6 months of complimentary item support from the purchase date. During those 6 months, our support team is available to provide swift assistance to figure out any potential issues you have in using the theme.
Important notice! Our Support Team acts within the scope of ThemeForest support policy. The full definition of support is available .
Theme support is a service provided directly by our agents through our . Support is limited to questions regarding the theme’s features or problems with the theme and bundled plugins. We are not able to provide support for code customizations or third-party plugins.
The Motors theme update is released regularly. Each theme update includes new features, improvements to existing options, security patches, and bug fixes. To be able to use them we recommend you keep the theme installation up to date. As soon as a new update is available, you will be informed via email from ThemeForest.
You can update the theme through the WP admin panel or via an FTP account. Let's have a look at all ways so that you can choose a method that is convenient for you.
Before starting to update the theme, we encourage you to walk through the following points:
php_value upload_max_filesize 64M
php_value post_max_size 64M
php_value max_execution_time 600
php_value max_input_time 600upload_max_filesize = 128M
post_max_size = 128M
max_execution_time = 300If you need help with anything other than the included features of the theme, we suggest contacting our Theme Customization Team.
To speed up your request processing, we require that you follow all the steps below before submitting a new support ticket. It's crucial and will help make the entire process more efficient. We respectfully demand that everyone who submits a support request follow these steps.
Ensure you are running the most recent version of Motors and that all the core plugins are up-to-date.
Always check for theme release notes.
Check our documentation for the answer to your question.
Try to disable any additional 3rd party plugins to see if this fixes the issue.
Try to switch to the main theme in case you are using the Child theme
Make sure you’ve cleared your browser and website caches.
If you cannot find the answer to your question, and our Support Team will assist you.
You can reach our support page by clicking Submit a ticket button on Motors Dashboard
Or click here and log in using the Login with Envato button to enter your support account. It will synchronize with your Envato account and verify your purchase.
2. Select Create a Ticket link at the top of the profile page.
3. Choose a Purchased Theme License option.
4. Select the Motors item from the list of themes.
5. Fill the form and submit your ticket.
On the Motors Dashboard, you can generate admin access to your website for a convenient interaction with the support team.
A popup window with a generated link and deactivation button will appear:
The support options available to you depend on when you make the support purchase.
A support upgrade is 6 months of additional support that can be purchased at the time of buying the item.
A support extension is 6 months of support that can be purchased at any time after the initial purchase of the item, provided the current support period hasn’t expired.
A support renewal is 6 months of support that can be purchased after any existing support for an item has expired.
To be eligible to extend or renew the support, you must have less than 6 months of support remaining and the author must still be supporting the item. You will then be able to purchase a support extension or renewal from the Downloads or Item page. The cost of support is determined by the type of support and is calculated as a percentage of the item price (the price paid to the author for the item license).
In order to extend or renew an item's support offering, you must have less than 6 months of the existing support period remaining, and also the author must still be offering support on their item.
To renew the support component on an item, please follow these steps:
Log in to your account
Hover over your username and click 'Downloads' from the drop-down menu.
The Downloads section displays a list of all the items purchased using your account.
Click on 'Renew support now!' or ‘Extend now’ next to the item you wish to renew the item support for, and that’s it!
There are two reasons why you are unable to extend or renew support:
You have more than 6 months of support remaining on your current support grant; or
The author has been nominated to no longer support the item.
If you have questions, and you are not able to create a ticket, then you can join our Facebook Motors Theme Community, where the other theme users share their experiences.
You can reach the Community via Motors Dashboard:
Always check our release notes - Changelog
Perform a full site and database backup. Thus, you’re able to revert the working version of your website if anything unexpected happens during/after the update process.
Ensure that your server is configured to the minimum requirements for the theme. You can see the required minimums of the server limits on the System Requirements page.
Reset the browser and server cache after finishing the update.
Have a staging version of your original website? Then just run the update process first on a test website to ensure that everything is working correctly.
An important step before updating!
Before the release of any update, we conduct automatic and manual testing of our theme. However, during the installation/update process, there may occur unexpected issues related to the work of other plugins or problems with the server side. In such cases, you can contact the support department for assistance.
According to the Item Support Policy of the Envato marketplace, technical assistance is available only during the item support period. Hence, it is recommended to check the support period before updating Motors and renew it if necessary.
Follow all the steps below to get notifications and smoothly update the theme directly from the WordPress dashboard.
The first thing you need to do is download and install the Envato Market plugin from the official website - https://envato.com/market-plugin/.
The plugin adds the Envato Market section to the dashboard menu. Go to the Envato Market > Settings to configure the plugin.
By clicking this link you can get an Envato API Personal Token with all the required permissions pre-selected. You should be logging in to your Envato account.
Alternatively, you can enable the required permissions listed below to get new updates:
View and search Envato sites
Download the user's purchased items
List purchases the user has made
Enter a name for your personal token
Accept the Terms & Conditions and generate a personal token. Copy the key from the success message and click on the Woohoo! Got It. button to complete the process.
Put the token key to the Token field in the Envato Market plugin settings and save your changes
You will be redirected to the Themes tab where you can update the theme by clicking the Update Available link
When the theme update is done, you will get a notification message "There are updates available for the following plugins:...".
After updating the theme it is required to update bundled core plugins in Motors > Plugins section. The site administrator will be redirected to this section until they are updated.
Navigate to Motors > Plugins and click Update Available. You'll need to update all the plugins in this section.
NOTE: Licence code for WPBakery Page Builder, Slider Revolution, and Subscriptio is not included. However, you can use them freely or activate your personal license (if you have one) to get plugins updates. This is the Envato policy, also authors of these plugins do not allow any theme developer to provide Purchase Code for third-party plugins. Some of them might have messages requiring activation, but they are already activated on our side. Anyway, we provide plugins' latest version within theme update so your website will always be updated and secure.
Sign in on the ThemeForest account that purchased the Motors theme. On the user's menu open the Downloads section.
You will be taken to a page with purchased items where the Motors theme is located. Click the Download button and select the Installable WordPress file only option. Thus the theme zip archive file (motors.zip) will be downloaded to your device.
Unzip the motors.zip file which will give a Motors folder. Make sure your unzipping software does not create an extra directory with the same name nested into each other.
NOTE: Place your site in maintenance mode using a special plugin (WP Maintenance Mode, Maintenance, etc.)
Retrieve your FTP login information from your hosting admin panel. Login to your FTP account via an FTP software (FileZilla or similar) to access your website folders.
Once you access the FTP account, navigate to the WordPress theme directory YOUR_HOSTING_ROOT/YOUR_SUBDIRECTORY/wp-content/themes and remove the motors folder.
Upload by drag and dropping the previously unzipped motors folder into YOUR_HOSTING_ROOT/YOUR_SUBDIRECTORY/wp-content/themes directory.
Congratulations, you have successfully updated the theme! Also, don’t forget to update the required plugins under the Appearance > Install Plugins section.
The child theme doesn’t need to be updated!
Whenever we make major changes to a certain part of the parent theme, you’ll have to check our release notes and compare the file from the parent theme with the modified one in your child theme. If necessary apply the customizations or modifications again. If you don’t do this, there’s a chance that your custom code (function, feature, etc.) might not work anymore.
SUPPORT POLICY ON CHILD THEMES
While child themes are a great way to add custom changes to the main theme, they are generally used to customize the core code of the parent theme. Because of this, please be aware that customizations of this nature fall outside our scope of support, and we will be unable to assist you with issues that may arise from it.
Configure every item of the Top Bar of your website on the Top Bar tab in the Theme Options panel.
The settings for the Top Bar include several sections, such as Main Settings, Address, Working Hours, Phone Number, Menu, and Socials. Let's walk through each of them.
Set the main settings of Top Bar using the following options:
First, turn on the Enable Top Bar option to display the Top Bar on your website.
Indicate the Top Bar background color on the Background Color field.
On the Text Color section, you can change the color of the text on Top Bar:
Set the Top Bars' icons color on the Icon Color field:
Indicate the Top Bars' links color on the Link Color field:
Also, you can enable the Login/Register option and display the Login and Register links on the Top Bar:
Please Note:
For the Dealership layouts (Dealership One and Two, Aircraft, Boats, Equipment, Motorcycle dealer), the login feature will allow the user to log in to the WooCommerce account only.
If you decide to build a multilingual website, enable the Language Switcher option, so the users can easily switch between languages.
Note: The Language Switcher option will work only if the WPML Multilingual Plugin is installed.
The plugin is not included in the theme package due to licensing restrictions.
Also, the theme allows publishing listings in several currencies on the website.
In the Address section, you can edit the address details on the top bar.
You can choose the Address Icon from the available icons' range on the Icon Picker field and set icons' color and size on appropriate fields.
Insert the address line in the Address field:
Also, you can show this address on the map by inserting the map embed link under the Google Map Address URL section:
To get the embed map code, open your needed address on Google Maps, click the Share button and open the Embed a map section. Use the link inside the SRC attribute:
Decide whether you want to display the address in the mobile view of the website in the Show Address on Mobile section
In the Working Hours section, you can edit the details of your working schedule on the top bar:
Select a different icon, apply the color, and set the size of the icon in the Working Hours Icon section. Then enter the text to display in the Working Hours field.
Decide whether you want to display the Working Hours in the mobile view of the website in the Show Working Hours on Mobile section
In the Phone number section, you can edit the details of your contacts on the top bar
Apply the color and set the size of the icon in the Phone Number Icon section. Also, enter the text to display in the Phone number field.
Decide whether you want to display the Phone number in the mobile view of the website in the Show Phone Numbers on Mobile section.
In this section, you can decide if you want to display the menu on the top bar of the website.
In the Menu section, you can also change the Font size, the Text color, and the Hover Text Color of the top bar menu.
Create the Menu under the Appearance > Menus section and set it as Top Bar Menu on the Menu Settings section:
In the Socials section, you can select which social media links you prefer to display on your top bar:
The social networks buttons will be displayed only if the links to these social networks are provided in the Socials tab ()
In addition to photos, you can embed the video URLs of your listing, upload a preview image, and add additional video URLs or posters.
Specifications is the widget that works only with the Elementor versions of Motors Dealership layouts.
Here you can add groups of item specifications.
Click on the Add Group button.
The group specification block appears, where you can name the group of specifications, add a group icon, the name of the precise specification, and the value.
You can add as many fields and groups as you want. And preview where the changes are going to appear.
You can easily add STM Classic/Modern filter VC module in your inventory page in order to get such result in your Inventory pages.
Besides this, there are several additional settings under Listing car options
Respectively there are different layouts for a Single-Car page and additional fields like Reviews, Seller info, Car details, and Features.
Offices are one of the required detail of the Rental cars. Users need to choose an office during reservation. Offices can be added through Dashboard -> Offices.
It’s possible to add several options for each office, like:
Office address
Google Maps latitude and longitude (You can find them on )
The Features widget manages adding and removing the items that a car has, such as ABS, Bluetooth, auxiliary heating, tire pressure monitoring sys., turbo engine, nitro, etc.
To select the items to be shown in the Features, tick the checkboxes.
You can add extra features in two ways:
in the Additional features field (the fastest one);
By switching on the Specials widget, you can manage your special offer, offer badge, and color, insert special offer text, and upload the special offer banner.
You will need to upload various images to the Layer slider. You can add items from Revolution Slider plugin in the WordPress backend. When you go there first you need to create the new Slider, and add new slides.
More detailed manual you can find here - .
The Prices section helps you set different types of pricing, pricing labels, and pricing descriptions for your listing:
regular price – the price at which similar goods or services are regularly sold;
regular price label – the word/words that will appear with the regular price. You can use the pre-written Old price or enter your own;
The widget allows you to add or create various listing options, such as conditions, body, makes, mileage, model, fuel type, etc.
To add an option item, you need to click on the preferred one from the left group of the windows, and the chosen option will appear in the Selected group of windows.
To create a new option item, choose the window from the right group of windows and click on Add new, write down the name of the new option, and press the + button.
If you want to unselect the item, just click on it, and it'll appear in the opposite window.
Demo Content doesn’t contain WP Options and Widgets, so you need to insert them manually via Appearance -> Widgets. Here are a few examples how to do this:
For example, in order to add Photo Gallery, you need to install Instagram Feed plugin and set it up. Then you will be able to add its shortcode via standard Text widget.
MailChimp Sign-Up Form also needs MailChimp for WP plugin to be installed and set its API up in order to work properly.


Fax
Work hours
Again, thank you for purchasing this theme!
If you have any questions that are beyond the scope of this document, feel free to pose them in the dedicated support forum at www.stylemixthemes.com
To expand the full list of features, click the Show all link.
In the opened window, enter a name, slug (URL-friendly version of the name), and description (optional).
To preview the changes you made, click on the Preview button located upon the Add button in the upper right area of your window.

User listing waiting — users will get a notification saying that the listing was added and is pending for approval. Also, you can use the shortcodes: [car_id] and [car_title].
User listing approved — users will be notified that the listing was approved and is now available on site. The same shortcodes are available: [car_id] and [car_title].
sale price – the price at which something is offered for sale;
special price label – the word/words that will appear with the sale price. You can use the pre-written New price or enter your own;
instant savings label – the amount customer will save from the difference between regular and sale prices;
custom label – this will appear instead of the price. As an example, you can write a Request price text and tick the Listing price form checkbox so that your customer can request the prices from you;
also, if you want to display that the listing is sold, tick the Mark as sold checkbox;
you can preview the changes by clicking on the Review buttons.
The users can also pay individually for each listing. In this way, users have the opportunity to add listings using subscription plans or only pay for each added listing separately.
Under the Pay Per Listing section you can configure the price and period for the pay per listing option:
First, enable the option by turning on the Enable Pay Per Listing.
Then specify the listing price on the Pay Per Listing Price field:
On the Pay Per listing Period field, define the number of days after what the listing will automatically labeled as draft and will not appear on the website.
After the user completes Order, you will receive an Order Notification and then you need to publish the Listing manually via Dashboard.
When User/Dealer modifies the Listing, you will receive a notification with a revision link (with changes on Title and Content). Then only site admin can see those changes and approve or decline modification.
The user can label their created listing as featured and the admin can set a price for this option. The Featured listing will be displayed at the top of the Inventory page:
On the Paid Featured Listing section you can configure Featured Listing settings:
First, you need to enable the option on the Enable Paid Featured Listing field.
Here, enter the label text for the featured listings
On the Featured Listing Price section indicate the price for the per featured listing.
Define the featured listing expiration date on the Featured Listing Period (days) field. Upon expiration, the listing will cease to be featured.
In the Details, you can set up the following information about a vehicle:
Mention the stock number of a vehicle;
Listing location;
Latitude and longitude;
VIN number or Vehicle Identification Number is a 17-digit number stamped into the chassis of a car that serves as the car's unique identity code;
City or highway mileage per gallon;
Registration date (works only with Classified layout);
Certification name (works only with Classified layout);
Certificate 1 Link;
Certified 1 Logo;
Certificate 2 Link;
Certified 2 Logo;
Brochure;
Created by;
Amount of car views;
Amount of phone views.
You can preview the changes you made if you see the "eye" icon in front of the option.
You can find new added modules under STM Listing Layout and STM Listing Single Car modules.
Please note that these modules work only with the Classified Layout version of the demo content. STM Listing layout tab contains modules like STM Listing Search (tabs), STM Blog grid, STM Listing tabs style 2 and etc. which are most important in this layout.
There are several modules for the single Listing post page under the STM Listing Single Car tab.
Classified layout Home page was built using above VC shortcodes. You can also customize this page easily through VC Editor:
In Theme options > User/Dealer > User options section you can adjust the settings related to the users with the Subscriber Role.
Specify which sidebar to show on the User's Public profile page:
Content of the sidebar can be edited in the Dashboard > Sidebars section:
How to Set Up the SidebarHere you can indicate on which side of the page to display the sidebar: Left or Right.
In the "User Slos Limit" field, you can specify the number of listings that users are allowed to freely add.
Here you can specify limits on the number of uploading images per listing.
Turn on the User Ads Moderation option if you wish to regulate the added listings by users.
If the option is enabled, the admin will need to approve any added listings. The listing can be approved in Dashboard > Listings > All items and by clicking on the publish button.
The pending listing will appear on the user account page in the following manner:
Related Page:
If you don't know where to put "Browse by Make" and "Browse by Type" logo images, please follow this guide.
Icon Filters element on the Classified layout Home page displays Listing Category logos/images. And these images don't come with a demo import.
In order to put these logo images, you need to go Dashboard > Listings > Listing Categories and be sure that "Use images for this category" option is enabled for this category. Then click on Manage icon on the listing category:
And here you can see the list of Categories. You need to click on Edit link and then you can see the Image field where you can put the logo images:
WooCommerce is the most popular e-commerce plugin for WordPress. Now you can have a shop with all e-commerce features on WordPress.
Before you start adding products, please go through the WooCommerce plugin settings and specify everything you need for your shop:
Adding the products: You can easily add new products via Products > Add Product
The Motors theme was created so that you can handily import listings data from popular automotive marketing software providers such as HomeNet Automotive, AutoManager, and other DMSs (Dealership management system).
It is necessary to install plugin to be able to import vehicle listings. You can use a free version of the plugin that can be installed from the WordPress default repository.
In order to install the plugin search it from the list of plugins, click the Install Now button, and activate it.
According to our client's needs, we have included this feature to comfortable adding the listings. STM WP All Import Addon works only with WP All Import plugin and supports by adding listings.
STM WP All Import Addon includes custom fields to help you add more variables, which was not possible in the free version of the WP All Import plugin.
Go to the Dashboard > Plugins, click the Upload Plugin button and select STM WP All Import file, which you have downloaded above.
It does not require making any changes in the settings in order to proper plugin work.
In this theme, we paid special attention to Sidebars for your biggest convenience and on multiple previous requests.
We have two types of sidebar: right sidebar and left sidebar, which can be selected for both archive and single posts/pages.
In addition to that, you can add/create a new sidebar with VC Widgets/Elements, in this case, you will need to go here:
Edit or create a new sidebar, and add any sections you need by means of WPBakery Page Builder.
For archive pages and blog posts, you can set sidebar options up via Theme Options > Blog Page.
For single pages/posts you can add sidebar via Widgetised Sidebar or STM Sidebar VC element.
There are two navigations on the site – Header menu and Footer menu, so you can adjust them under Appearance -> Menus
This is standard Wordpress functionality, you can choose from the pages, post categories, or custom links.
Create your own template for listings using WPBakery Page Builder.
You can make your listings more unique by creating an original template for them.
Please note template will be applied automatically to all listings that users and dealers publish on your website.
To add a new template, first, create a new listing. Go to Listings > Add New.
STM Equipment is the element allowing you to place different types of posts on your website pages, namely different grid styles like the one pictured below:
By using this module it is easy to display different category grids which speed up and simplify the navigation for users, and make the page look more interesting.
How to use this option.
Go to the Dashboard panel and open Pages screen. Next, create a new page (or select one from the list) where you are planning to post new elements.
For further work you need to use WPBakery Page Builder to create a grid.
Click on the Add Element button or on the Plus (+)
You can change your site's main language via Settings -> General -> Site Language
It’s easy to localize your site using plugin. Here you can see the related tutorial – https://localise.biz/help/wordpress/translate-plugin/beginners.
Another way is to add your translations via creating your own .po files. Before adding translations for static strings, it needs to rename language files correctly according to your site languages. Theme language files are located in a ../wp-content/themes/theme-folder/languages/folder. You can find a list of language codes here . As an example, the language code for English is en_EN, so you would save the translated files as en_EN.po first, then en_EN.mo.
There are several ways to fill up translations. One of them is using platform. You can add translation via editing your .po file and at the end PoEdit generates .mo file for you. Then you need to upload ready translation files to primordial folder (../wp-content/themes/theme-folder/languages/).
Motors theme includes ready translation files for 6 languages:
Image Preview Slider displays the listing gallery on the listing card. Gets activated when hovering over a featured listing image allowing you to see all the gallery images without visiting the single listing page.
Image Preview Slider works in page builder elements that display listing cards in the list and grid views, on the Inventory pages as well as on the Dealer's public profile page. It is available in the following layouts:
Special for the convenience of HomeNet Automotive dealers a ready import template was created which automatically fills the required fields with variables for importing listings.
Dealer Two Layout provides the opportunity to sell cars online. With easy managing options, you will spend just two minutes to set up this function.
To enable the function of online selling with WooCommerce you need to go to Theme Options > Sell a Car section and check the option Enable Sell a Car online (WooCommerce)
After that, for each listing you want to be available for selling online, you should enable an option Sell a Car online. For this, in the Listing Manager find the Prices section, and check to Sell a Car online.
In such a way, this specific vehicle listing becomes available for online purchase. Customers can simply click on the button Buy Car Online to make an instant purchase.
Special for the convenience of dealers, we have created a ready import template that automatically fills the required fields with variables for importing listings.
Go to Dashboard > All Import > Settings and upload the AutoManager_template file in Import/Export Templates section.
After importing the template, go to the New Import menu, upload your XML/CSV file, and select Listings as a data file.
All pages can be created as simple content pages or built by means of Visual Composer page builder. You will need to first set up the page and then add and set up content blocks. Just add a row and add the modules to row from the Visual Composer dashboard.
Now you can choose how to compose your template. Add Content modules, Testimonials, etc. You have everything to realize your imagination.
We have also included extension packages for Visual Composer. You can use them free.
Just pick the module you like and add it to the row. Then you can edit it.
You can also edit the row background, add video or parallax images to the background. Just click on Row edit icon and you will see the options & features, which are available for this row.
Custom added shortcodes in our theme are on a separate tab:
With the help of the Images, you can upload photos of your listing so that prospective customers can see the product.


Using the WPbakery Page Builder build the template you want. Add some relevant elements, like Price, Gallery, etc.
Click on the Plus or Add Element to add a new widget.
Select the required elements and add them.
After that, you can save your template. Click on the template icon.
In the new window enter the title and click save.
Now you can apply your template as default to all your future listings.
Please note this template will be applied only to the listings you will create in the future. All listings that you already have on the website will save their layouts.
Follow WPBakery Page Builder > General Settings from your dashboard. In the section Default template for post types for the Listings select the template you saved from the dropdown menu and save changes.
When you click on it, a new window pops up — STM Category Grid Filter Settings.
Enter the title
Select a style
Specify the category
There are three predefined styles available to choose from. Let’s see how they look:
Style 1
Style 2
Style 3
When you select the third type you can also set the number of categories to display. The available options are 6 and 12.
To enable Image Preview Slider, navigate to Inventory Settings on Theme Options panel and activate the appropriate toggle switch. By default, 5 images are included in the slider.
Add several images on Listing manager when publishing or updating a listing.
Gallery images can be seen by simply hovering on the listing image. Here are some examples of where and how the preview slider appears.
After importing the template, go to the New Import menu, upload your XML/CSV file, and select Listings as a data file format.
Also, You can use uploaded XML/CSV files in WordPress as well as direct links via Download a file and Use existing file buttons.
In this step, you can Add Filtering Options in order to sort the needed listings or go to the next step.
Scroll down to find the Load Template field and select the HomeNet template which you uploaded earlier. It will automatically fill the required fields.
All the fields below are filled automatically with the help of the HomeNet template.
After making sure that all fields are filled in, proceed to the next step, click the Auto-detect button and continue the process.
Now your listings are ready to import.
All of your imported templates will get the Default Listing Template after the import process completes. Make sure that you set the default template for a single listing before starting the import process.
In addition to all the possibilities of the Sold Listings, Dealership Two Demo possesses an additional feature in the Listing manager that helps to sell listings online.
Find the Price section by creating/editing the listing and enable the Sell a car Online.
Subsequently, the quantity of the items for sale in the listing can be determined.
After each online purchase, the number of items for sale in the listing is automatically reduced. When the number of items reaches zero, the listing gets the Sold label.
In this step, select only the main or the parent item to import, such as car, listing, or vehicle.
Scroll down to find the Load Template field and select the AutoManager template which you uploaded earlier. It will automatically fill the required fields.
All the fields below are filled automatically with the help of the AutoManager template.
After making sure that all fields are filled in, proceed to the next step, click the Auto-detect button and continue the process.
Now your listings are ready to import.
All of your imported templates will get the Default Listing Template after the import process completes. Make sure that you set the default template for a single listing before starting the import process.
Besides this, each page contains these options which include header color or background image, title fonts and colors, breadcrumbs and button settings:


Listing categories are available in Dealership and Classified demo layouts. In the manual below you will find:
.
They are considered key features of the listings and include specific information about vehicles. The vehicles on the Inventory page are sorted by these categories on the Inventory Filter.
You can modify the demo categories or add your own filter options via WordPress Dashboard > Listings > Listing Categories section.
The Category can be edited by expanding it or clicking on the pencil icon:
The available options for listing categories are as follows:
Singular name - Singular label of Listing category.
Plural name - Plural label of Listing category.
Slug - The URL for the listing category should be as short as possible.
Number field - When a category is marked as "Number", it will only accept numerical values and not text. These filed can be displayed in Slider view on the Inventory page:
Use on item grid view - when the option is enabled the category will be visible in Grid view on the inventory page:
Use on item list view - when the option is enabled the category will be visible in the List view on the inventory page:
Use on the single car page - the category with its value will be included in the "Car Details section":
Use on a car filter - the category will be included in Classic Inventory:
Use in tabs - The category will be displayed in tabs of the inventory page in the Motorcycles demo:
Use on car modern filter - the category will be included in Modern Inventory in WPBakery Page builder:
Use images for this category - when activated, it becomes possible to upload images for the taxonomies associated with this category:
Use on car filter as a block with links - when enabled the options of the category will be displayed in the list view on the Classic filter:
Use in the footer search - when enabled, the taxonomies can be searched in the footer search of Classified demos:
Use this category in generated Listing Filter title - the chosen options will be included in the title of the search results for the inventory in WPBakery Classified demos:
Set parent taxonomy - it is possible to set a certain listing category as a parent for another one. In this case, there will be a .
Use on the listing archive as checkboxes - the taxonomies will be displayed in the checkbox view in the Inventory filter:
Show in the admin column table - the options will be displayed for site administrator in Dashboard > Listings > All items section:
To make changes to the default taxonomies/values of the listing category, simply click on the list icon in the manage column:
Taxonomies that already exist can be modified or removed in an opened window:
To add a new classification for a chosen category of listings, just complete the necessary information and click on the save button:
The relationship feature is included for the Listing Search widgets that appear on the home page and Inventory filters. The feature allows connecting taxonomies and displaying child taxonomies depending on parent one.
This option helps to find & select needed makes and models faster. In order to realize this relationship you need to follow these steps:
By editing the "Model" listing category we will set the "Make" category as a parent:
After this it is required to go to Manage Models and set the correct parent Makes for each Model:
Now, when you select make from the Search form only corresponding models will be displayed:
The parent-child relationship between Makes and Models can be imported in bulk using the manual provided below.
In the Header section, you can find the settings where you can adjust each element of the header.
There are 4 sub-panels: Main, Sticky, Logo&Title, Menu, Buttons/Action, and Socials. See below for information on what each section contains.
On the Header Layout field, you can select the header style of your website.
Let's have a look at the header styles:
Dealer:
Dealer Two:
Classified:
Classified Five:
Boats:
Motorcycle:
Rental:
Magazine:
Aircrafts:
Equipment:
On the Header Background Color field, you can set the header background color.
Set the header background color on the Mobile Header Background Color field.
Also, you can use the image as a header background. Upload your wished image under this field.
Here you can set the margins for the menu and icon area.
On the Header text color section indicate the color of the text on the header area:
Here you can set the mobile header text color:
Set the color of socials icons on the header area on the Header Socials Icon Color field.
On the phone settings area, indicate the contact phone to display them on the header.
On the Dealer header style, there are two phone fields: Main and Secondary. The Main contact phone displays on the mobile header.
On the Address settings area set the address section on the header. On the Address field specify your address. Pick the address Icon and indicate the icon size on the Address Icon section.
On the Google Map Address URL section insert the map embed link to show this address on the pop-up map.
To get the embed map code, open your needed address on Google Maps, click the Share button and open the Embed a map section. Use the link inside the SRC attribute:
Here you can enable the Sticky header, set the paddings, and indicate the background color of the sticky header.
In this section, you can set the website logo and title settings.
On the Logo field, upload the Logo file.
Specify the logo image width in px on the Logo Width (px) field.
If there is no Logo image upload, the Website Title will be displayed instead of the logo. On the Text Logo Font Family area, configure the logo font settings as font family, font-weight & Style, font size, font color, and so on.
Here you can set the header menu font and color settings.
You can select the font family, specify font-weight, and style, adjust the font size, text-align, text-transform, and line-height of the menu text. Also, select the Backup Font Family as the fallback if the main font will not be loaded.
On the SubMenu Font Family field set the sub menu's text Font Family, Font Color, and Backup Family:
Adjust the Menu section Margin options:
On the Item Padding field indicate the padding option for menu items:
Here you can set the menu section background color.
Set the background color of menu items blocks:
Indicate the menu item block hover color:
On the Item Hover Text Color set the menu item text color on hover action:
On the Button/Action tab located the settings of the header icons.
Enable the Show Compare button to display it on the header area. Pick the icon, indicate the icon color, and set the icon size on the Compare Icon section:
Display the WooCommerce cart on the header by enabling the Show Cart option:
Here you can set the Compare and Cart buttons background color on hover:
Set the Compare and Cart buttons Text color on hover:
Enable the Show Profile button to display the Profile icon on the header.
On the Profile icon settings configure the icon options and set the profile button hover background color and profile button hover text color on appropriate fields:
Display the Add a Car on the header by enabling the Show Add a Car Button.
On the Label field indicate the Add a Car button text. Set the button options as background color, hover color, text color, add car icon settings on the appropriate fields. Enter the Add a Car page URL slug on the Link field as below:
Enable the WordPress default search option on the header area.
Configure the search icon option on the Search Button Icon area. Indicate the icon hover background color and text color on hover on the Search Button Hover Background Color and Search Button Hover Icon Color fields respectively.
On the Socials section specify which socials to display on the header.
Upon logging in, both Users and Dealers will be directed to their User accounts where all published listings through subscriptions are visible.
When "Pay per Listing" is enabled, the listing that was published for additional payment will be visible in a separate tab:
It is possible to view the statistics for the number of views by clicking on the "eye" icon in the listing gallery.
The statistics will be visible in a graph and provide reports for the last week or the last 30 days.
On a Single listing page, users can view the phone number of the seller:
The statistics will be visible in a graph and provide reports for the last week or the last 30 days.
Published listings can be edited by authors from the user account:
When the listings are edited the same form opens when listings are added.
When the listing is marked as featured it will be displayed at the top of the inventory page:
Authors can mark a published listing as sold directly from their user account.
These listings will be displayed on the Inventory page with the "Sold" label:
The listings can be temporarily disabled from the user account page and they will not be visible on the inventory page.
After disabling the listings authors can delete the listing and it will be removed from the site:
You can import your custom inventory in XML/CSV file format using the WP All Import solution.
Sample import files in XML/CSV file format are provided that you can check the compatibility of the file structure with your importing files.
Find the All Import menu from the Dashboard to upload your custom XML/CSV files, select Listings as the location of the data file, and click Continue to Step 2.
Also, You can use uploaded XML/CSV files in WordPress as well as direct links via Download a file and Use existing file buttons.
In this step, you can Add Filtering Options in order to sort the needed listings or go to the next step.
Drag the variables from the right column to the field where you want to import them.
Important!
Put your images only to the STM Listing Add-On section. Make sure that the name of the images are unique, even if they are located in different directories.
After making sure that all fields are filled in, proceed to the next step, click the Auto-detect button and continue the process.
Now your listings are ready to import.
All of your imported templates will get the after the import process completes. Make sure that you set the default template for a single listing before starting the import process.


On the Single Listing tab, you can set the single listing page appearance options.
Rental products were built based on the WooCommerce plugin - . And there are 2 types of these products:
Car Option
Standard WooCommerce Products
Car option products are not simple products for sale. They are just options that can be included to any car. You can create Car options under Dashboard -> Products -> Add new:
Unlike Dealership Layouts settings, the mega menu in the Classified type mostly adjusted via WPBakery builder. That is why the first thing you need to do is enable WPBakery for mega menu, as by default the builder is activated only for pages.
Open WPBakery Page Builder > Role Manager from the dashboard menu.
After this, on the newly opened page find the Post Type section and select Custom from the drop-down menu. Now you can enable builder for anything you need. Check the option stm_megamenu to activate the WPBakery.
Now you can start your work. To add new menu items go to Mega Menu on the dashboard panel and click on the Add New button.
To begin your work with the mega menu, open Appearance > Menu from the dashboard panel.
On the Menus page, you can edit, add and manage menus of your website.
To build a new mega menu you need to add a new item first - the parent item you want to have the dropdown menu on. Proceed to the panel Add menu items on the left side of the page and expand the Custom Link.
In the spaces provided enter the URL and Link Text for your mega menu and click on the Add to Menu to apply changes.
Modules that were supported only by specific layouts, now can be applied to other templates as well. For example, you can use some widgets from the Car Dealership layouts with Classified listings without any issues.
Motors Layouts which support this option: Car Dealership One, Car Dealership Two, Classified Listing One, Classified Listing Two, Classified Listing Three, Classified Listing Four.
Check out some modules you can use:
STM Car listing tabs


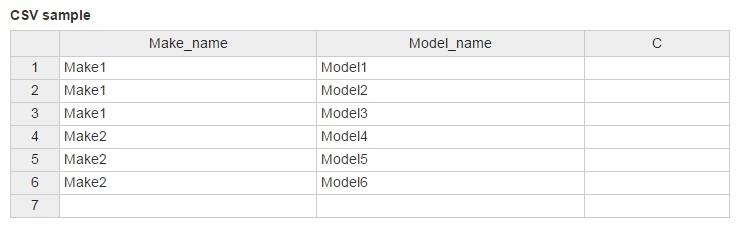
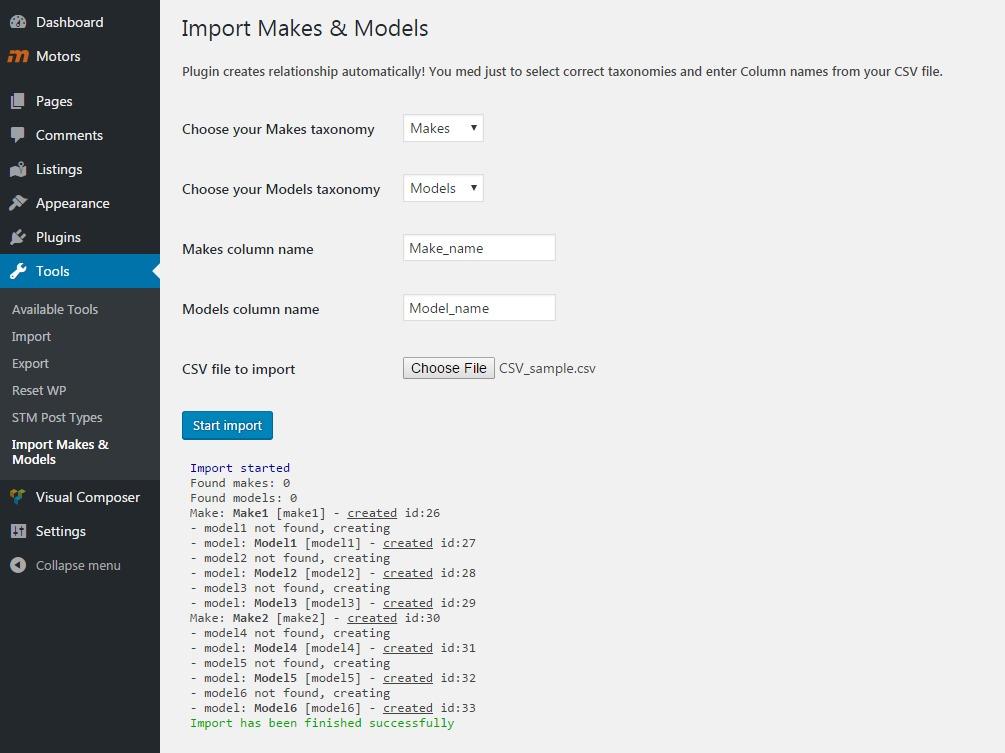


This option displays the published date of the listing on the single listing page.
The option displays the Print button on the listing page and allows to print the listing page via the browser print option.
Show Test Drive Schedule displays the test drive button on the listing page. The Test Drive option allows visitors of the website to make a test drive reservation.
The requests from the Schedule A Test Drive will be located under the Listings > All test drives section of the admin dashboard.
The test drive form appears as a pop-up:
The Show Stock displays the Stock Number of the listing.
Enable the Show Compare option displays the Compare button on the listing page.
Note: The Compare page should be indicated under the Theme Options > Inventory Settings > Main > Compare Page filed, otherwise the compare option will not work.
The option displays the social share block on the listing page. The share option allows you to share the listings on social networks.
This option allows you to download the pdf brochure of the listing.
The listing brochure needs to be uploaded on the Listing Manager > Details > Brochure field on the single listing backend page.
Enable the Show Certified Logo 1 option to display the certificated dealers' logo on the listing page.
The Certified Logo 1 can be displayed via the STM Single Car Actions or STM Single Car Data widgets.
Also, you can display the second certificated logo on the single listing page.
The Certified Logo 2 can be displayed only via the STM Single Car Actions widgets.
The Show Featured Button option displays the Add to Favorites option's button on the listings page.
The users can see the list of items marked as featured on their account page on the My Favourites page:
Enable the Show VIN option to display the VIN number of the vehicle on the single listing page.
The listing VIN number can be entered on the Listing Manager > Details > VIN number field.
The Show Search Result option displays items similar to the searching listing on the single listing page. After enabling the Show Search Result, the Full-Width Search Results option can be activated.
The Full-Width Search Results shows similar searching items on the full-screen page. By default, this option is disabled, and similar searching items remain on a single item's container line.
The Full-Width Search Results can be enabled, which permits specify the number of items on the Desktop and Tablet screen size.
The Search Results feature appears after applying any listing filter.
Similar searching items enables on the bottom of the single listing page after selecting one of the parameters of the searching filter.
The location of the Similar Search Result Carousel can be changed on the single listing page. In order to change the location, place the STM Inventory Search Results any place on the single listing page.
The Show Registered Date option displays the registered date of the listing on the Car Details section.
Enter the Registration date of the listing under the Listing Manager > Details > Registration date field on the backend page of the listing.
Enable the Show History option to display on the Car Details section.
The History field will display the value of the Certificate name field located under the Listing Manager > Details > Certificate name section. And it will be redirected to the link indicated under the Certificate 1 Link field on the Listing Manager section also.
Enable the Show Number option to display the full phone number of the listings' owner.
The listings owner phone number will be displayed only inside the STM Dealer Info widget on the single listing page
WhatsApp Button is a feature which allows potential clients to directly converse with Dealers or with the Administrator of the site on WhatsApp Messenger.
Enable the Show Trade In Button to display the Trade in Form on the listing page. Through this form, users can offer a car for exchange. The message will automatically send to the listing owner's email.
The Show Offer Price Button option allows you to dispay the Make an offer price pop-up modal button on the listing page. Through this form, the user can offer their price for the vehicle. The message will automatically send to the listing owner's email.
Turn On the Show Calculator option to display the financing calculator on the listing page.
You can customize the initial values of the calculator under the Single Listing > Calculator section of the Theme Options panel.
The Calculator appears as a pop-up modal:
If you want to display similar listings on the single listing page, enter the listing category slug name on the Show Similar Cars by Parameter field to define by which parameter the similar listing should appear
The Similar listing section can be displayed via STM Silimar Cars widget.
On the CarGuru Style field, you can indicate the appearance style of the CarGuru section.
Define the CarGuru price displaying condition on the CarGuru Minimum Rating to display field.
Here you can set the CarGuru banner height:
The option displays the Request a Quote button on the single listing page. Here you can enter the link where the users can request a quote.
Also, Request a Quote Link you can enter the ID one of the tabs displayed on the single listing page to refer the users to this tab content:
Copy the tab section ID and insert it to the Request a Quote Link field:
Upload the background image for the Single Listing page on this field:
Displays Quote By Phone pop-up form on the single listing page. Through this form, the user can request the vehicle price. The message will automatically send to the listing owner's email.
On the Reservation Date Page field in the Rent a Car Service layout, you need to indicate the page where will displayed the reservation Information page:
If you are using the Rent a Car Service Two layout, on the Reservation Date Page field specify the page on which the list of rented cars will be displayed.
Here you need to specify the order received page:
The content of the page is displayed in the specified section in the screenshot below, the rest of the pages are taken from the order data.
The Popup Discount Program Description will appear on the vehicle reservation page on clicking the discount field.
Turn on the Enable Fixed Price for Quantity Days option to set up fixed prices for rental products in discount by the number of days.
The fixed price can be specified under the Car Rent Price Info > Fixed Price By Quantity Days section on the vehicle backend-side page:
You need to change a Product type to Car option in order to separate this product from standard products. Besides this, it’s possible to set Price and Image doe this option.
Standard Products can be created in the same way as Car options. But these products are for sale and need to be set up but more fields.
Also, you can set Discount, Pricing for special periods, and Price Per Hour options for your rental product.
Besides this, you can use the option Fixed price by the number of days and set up fixed prices for rental products in discount by the number of days.
To enable this option, go to Theme Options -> Rental Layout Settings section. And check the option Enable Fixed Price for Quantity Days.
After that, when you edit your product follow the Car Rent Price Info section. Select the tab Fixed Price By Quantity Days and specify the price for a particular number of days. Click Add.
Thus, when renting the car users will see the fixed price depending on the number of days.
Main car details can be created under Dashboard -> Listings -> Listings Categories in the same way as standard Listing Categories in other layouts of the theme.
You can set simple or variable products under the Product Data -> Product type option. If you choose Variable Product, you can create product attributes like Payment Methods:
After this, it’s possible to set Variable Products data. Here you can find more information about Variable products - https://docs.woocommerce.com/document/variable-product/. The only difference is the Variation description, which allows changing the order button text on the Reservation page. Besides this, you can choose different payment methods for each variation. We just renamed some of the core payment options of the WooCommerce plugin in our demo site - https://docs.woocommerce.com/documentation/plugins/woocommerce/getting-started/sell-products/core-payment-options/.
On the Add New Item page enter the title for your new menu, use the WPBakery builder to set it up and publish.
How to use WPBakery Builder?
Click on the Plus icon from the builder toolbar and reveal popup.
Here you need to open an additional menu and follow to the STM MegaMenu.
You will have three options here to choose from:
STM MegaMenu Top Categories
STM MegaMenu Top Vehicles
STM MegaMenu Top Makes Tabs
Each of them can be customized depending on the categories, vehicles and makes respectively. Let’s Create All makes section in the mega menu, to display all available makes on the website.
Click on the STM MegaMenu Top Categories. Enter a title for the section, select a listing category and select taxonomies (autocomplete available). Save changes and publish the menu.
How to use STM MegaMenu Top Vehicles?
This option allows you to display items according to the vehicle type and its quantity presented on the website.
Open STM MegaMenu Top Vehicles settings and enter a title for this section. All necessary data will be loaded automatically from the respective categories on your website.
How to use STM MegaMenu Top Makes Tabs?
The next option works with the same principle. Open STM MegaMenu Top Makes Tabs Settings and enter the title for this section on the menu. Check the makes you want to display in this tab.
Now go to Appearance > Menus and organize the structure of your mega menu. Use the panel Add menu items where you can find the Mega Menu section.
If you don’t have this option you can easily add it to the panel. Find the Screen Options tab in the top right corner. Reveal it and check the MegaMenu.
Go back to the Add menu items. Select the mega menu and choose items you want to add.
Mark the SubMenu Use PostId in the parent menu (in our case it is called Mega Menu) so all the data in sub items could be displayed properly.
Now organize the structure of the menu by dragging items.
Once you finished setting up check the menu on your site. The overall look should be similar to one that is below:
(1)
(2)
After this, you can add other items (columns) to display in the mega menu and set up your grid. Just go back to the Custom Links and add a new item.
For instance, you want to show some special offers right away on the menu panel. Create a Special offer submenu (Custom Links > Enter URL and Link Text > Add to menu).
You can use two ways to place it under the Mega Menu. Simply drag the container to the right.
Or choose Under Mega Menu among the Move options.
Check the box Menu as title to use the name you entered in the Link Text. Also for special offers column mark the box Show Special Offers to automatically import offers to this menu.
Move on to creating the next column. Go back to Custom Links, enter the information and add an item.
Draw your attention to the setting you have for each sub menu, they may vary a little depending on the structure. Dropdowns that identify columns have the following setups: icon selection, image adding, text content.
If you create column’s sub-item you will have other options as well.
Let’s assume we want to create a Quick Search column with 3-4 sections to speed up the searching process. Create a New Vehicle subsection under the Quick Search. Add a URL for a quick forward to the new vehicle page. It helps to simplify website navigation.
You can add different details to each section to make it well organized. Enter text items, supplement it with icons, add images.
Continue building your mega menu and pay attention to the structure. You can create any number of columns.
The final form of your mega menu should look similar to this:
STM Special Offers Carousel view
STM Listing Search Without Tabs
STM Special Offers Grid view
STM Icon Filter Grid View
STM Listing Search (tabs)
STM Listing tabs style 2
STM Blog Grid
STM Icon Filter Carousel view
STM Image Filter By Body Type
STM Inventory No Filter
STM Cars on Top Element
STM Dynamic Listing Two Filter
STM Dynamic Listing Filter
STM Inventory Map Wrap


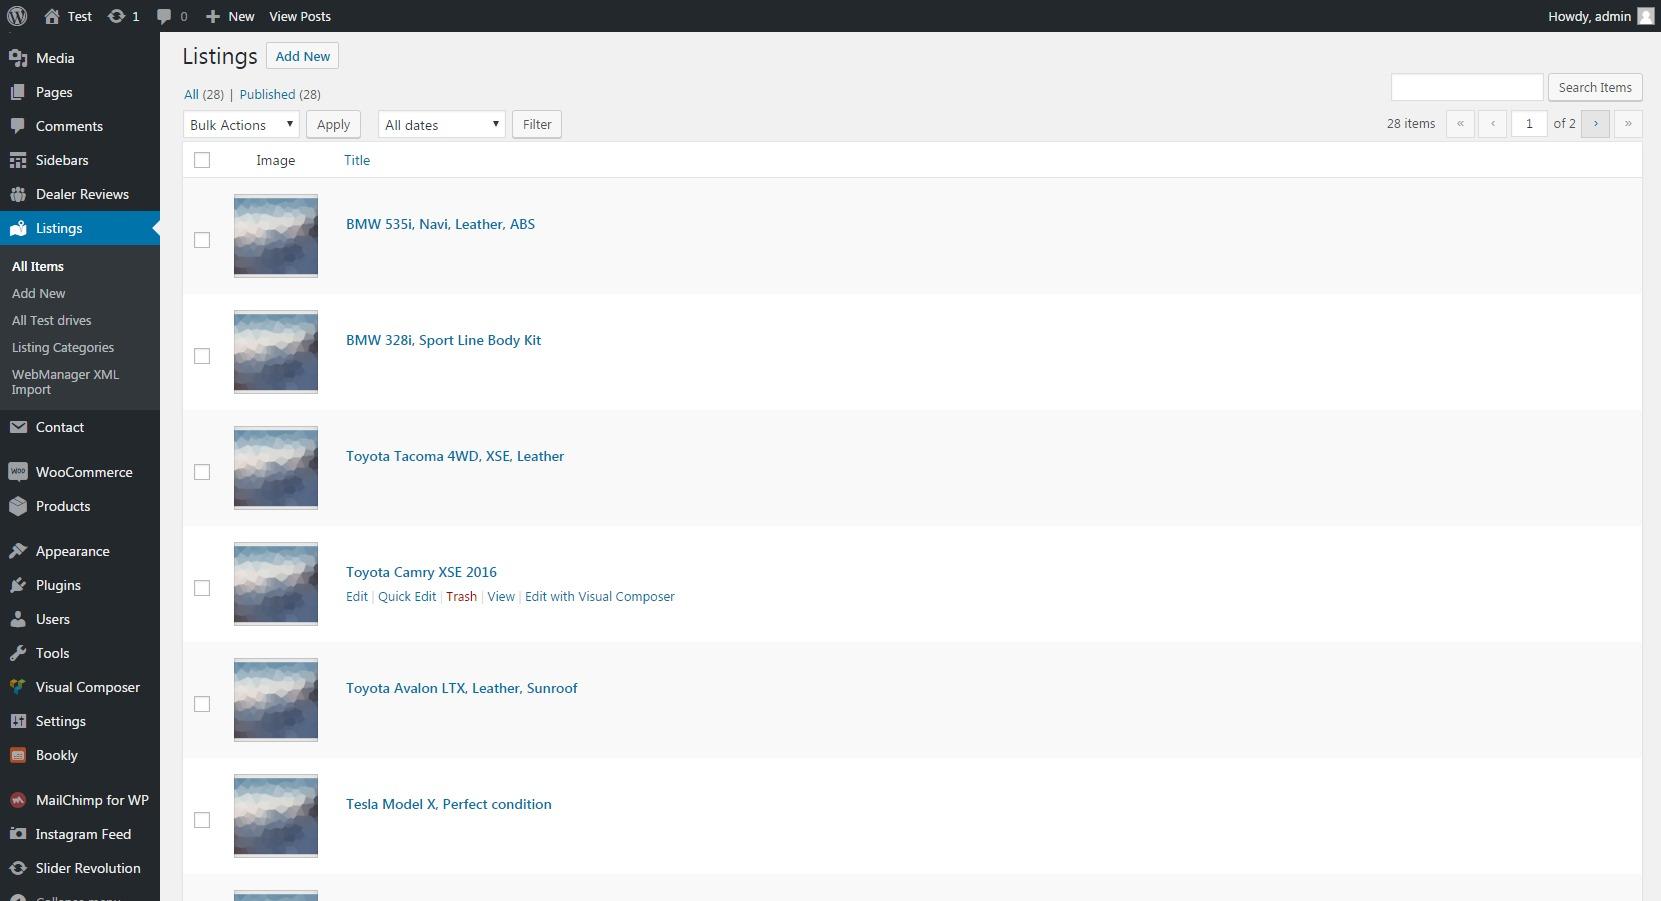
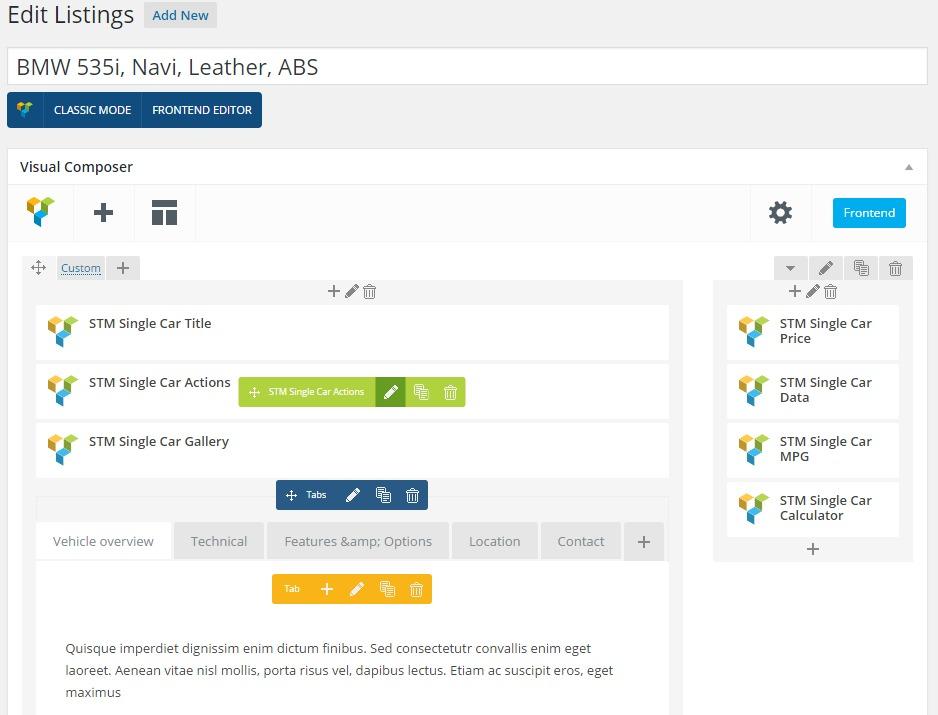
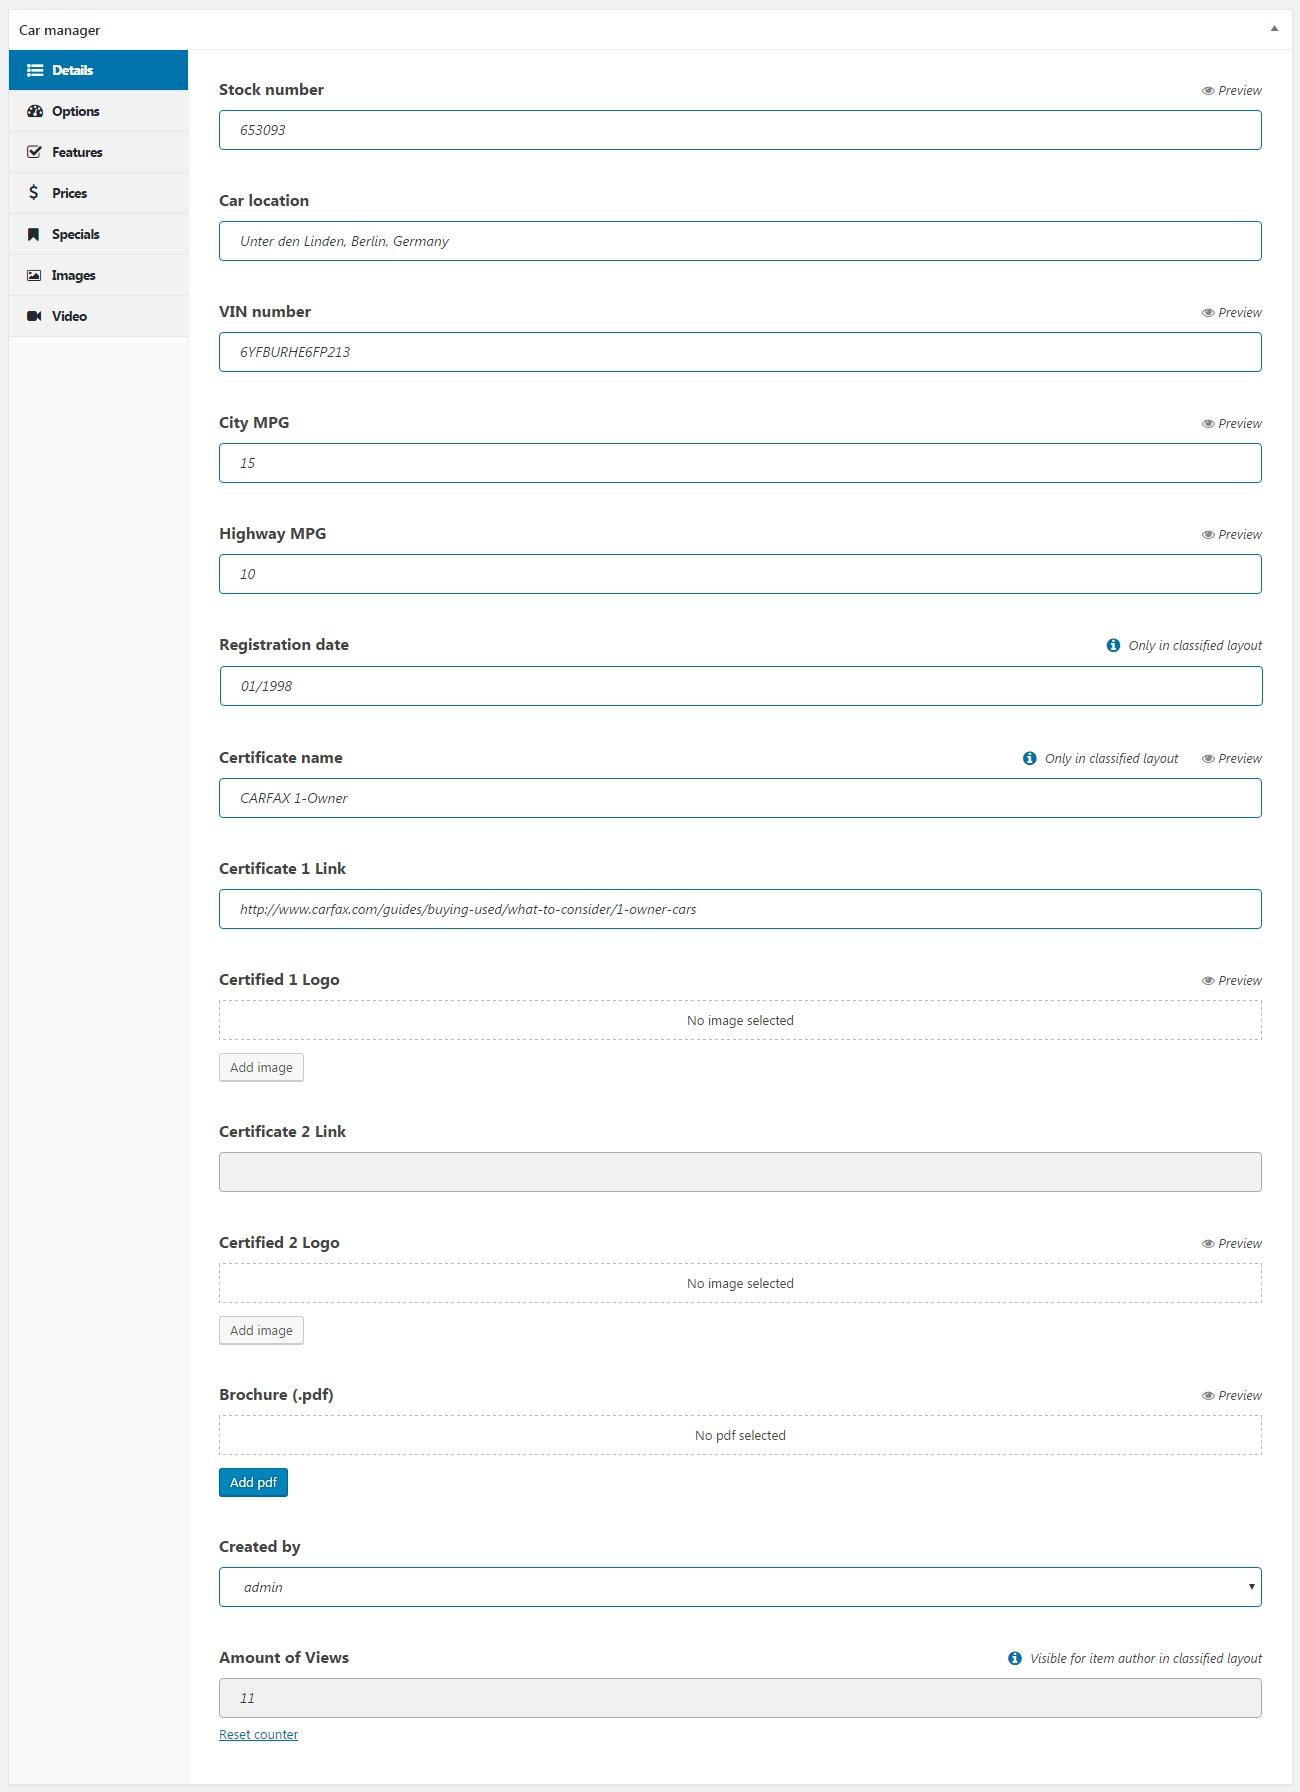
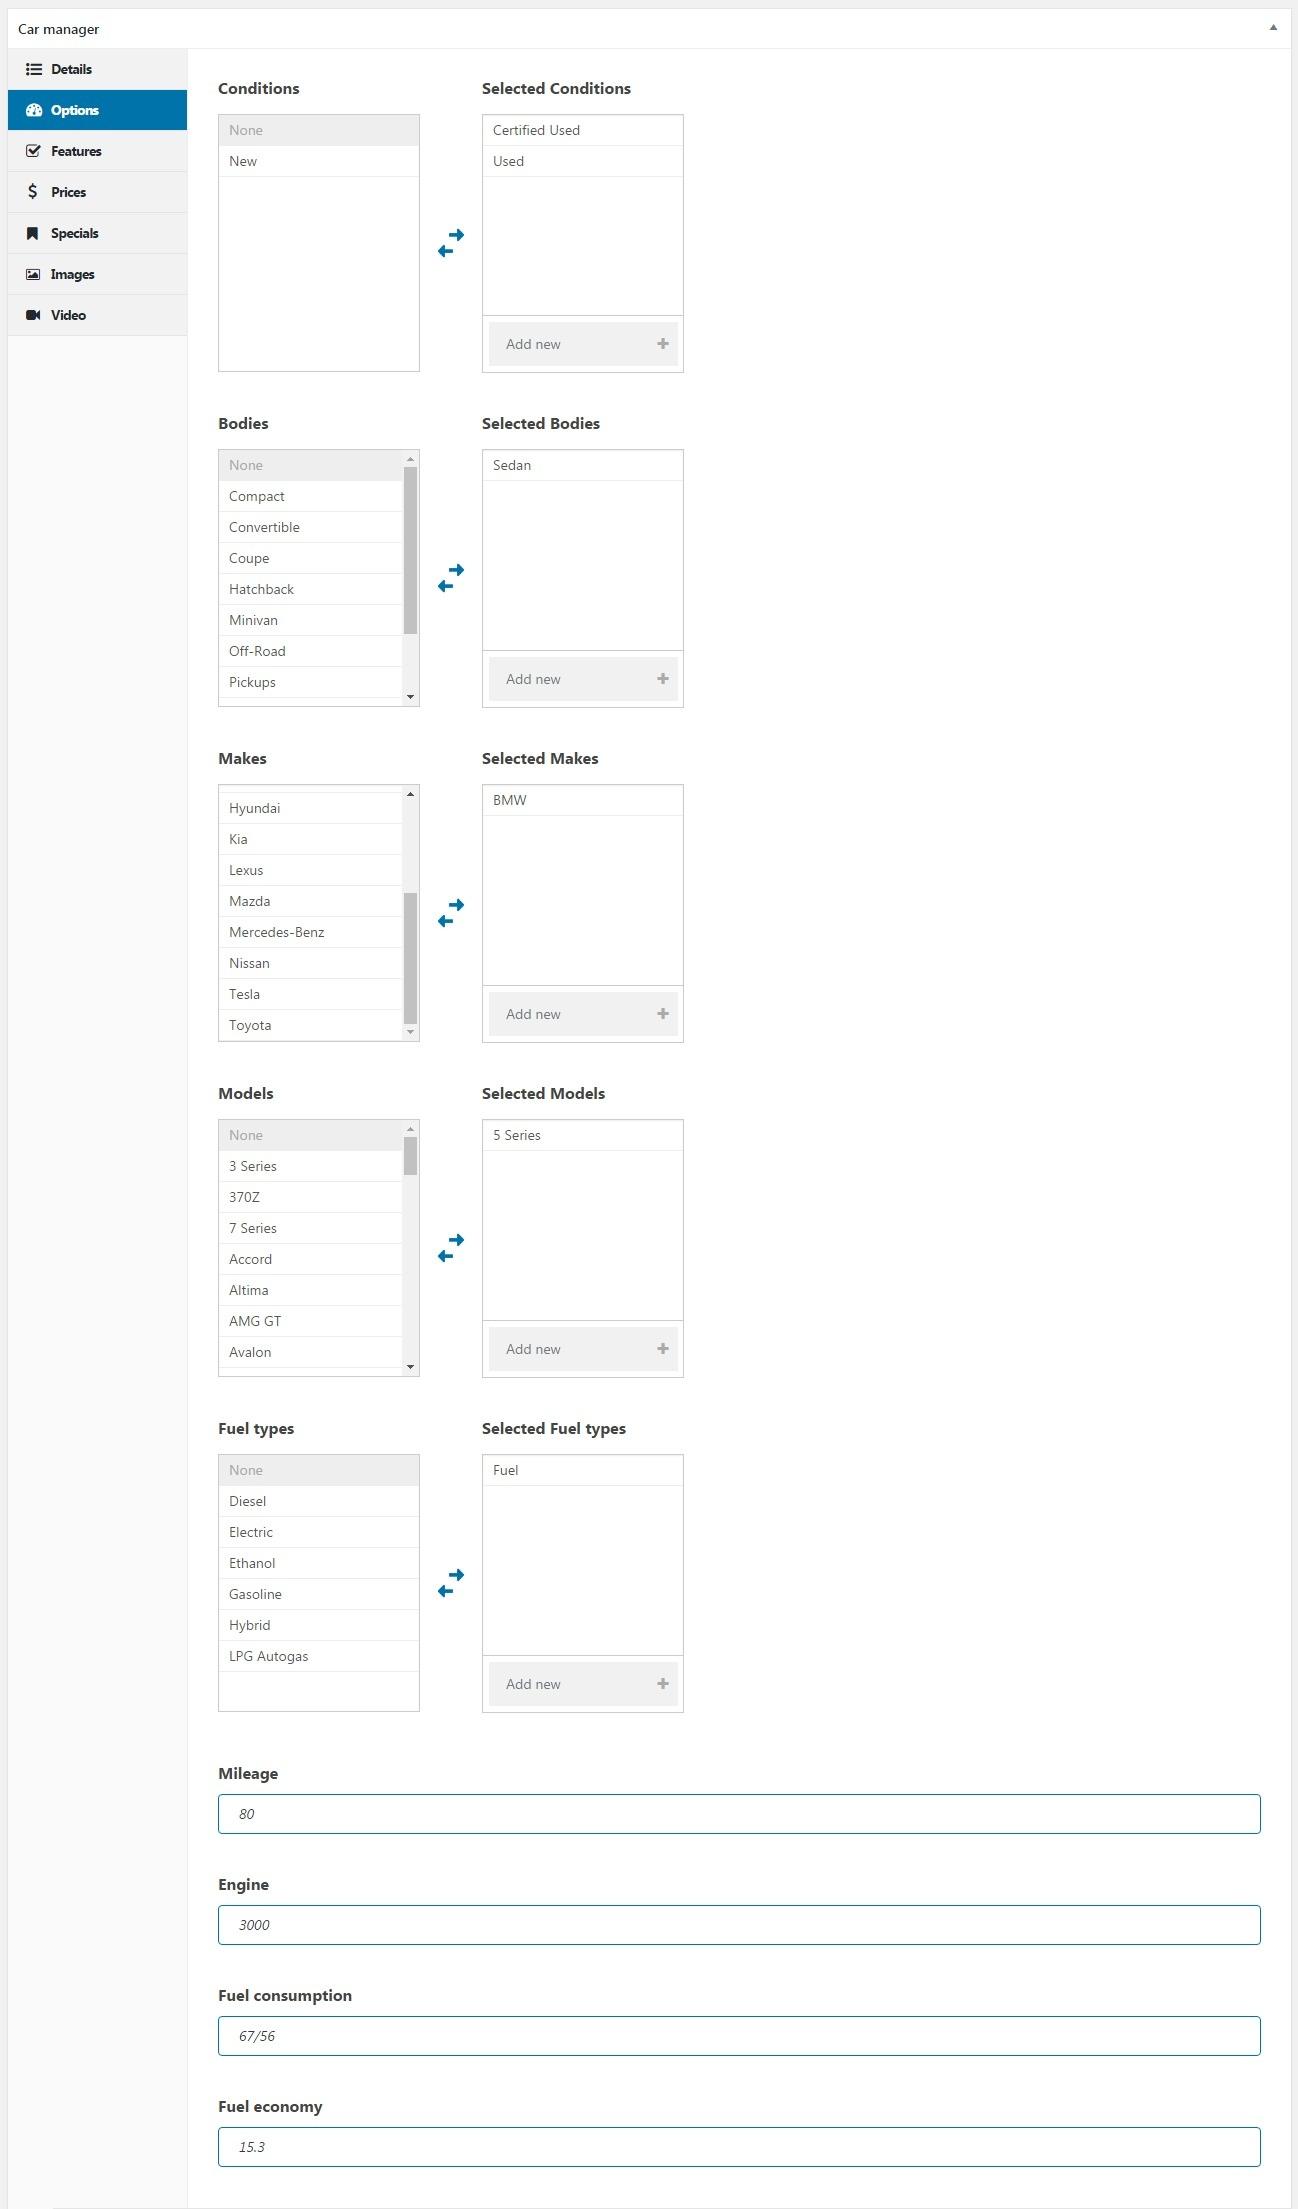
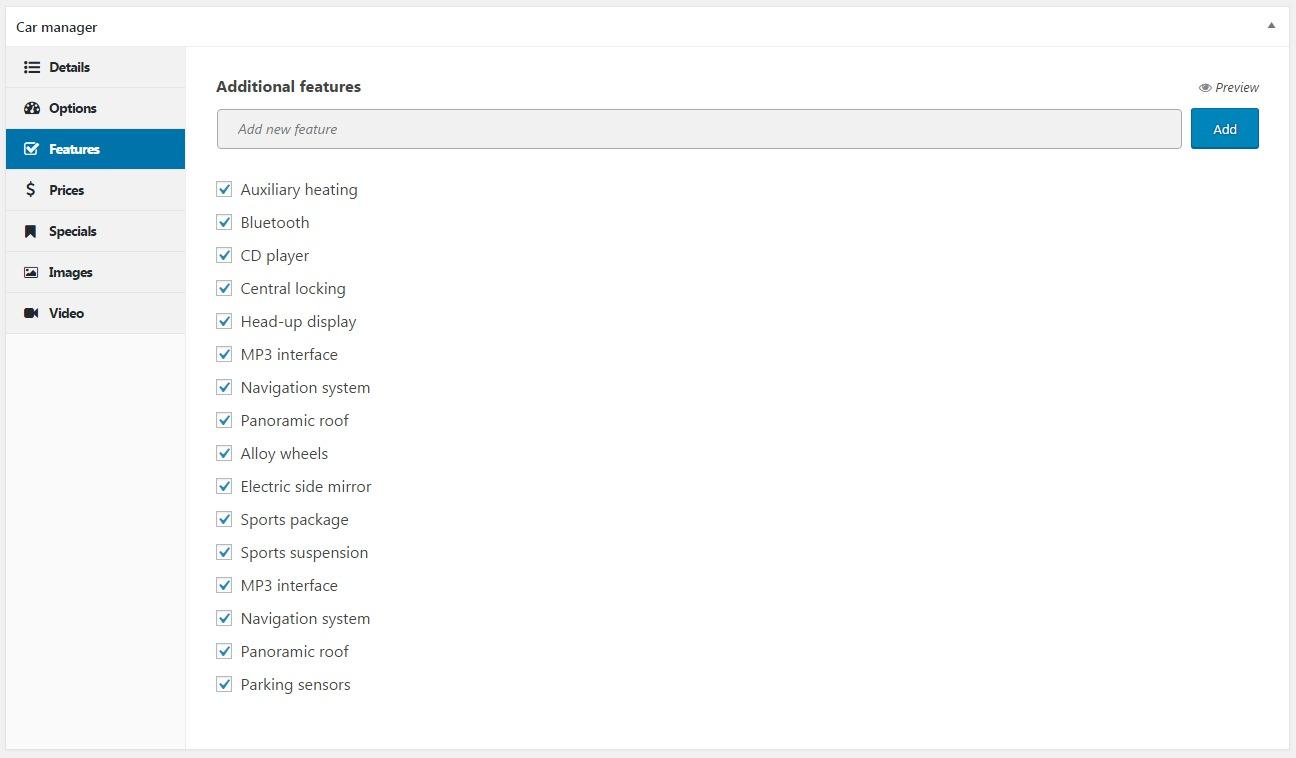
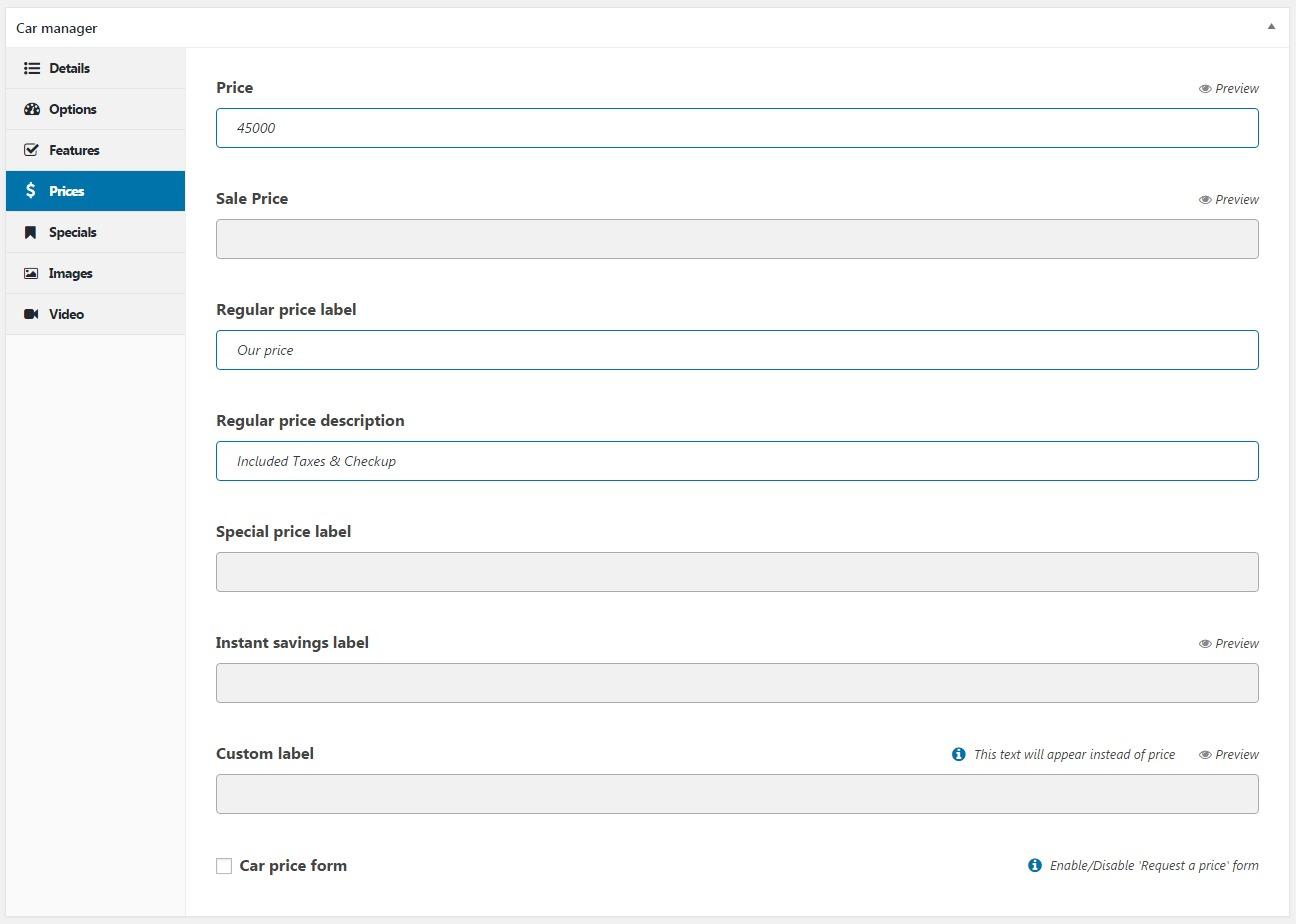
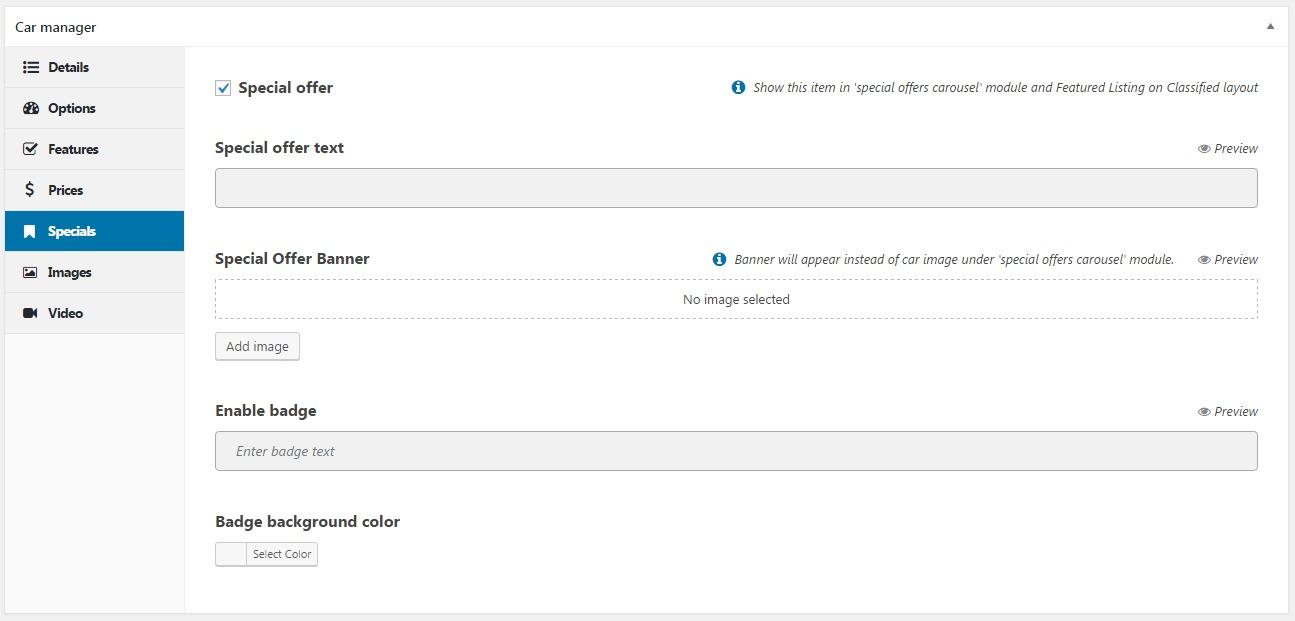


The Inventory page is the listings' archive page, where the users can see the list of available listings and sort them according to the provided options in the theme filter. And on the Inventory setting section, you can adjust this page's appearance.
On the Main section of the Inventory Settings tab located the major options. Below are descriptions of all of them, let's have a look.
On the Inventory Archive Page field, you need to indicate on which page to display the listing archive page
Here you can upload the Title Box section background image on the Inventory page.
For correctly applying this option, the Title Box section should be enabled under the Page Options > Title Box field on the Inventory backend page.
Here you can define the Inventory page Title name. The text will be displayed if the Inventory page is not indicated on the Inventory Archive Page field.
Enable the Hide Price Labels on Listing Archive option to remove the price labels from the price section of the listing
Here you can set the Inventory page heading.
Decide on which sidebar to display on the Inventory page. You can also select the Without sidebar option to disable the sidebar on the page.
On the Compare Page filed indicate the compare page. It needs to add the STM Compare module to the selected page.
Here you can set the default view of listings on the Inventory page.
The Bind WP Search option binds the WordPress default search option to the Inventory page. So if you search something via WordPress default search the page will be redirected to the Inventory page.
The searched elements will be displayed on the WordPress default Search results page:
The Inventory page will open on search:
Enable this option to display the sorting by Additional listing features also.
You can also display the Add to Favorites option on the Inventory page by turning on the Enable Favorite Button option.
Here you can select the default sort condition of the Inventory page.
Decide on which position you wish to display the Filter area on the Inventory page
Here you can upload the background image for the Filter.
On this field, you can indicate the number of listings to display per page on the Inventory page.
Turn on the Use Boat Filter Style to display the Inventor page with the special boats inventory page style.
The List Version Sort Parameter (Type Slug) option is related to the Boats Filter Style. Here you can define by which listing category the default sort should display. The option will be applied only with the List Listing View Type.
The Sold Listings feature enables the administrator to set a Sold badge to the sold or unavailable listings.
Learn more about settings in the Customization section.
The Motors theme allows setting multi-currency on your website. Set the default currency and additional currencies on the Inventory > Price section.
Enter the default price name on the Price Currency Name field:
Also, insert the currency symbol on this field:
On the Price Currency Position define the position of the currency symbol regarding the price number.
On the Price Delimiter field enter which symbol do you wish to use to separate the thousand on the price number
On the Multiple Currencies section, enter your additional currency values. Insert the currency name and symbol on the Currency and Symbol sections. Remember to indicate the conversion rate on the To Field.
The Currency switcher will be displayed on the Top Bar:
On the Filter section, you can include the search by location option also. To enable this option turn on the Show Location/Include Location in Filter option. The option sorts the listings by selected location (the closest listings to the selected address will be displayed first).
On the Unit Measurement field indicate the unit measurement for distance and enter the search radius on the Set Max Search Radius section.
Here you can set the appearance options of the listing block section for Grid/List view on the Inventory Page.
You can set the displaying of the listing's title through this option. Enter the slug of the listing categories that you wish to display as a listing title. Below you can see examples:
Enable this option if you wish to label the two first parameters listing's title. The option works only on the List view of the Inventory page.
Also, you can display the dealer short information on the Inventory page. The Dealer Info appears only on the List view of the Inventory page.
Enable the Show Stock option to display the stock value in the Inventory page. The Stock number appears only on the List view of the Inventory page.
Display the Schedule Test Drive button on the Inventory page. The Test Drive Schedule button appears only on the List view of the Inventory page.
Show the Add to compare button on the listing block on the Inventory page.
Note: The Compare page should be indicated under the Theme Options > Inventory Settings > Main > Compare Page filed, otherwise the compare option will not work.
Enable Share Block option to display the social share button on the Inventory page. The Share Block appears only on the List view of the Inventory page.
Display the PDF brochure button on the page so the users can display the listing brochure. The PDF brochure button appears only on the List view of the Inventory page.
Enable the Show Certified Logo 1 option to display the certificate dealers' logo of the listing on the Inventory page. The Certified Logo 1 appears only on the List view of the Inventory page.
The Certified logo 1 can be uploaded under the Listing Manager > Details section.
Enable the Show Certified Logo 2 option to display the second certificate dealers' logo of the listing on the Inventory page. The Certified Logo 2 appears only on the List view of the Inventory page.
On the Pay Pal Settings tab, you can set the Pay Pal settings. It is required for Become a Dealer option.
On the Currency section, enter your main currency name. Then enter the PayPal email and indicate PayPal using mode on the Paypal Email and Paypal Mode fields respectively. Rember to fill the Membership Price also.
On the page below you can read more about Classified users as Simple User and STM Dealer user.
The Sold Listings feature allows display sold or unavailable listings as Sold.
Go to the Dashboard > Theme Options > Inventory Settings in order to activate Sold Listings.
Enable the Sold Listings property, select the badge background color and click the Save Settings button.
Afterward, the Sold badge can be put to any of the listings. Go to the Dashboard > Listings and select and tick the sold listing in the Mark as sold column.
Sold listings feature is available also in the listing creation/editing process and can be done in the Price section by ticking next to the Mark as sold.
The Sold badge appears in the inventory and single listing page view respectively.
After enabling the Sold Listings feature, a Listing status filter appears in the Inventory page, which allows filtering active and sold listings.
The STM Sold Cars element available which displays only the Sold listings on the page. The element can be added from the STM elements group.
The number of listings per page can be determined in the element's settings.
After inserting the STM Sold Cars element into the page, all Sold listings display on the appropriate page.
The word Sold on the label can be changed to any desired one by simply installing the plugin. The Loco Translate is a free plugin and can be installed from the default repository of WordPress.
After installing and activating the plugin, go to Dashboard > Loco Translate > Themes and select the Motors theme.
Create a new language file by clicking New language or edit an existing language file by clicking Edit.
Select a language from the list, specify the file location and click Start translating button.
Important!
It is required to store the translation file in “../wp-content/languages/themes/” folder to keep translation during the theme updates.
Find the required string in the searching field(1), enter the word which you want to change(2), and save your changes(3).
WhatsApp Button is a feature which allows potential clients to directly converse with Dealers or with the Administrator of the site on WhatsApp Messenger.
To enable WhatsApp Button navigate to Theme Options > Single Listing and activate the 'Show WhatsApp Button' toggle switch.
The Administrator of the website can enable the feature for all Dealers on Users> Edit user> STM User / Dealer additional fields. Furthermore, ensure that the 'Phone' field is filled with a valid number in a format that WhatsApp supports.
WhatsApp Button can also be enabled by the dealers of the website. For this, navigate to Profile Settings and fill in the necessary field with the valid phone number checking the box in front of the option “I have a WhatsApp account with this number“.
After Dealers are done with the set up process, they need to save the changes entering their current password into the appropriate field:
There are several modules that display WhatsApp Button on listings such as STM Dealer Info (widget), STM Car Dealer Info, Social Buttons (WhatsApp).
The default template takes the sidebar from Appearance > Widgets. There is an STM Listing Car Sidebar block there. Add the STM Dealer Info widget to the sidebar and enable the WhatsApp button.
Motors loads the default template when WPBakery Page Builder is not being used.
STM Car Dealer Info element can be added through the WPBakery Page Builder.
Go to Listings and choose any listing to which you want to add STM Car Dealer Info. Click on the 'Plus' (+) icon, on the popup window find 'STM Car Dealer Info' element or use the Search bar to find it more quickly.
After you click on the 'STM Car Dealer Info' element, a new popup window will appear. Tick the 'Yes' box under 'Show WhatsApp Button' and save the changes.
You can add STM Car Dealer Info element anywhere you wish.
Do not forget to specify the creator of the listing so that your information can be displayed on the STM Car Dealer Info. Make sure that the author of the listing is correct and that the author has the correct WhatsApp settings as indicated in the previous section.
Here is the result of your added STM Car Dealer Info element:
Social Buttons (WhatsApp) element can be used if you want to show the button without additional information about the author. Thus, this block can be used on blog posts and pages. The element will use the page or post author's WhatsApp number.
Go to Listings and choose any listing to which you want to add WhatsApp Button.
On WPBakery Page Builder click on the 'Plus' (+) icon.
On the popup window find STM Single Listing tab. Under this tab, find Social buttons (WhatsApp) element and click on it.
When you click on Social buttons (WhatsApp) element, a new popup window will appear and there you can adjust the properties of the button or you can leave them blank for default options:
Social buttons (WhatsApp) element can be added anywhere of the content by simply dragging and dropping the element.
Here is how it looks on the listing page:
After clicking the 'Chat Via WhatsApp' button, you will be redirected to the appropriate page where you can start the conversation on WhatsApp Messenger by clicking the 'Continue To Chat' button.
Here you can set the settings related to the users with the STM Dealer User Role.
Here you can select the sidebar to display on the Dealer public profile page:
The sidebar can be edited under the Dashboard > Sidebars by site administrator.
How to Set Up the SidebarSpecify on which side of the page to display the sidebar on the Dealer public profile page: Left of Right.
In this section, you can define by what criteria the user can rate the dealer:
These labels will be displayed as rating options in the dealer's review section:
Indicate the number of listings that the users can create for free after becoming a Dealer:
On the Dealer Slot Images Upload Limit enter the allowed number of uploading images per listing.
Enable the Dealer Ads Moderation option to moderate the listings added by dealers.
When the option is enabled, the admin will need to approve any added listings. The listing can be approved in Dashboard > Listings > All items and by clicking on the publish button.
The pending listing will appear on the dealer account page in the following manner:
Users can write reviews for dealers on their public profile page. Enable the Moderation For Dealer Review feature to moderate the submitted reviews.
These reviews are located under the Dealer Reviews section of the admin dashboard:
By reviewing the content and rating it, it can be published:
Related page:
The Custom Icons tab in WP Dashboard allows you to add your own Custom Icon Fonts. This feature is supported by a free Custom Elementor Icons plugin preinstalled with the theme.
Important!
Since version 5.0.9 we have removed the Custom Icons by StylemixThemes plugin from the theme package and replaced it with Custom Elementor Icons plugin.
You need to uninstall the Custom Icons by StylemixThemes plugin for everything to work correctly.
Icon Fonts can be generated through website, where you can convert your own SVG files to Font format, or you can create Icon Font from any icons in the icomoon.io library. We will discuss both options below.
You can upload your SVG icons to convert them to the icon font format. Go to the icomoon.io website library and click the "Import Icons" button:
Choose the SVG icons from your computer and insert them into your library:
You will see the uploaded SVG icons to convert them to the icon fonts:
Select the icons you want to convert and click the "Generate Font" button below:
All your icons will be listed for a check:
If you want you can change the default settings of the icon set by clicking the settings icon:
In the icon settings, you will write the unique name of the set and the class prefix/suffix:
NOTE: To write a unique class prefix is important because the icon name should not conflict with other well-spread icon sets.
Then click the "Download" button to download your icon font set:
Go to the website library and click the "Add Icons From Library" button to generate the external icon fonts. It is very useful when you do not have your own icon fonts:
Choose any icon set from that library and click the "Add" button:
In the chosen Icon set, you can further select icons and make your own Icon set:
In the next step, you will be referenced with your icons in details:
If you want to change the default settings as icon set name, prefix, suffix, you should click the settings icon. Then click the "Download" button to download your icon font set:
After activating the Motors Theme, you will see a default icon set uploaded in Custom Icons tab. You can upload any icon fonts by clicking the Upload New Icons button above:
After generating Icon Fonts in , you can upload your icons in the format of an archive file to your website. You can upload Icon Fonts from your WordPress Media Library if it is uploaded before or from your Computer directory. Click the "Select files" button to upload your icon fonts. Your Icon Fonts folder should be in a zip file:
After choosing the proper file, you will get the success message of reloading it. Then, below the success message, you can see your icon set to insert them into any pages or posts:
Important!
The Icon Fonts folder should have an appropriate structure containing all necessary files. If the structure is not correct, you will get the error message of uploading icons.
To check the icon folder structure, you need to extract that folder:
The icons folder should have the following structure:
If you do not have selection.json or style.css or another important file, you will get the above error message after uploading it.
You can upload more than one Icon Font Sets. As an example above, you need to upload other Icon Folders and you will have several sets:
If you want to delete the Icon set, you can click the "Delete Icon Set" button and the set will be deleted:
There is a new version of Subscriptio plugin. The new plugin release is not just a regular update, it's a completely new version — designed and engineered from the ground up. Find more details here.
If you’d like to use the new version of the plugin, you won’t be able to update it using the general way.
If you are a new theme user, then while importing the demo, the new version of the plugin will be installed automatically.
If you are already using the plugin, you will need to accomplish some steps to update Subscriptio.
Let’s review the second option.
The plugin update will delete all your current related settings. That is why you need to re-save settings to ensure plugin update won’t affect negatively on the site work.
Please re-save all the settings related to pricing plans, like:
Settings on the Pricing page — re-save setting from the STM Pricing Tables widget/element.
Editing the Plans — enabling subscription, specifying the slot limits.
Please follow the section where you can find all the relevant information on how to add plans to your site.
Also, re-save settings in User/Dealer Options (Theme Options > Main) like Enable Pricing Plans, set the Pricing link.
After re-saving the settings, you can remove the current version of Subscriptio plugin and install the new one.
Go to the Motors menu from the dashboard. There is the Remove Subscriptio option, click on it. You will be offered to remove the plugin, click Remove.
Once deleted, go to Appearance > Install Plugins and find the Subscriptio on the list. Click Install and activate the plugin after installation.
Now let’s have a look at the updated plugin and see what changed. There are two new tabs added: Schedule and Limit.
Two more options added to General settings, now you can select between:
Create multiple multi-product subscription
Create single multi-product subscription
Under the Limit tab you can set up subscription limits and allow customers to pause and cancel subscriptions. Subscription limit — active subscriptions could be limited for one customer (one per product or one per site). Trial limit — free trial usage could be limited too. Allow customers to cancel subscriptions — customers could manually cancel their subscriptions from the My Account page. Allow customers to pause subscriptions — customers could manually pause and resume their subscriptions from the My Account page.
Under the Schedule tab, you can manage such settings as Automatic Payments, Manual Payments, Suspensions. For automatic payments, you can set the number of retries if the payment is failed.
In Manual Payments you can set up the renewal orders to remind users about the renewal payments before they are due — how many days prior to Payment Due date renewal orders must be generated.
The option of Suspension will give you the chance to set the suspension period, so customers could keep their subscriptions before they are permanently canceled. Suspension period — how many days should subscription be kept suspended before it is canceled.
For more detailed information please visit the following sources:
Now, you can add plans from your account page in My Plan menu.


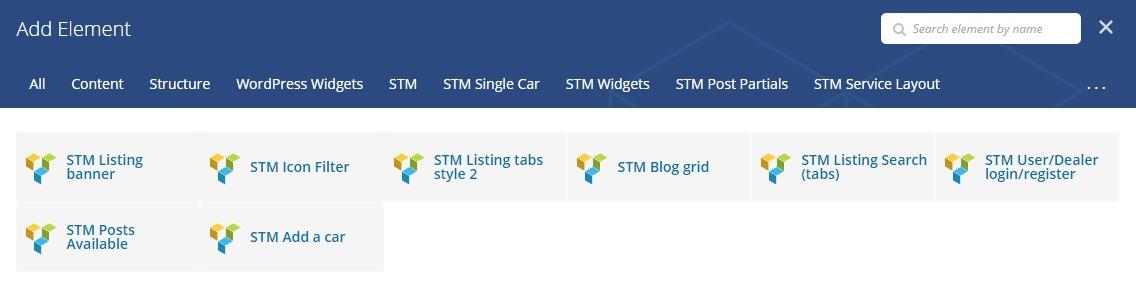


In the User/Dealer section of the Theme Options panel, you can configure the settings for (Simple User and Dealer User).
Please pay attention:
The User/Dealer tab section is available only in the Classified Listing, Classified Listing Two, Three, Four, and Multi Listing types layouts.
In the Main area, the common settings for the Simple User and STM Dealer users are located. Let's have a look at them:


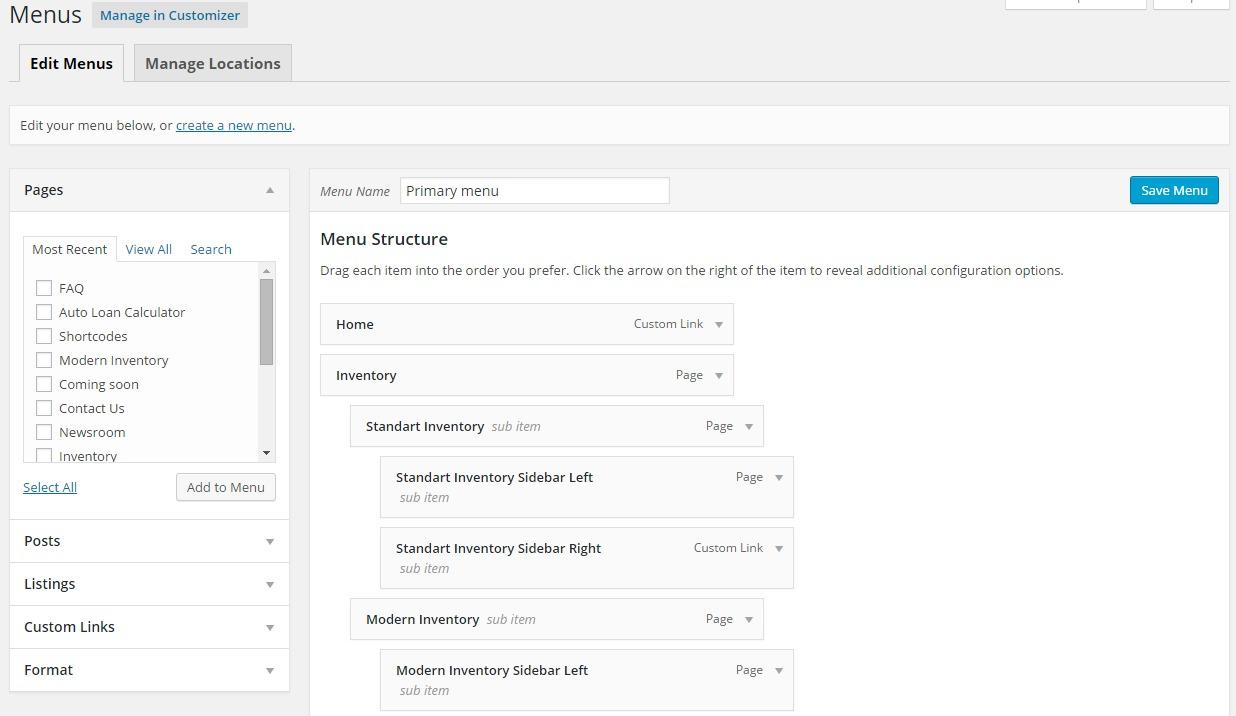
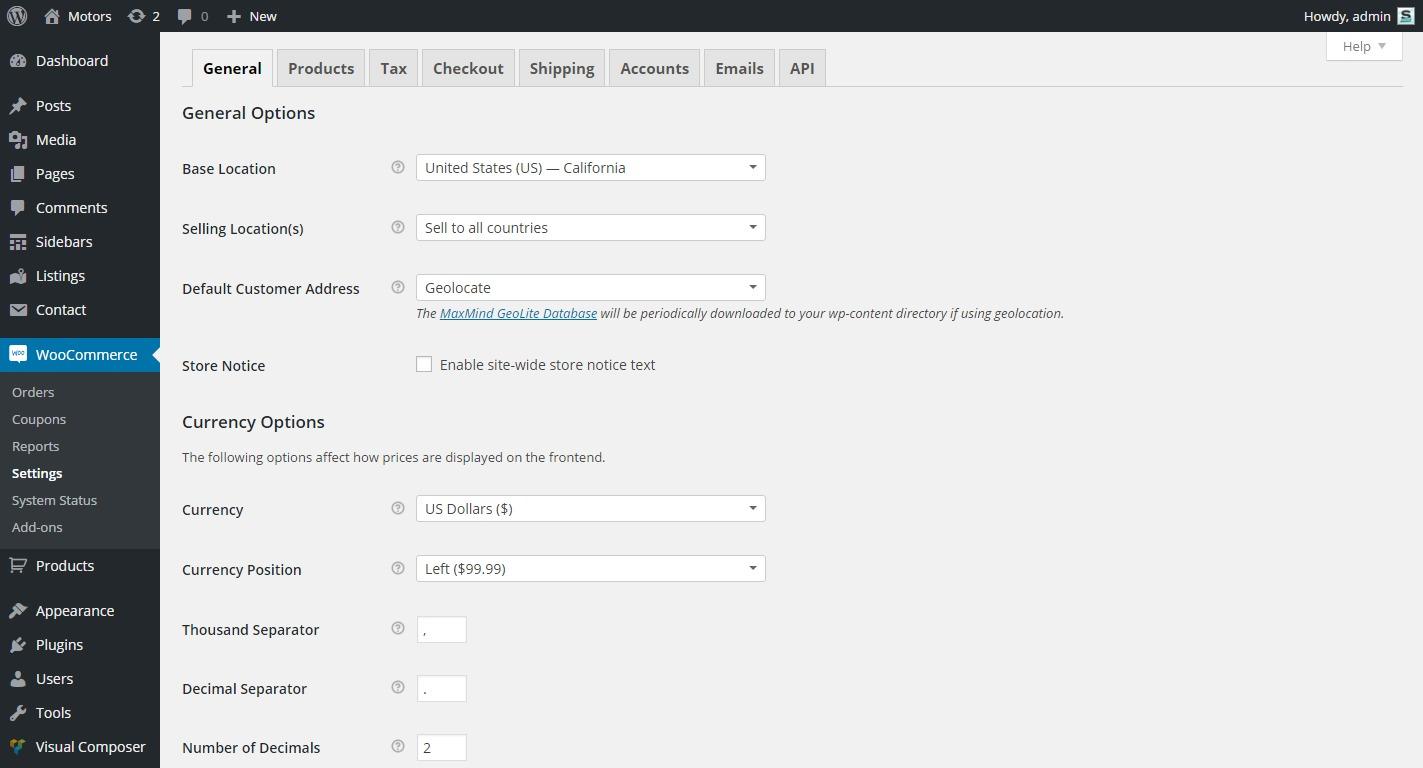


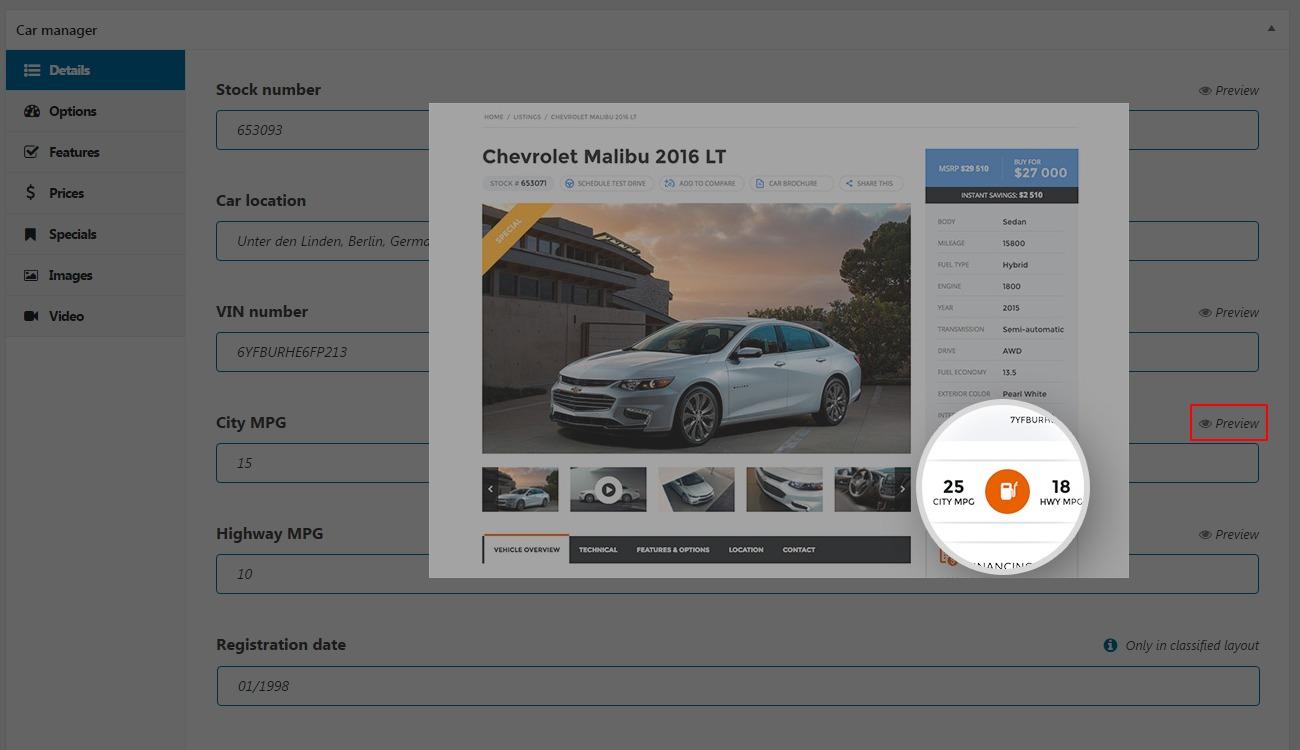
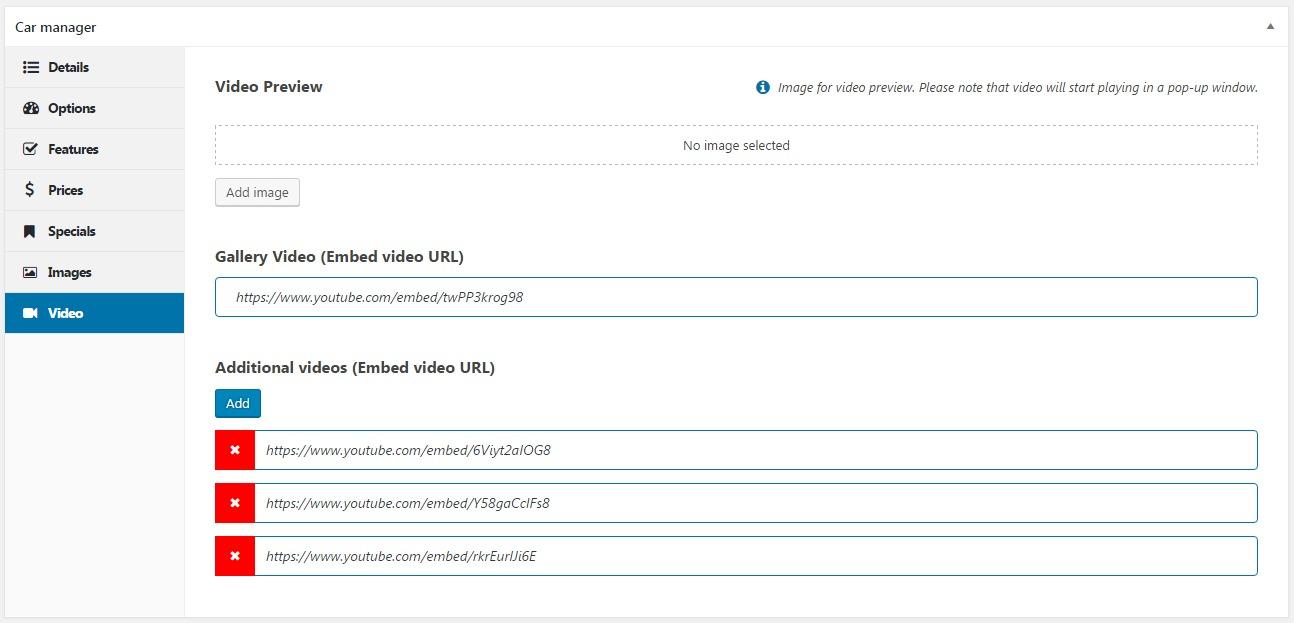
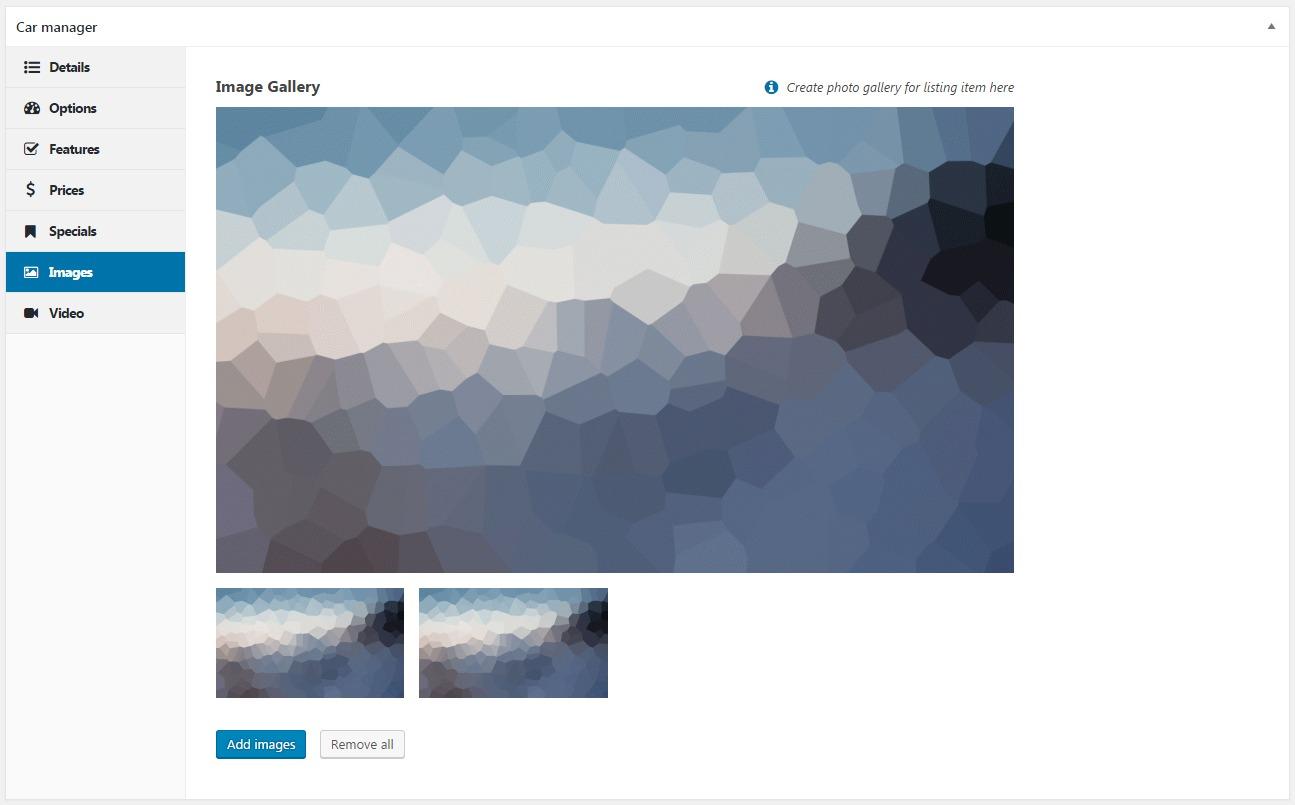
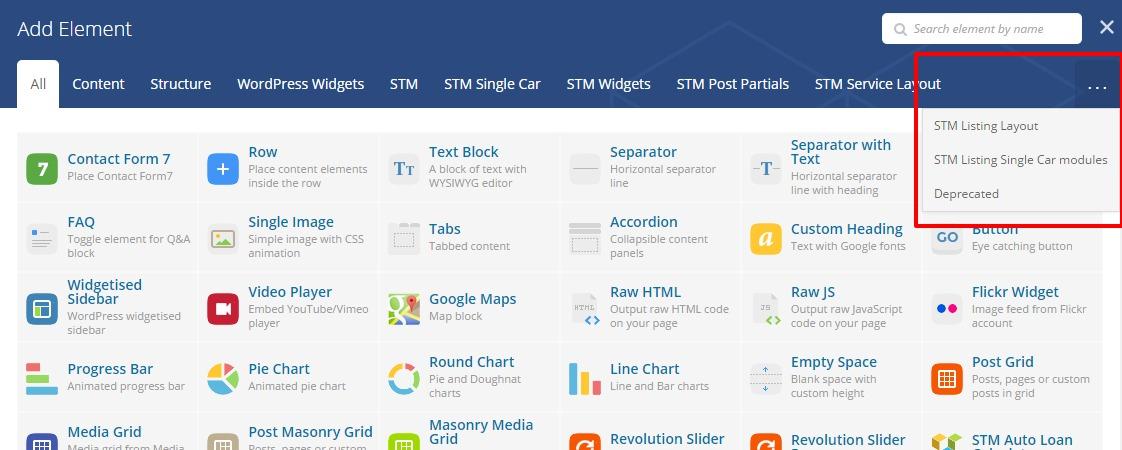
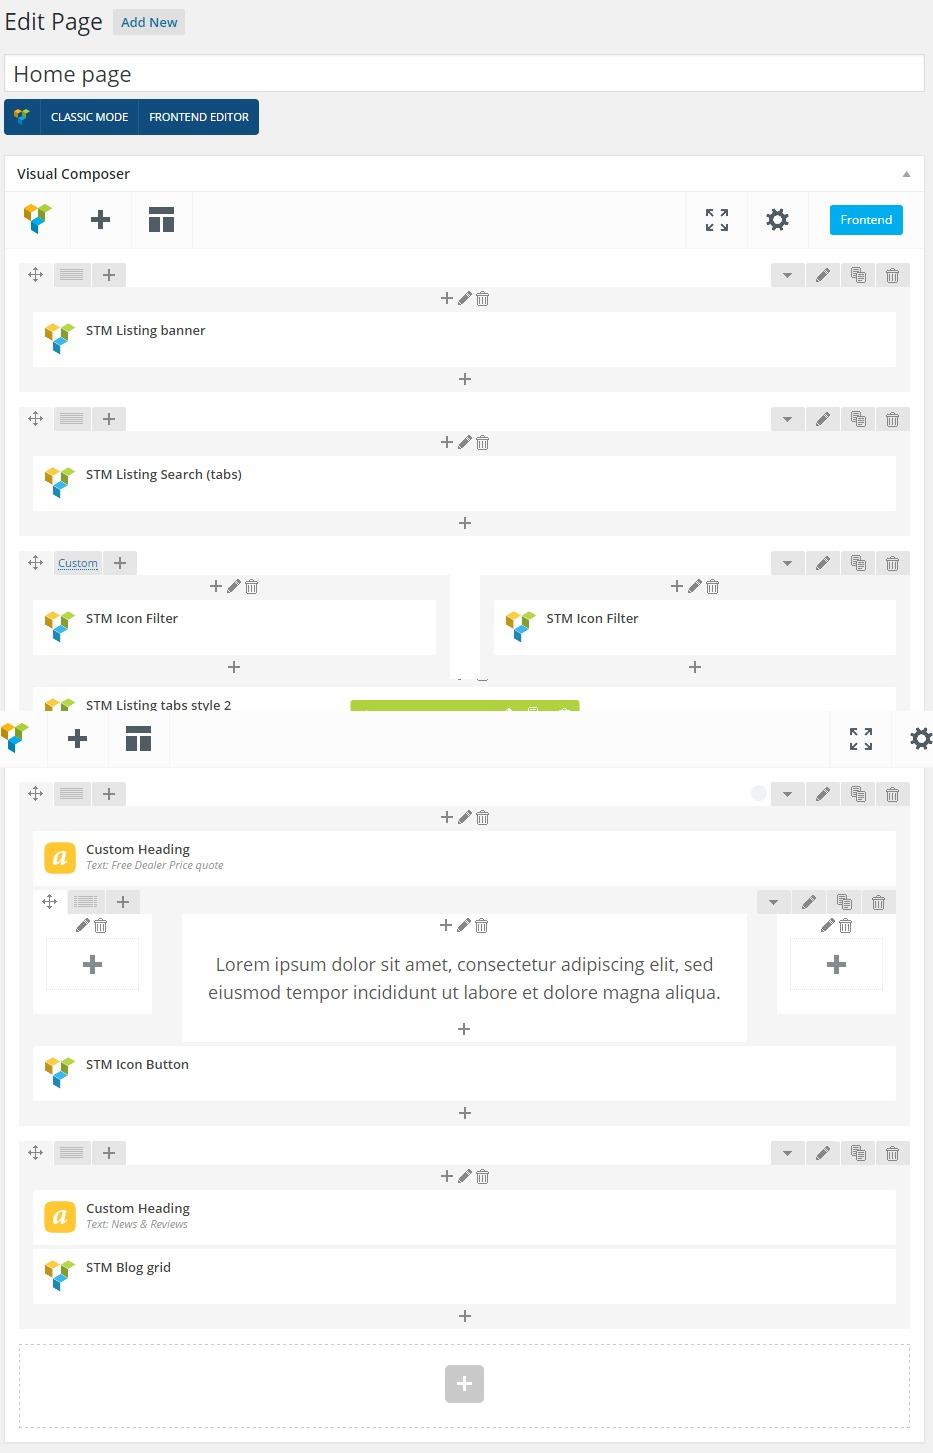


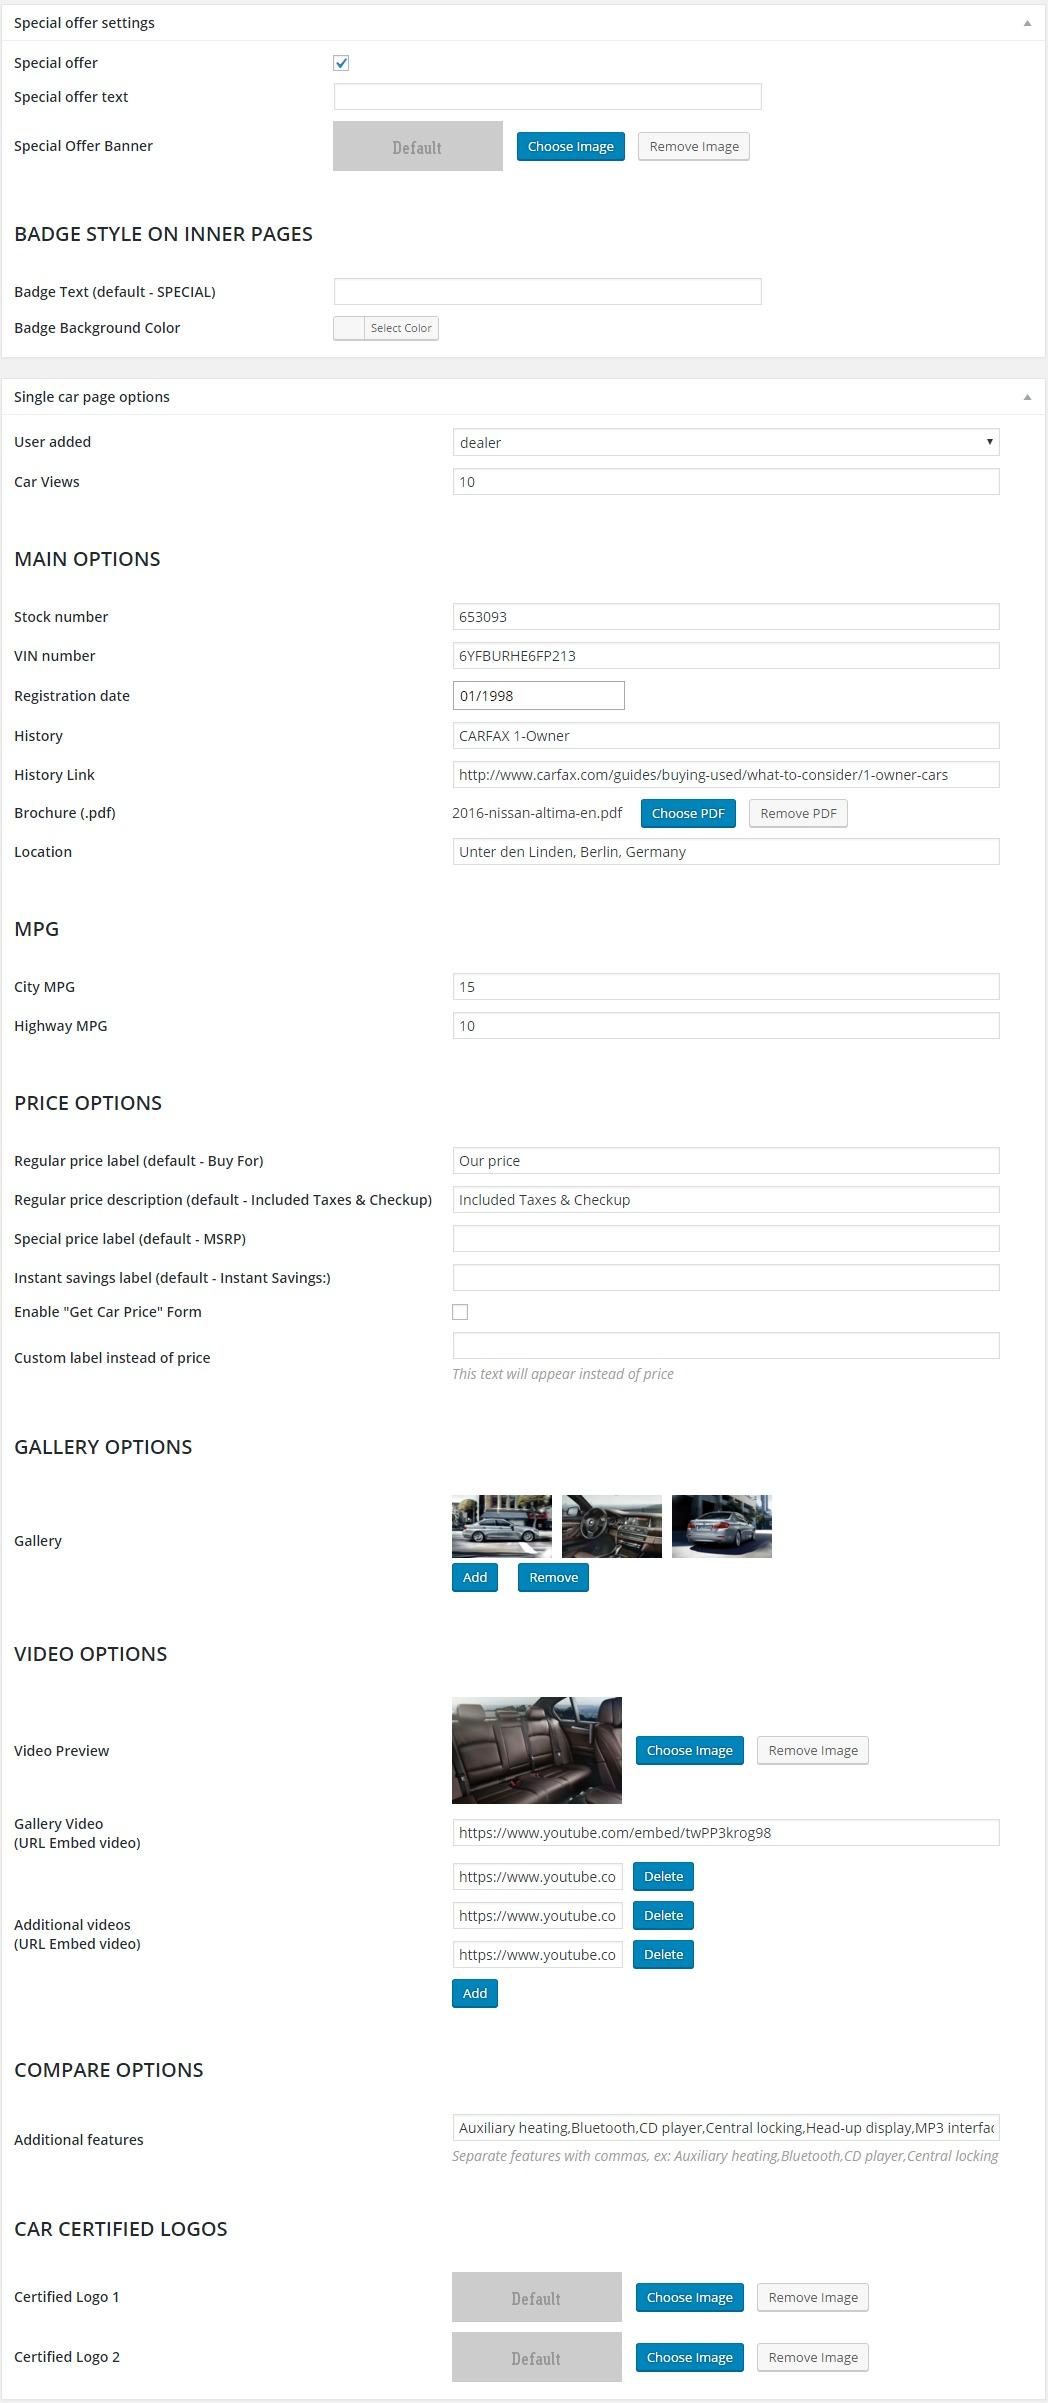
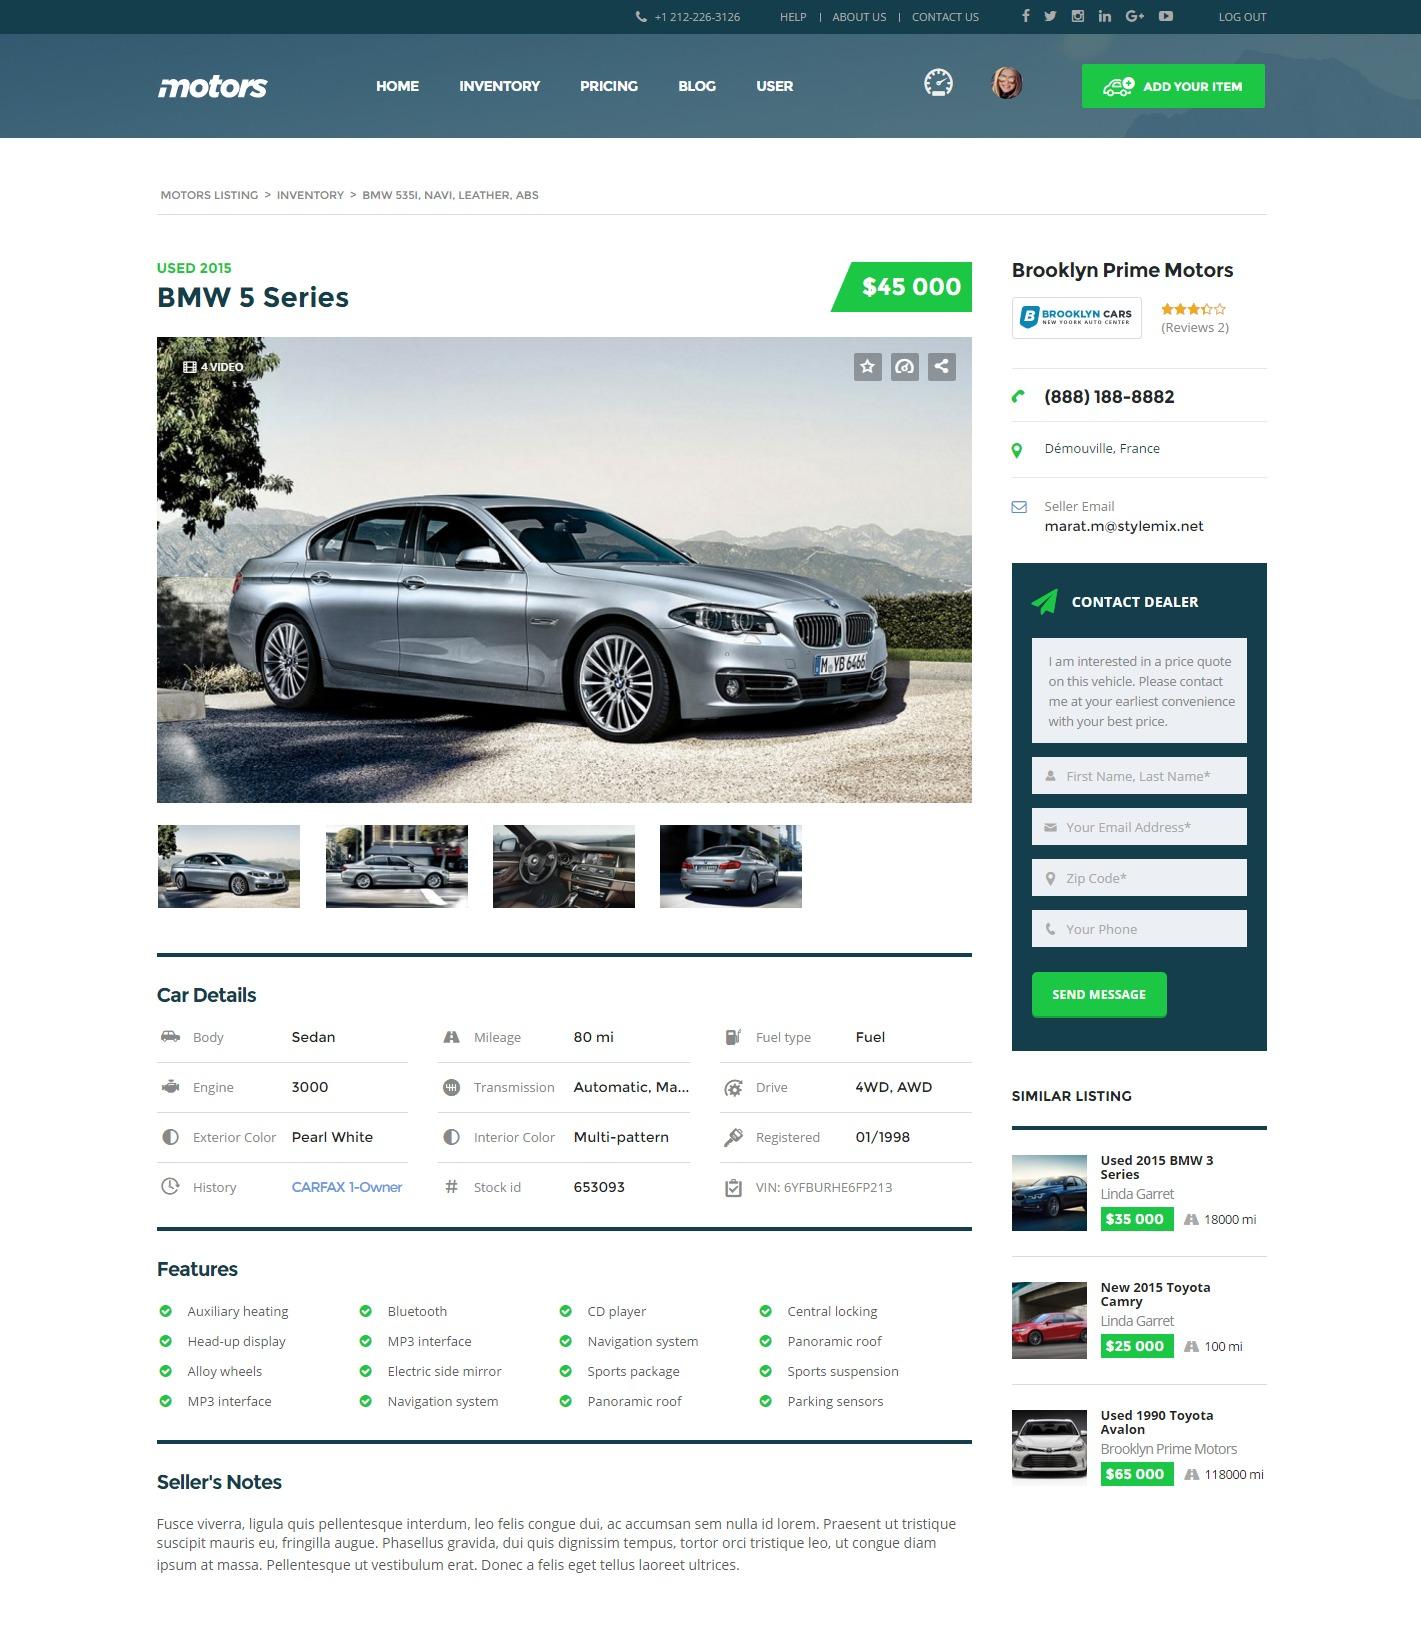
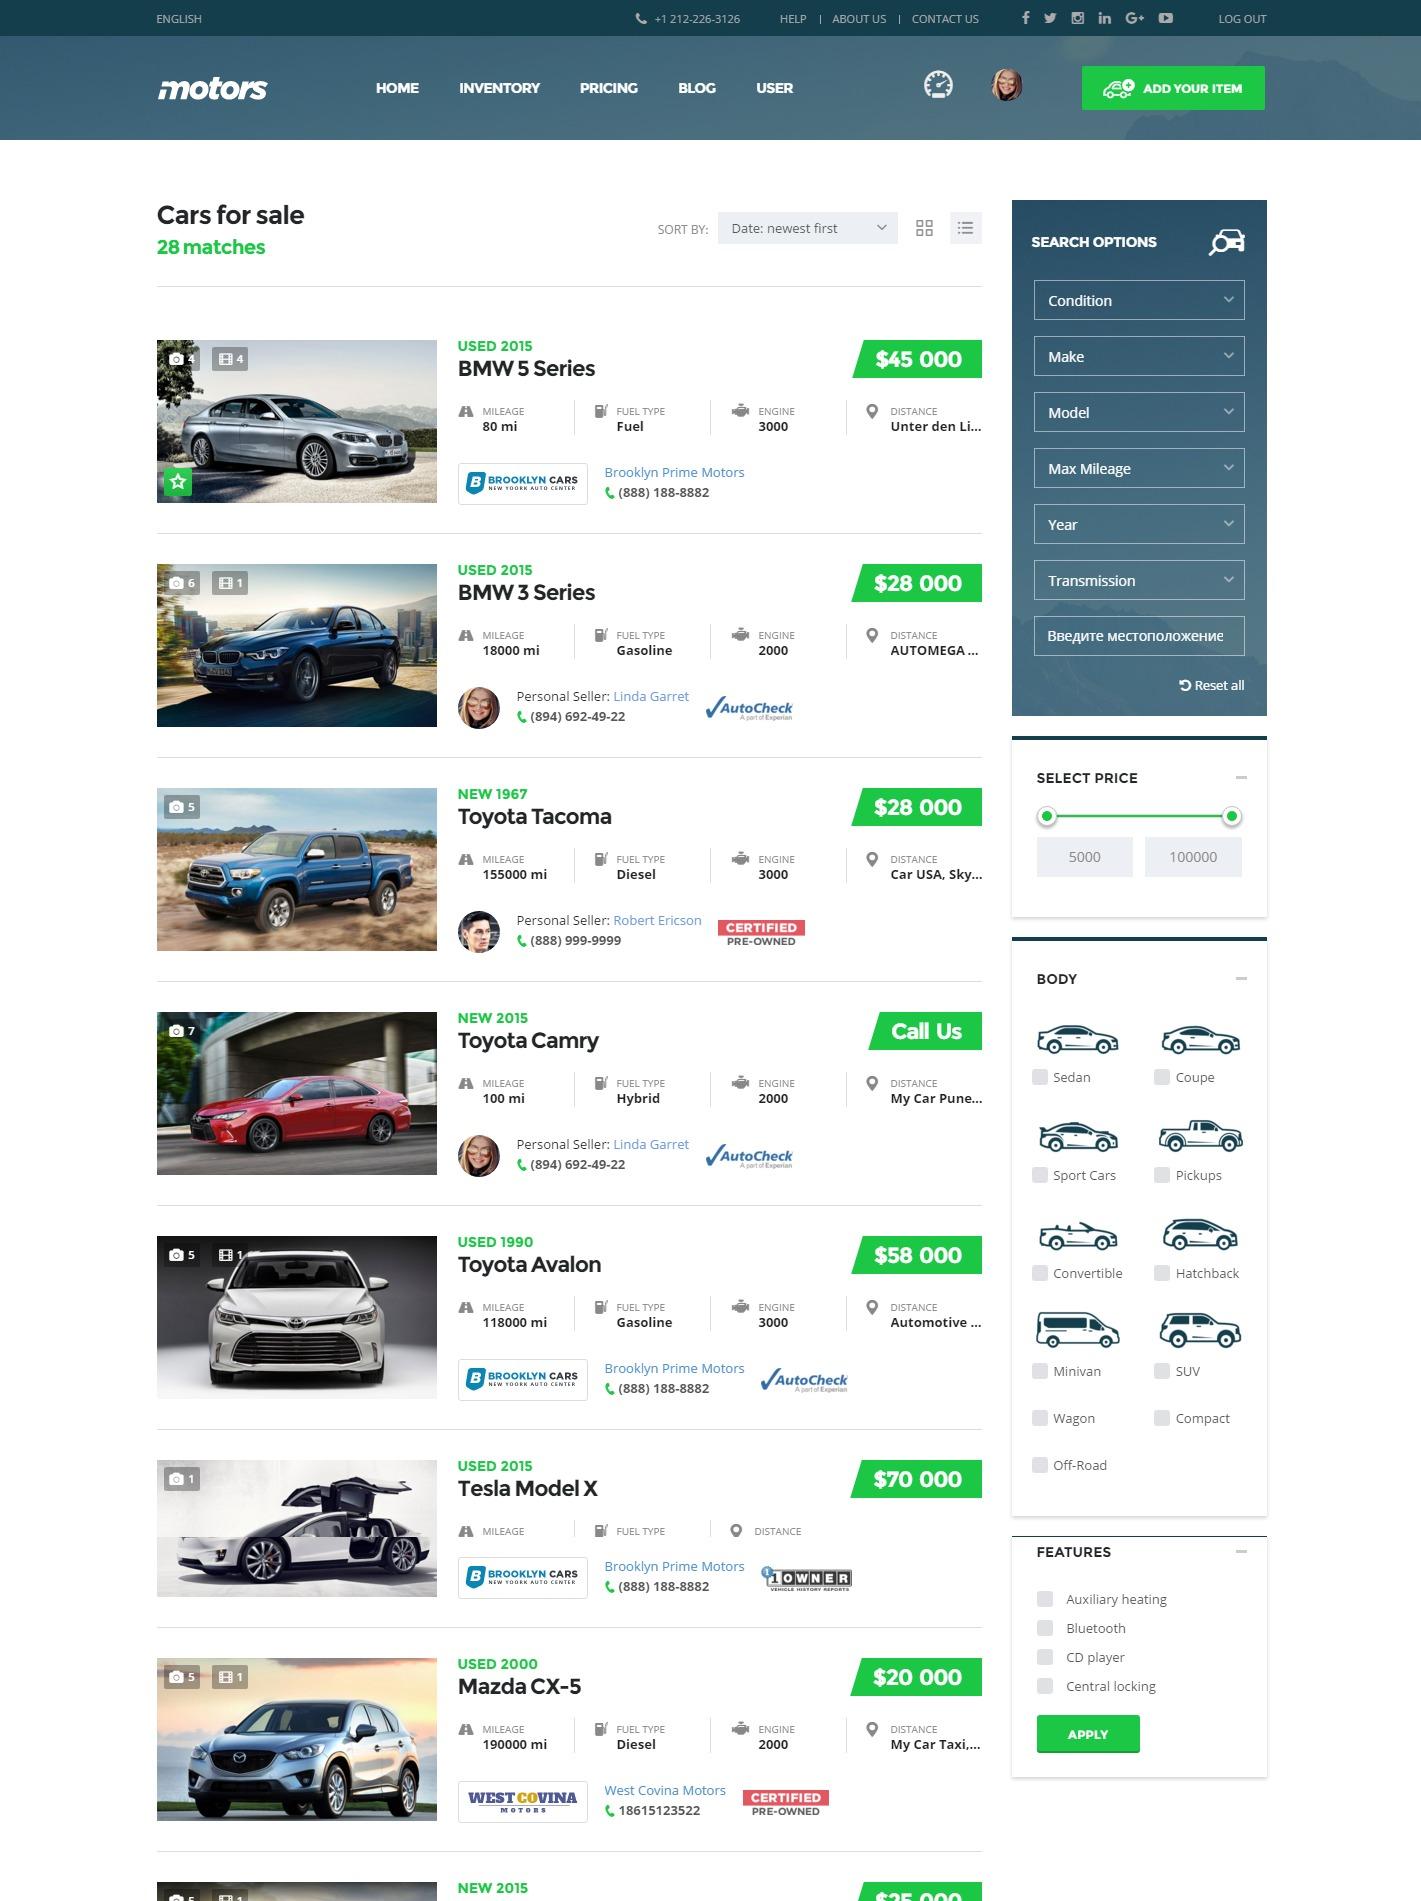


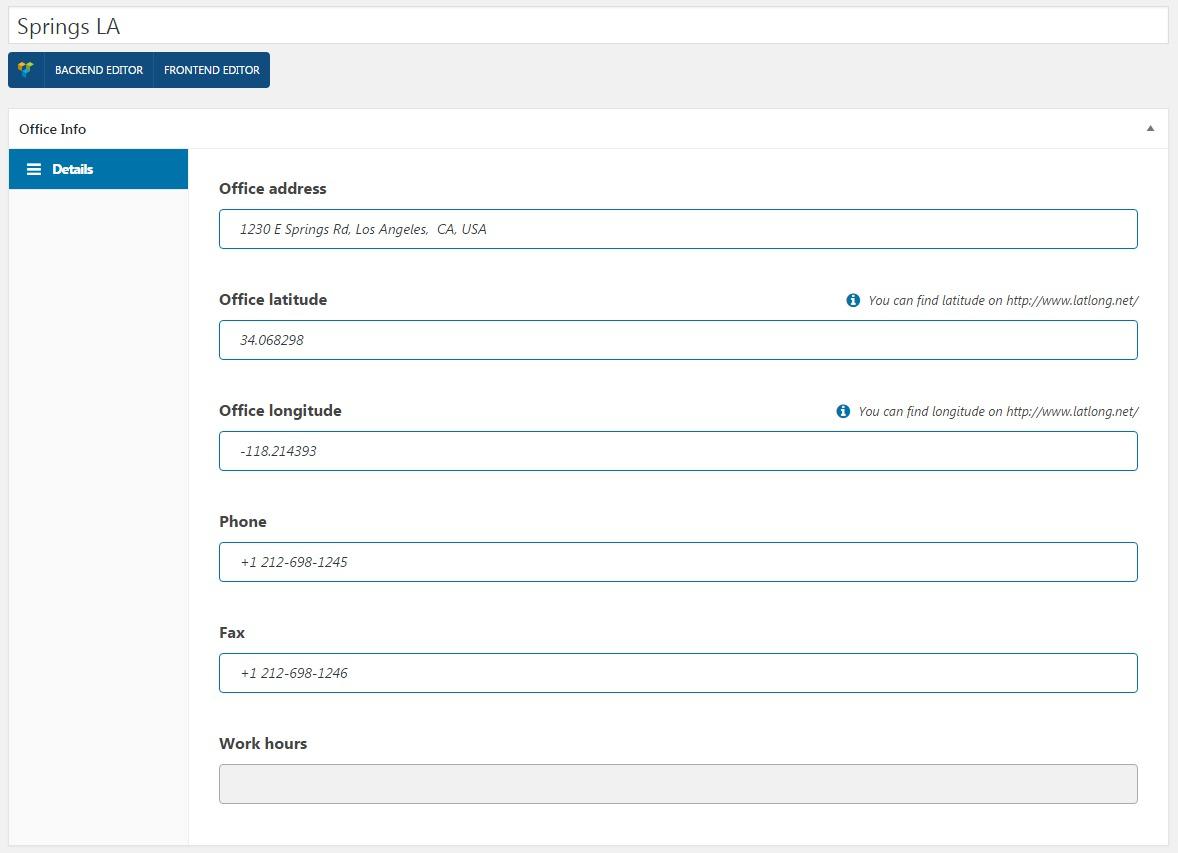
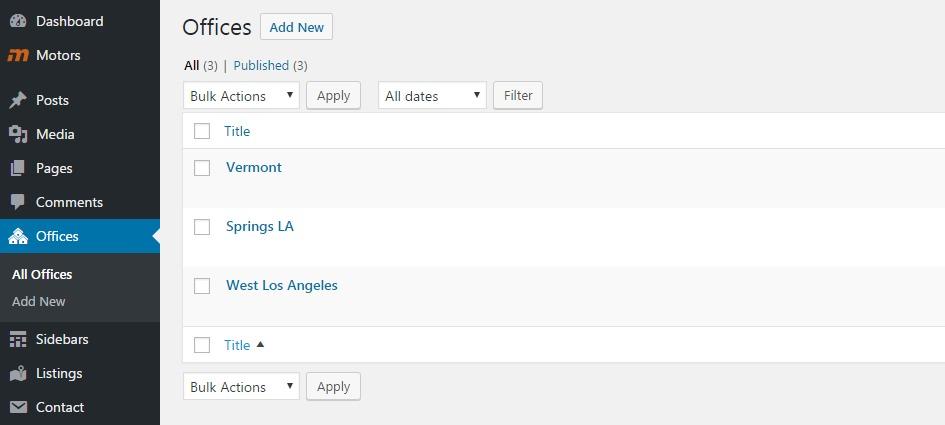
On the "Login/Registration Page" field choose the login/register page which contains the "Login Register" widget.
Users have the option to create an account via the Login/Register page.
When enabled, a confirmation link will be sent to the email of users after they have registered on your website.
You can edit the template for email confirmation on the Dashboard > Tools > Email Template Manager section of the admin dashboard.
Here, on the Dealer List Page field, you need to indicate the Dealers List page. The selected page has to contain the STM Dealer List module.
If you wish to allow users to add listings, indicate the Add a Car page on the Add a Car Page field.
The page selected for adding new cars by users/dealers will also be used for editing items.
On the Image Size Limit section, indicate the maximum size for the uploaded image on the Add a car page.
To notify users who have added a listing about its approval status, you can enable the option to send an email to the dealer or private seller.
The User listing waiting and the User Listing Approved email templates you can change under the Tools > Email Template Manager section of the admin dashboard.
Also, you can allow to users add a new category on the Add a Car page if there is no such category enabled.
Turn on the Pricing Plans option to enable the WooCommerce subscriptions on your website.
More about Pricing Plans read on the Pricing plans page:
Indicate the page with pricing options in the Pricing Link field.
On the selected Pricing page the Pricing Table should be added and configured.
Enable the Site Demo Mode option to prevent new user registrations.
Previously registered users can still log in. Additionally, this option disables the ability to add new listings from the front end.


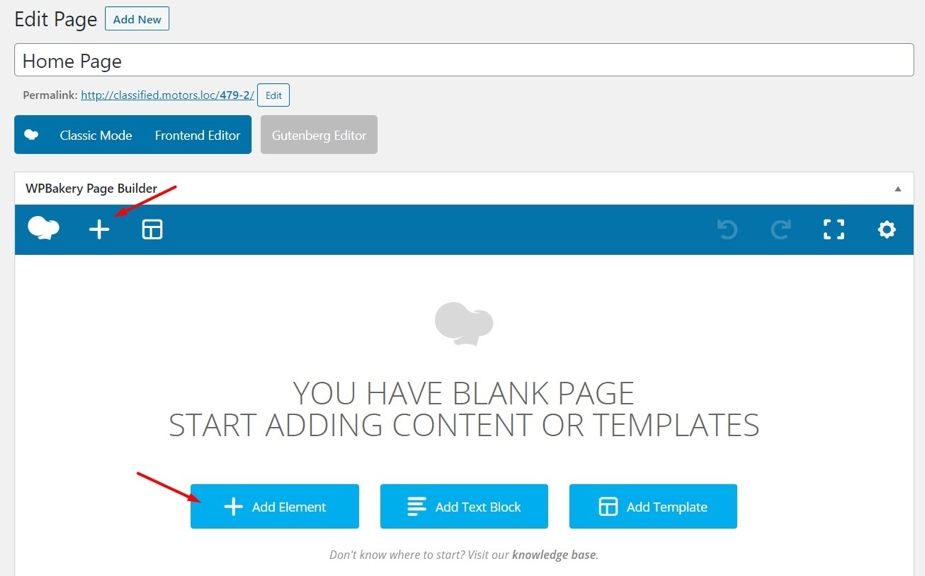
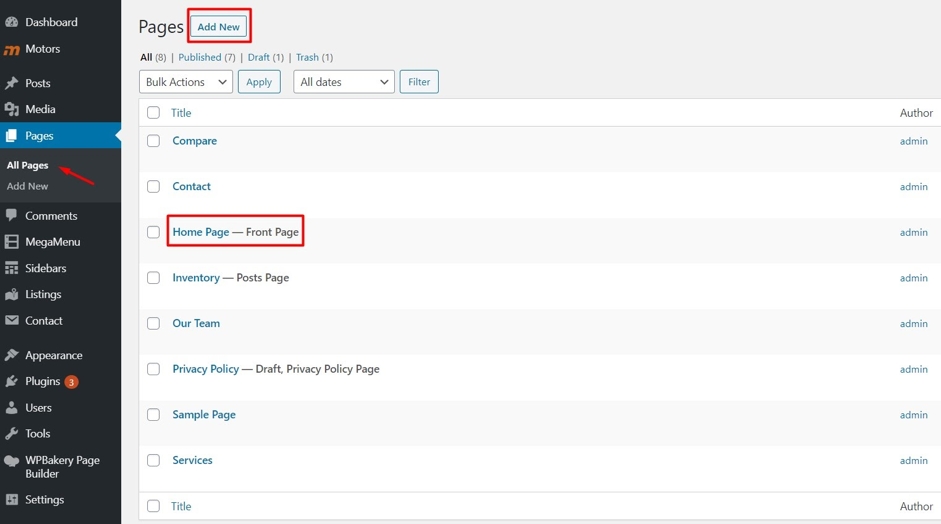
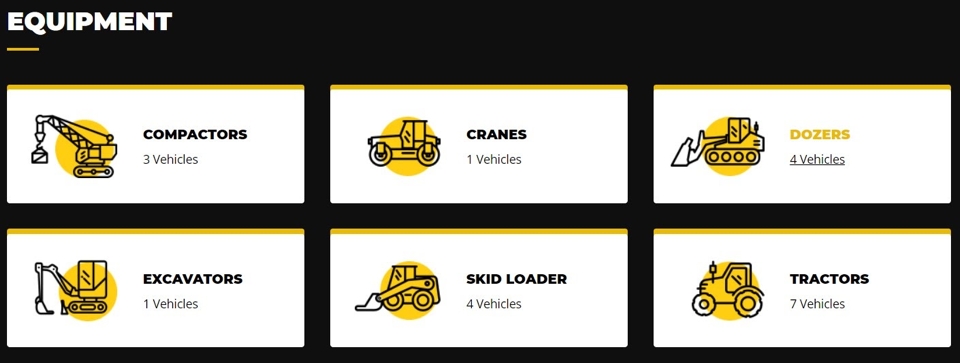
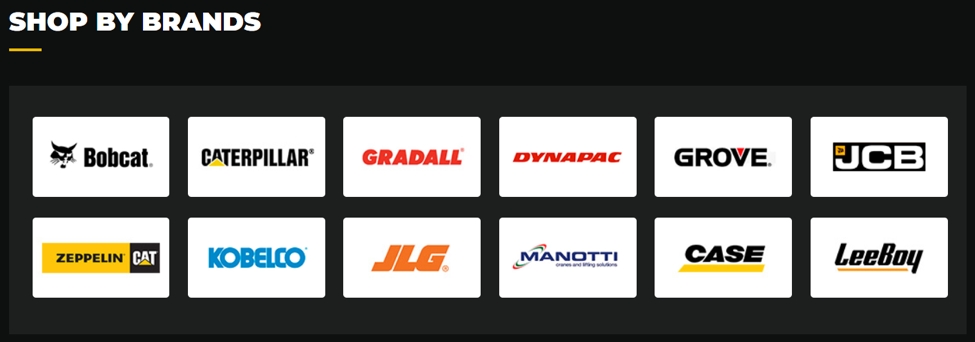

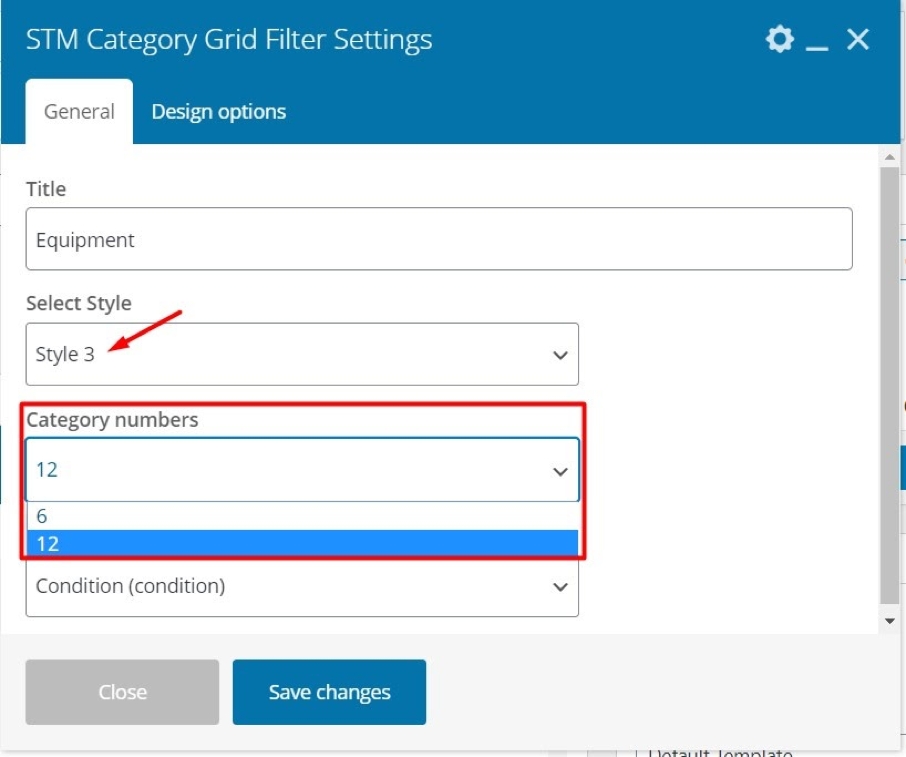
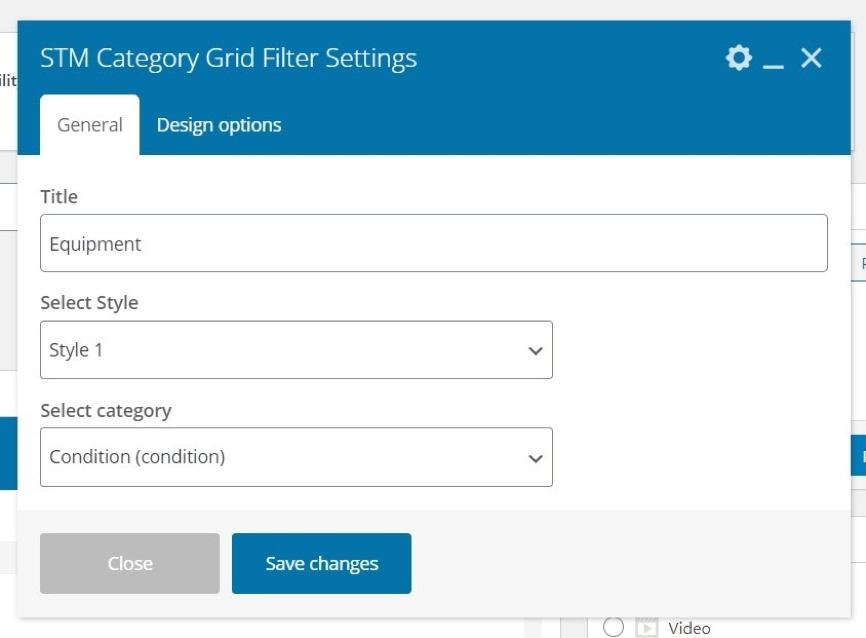
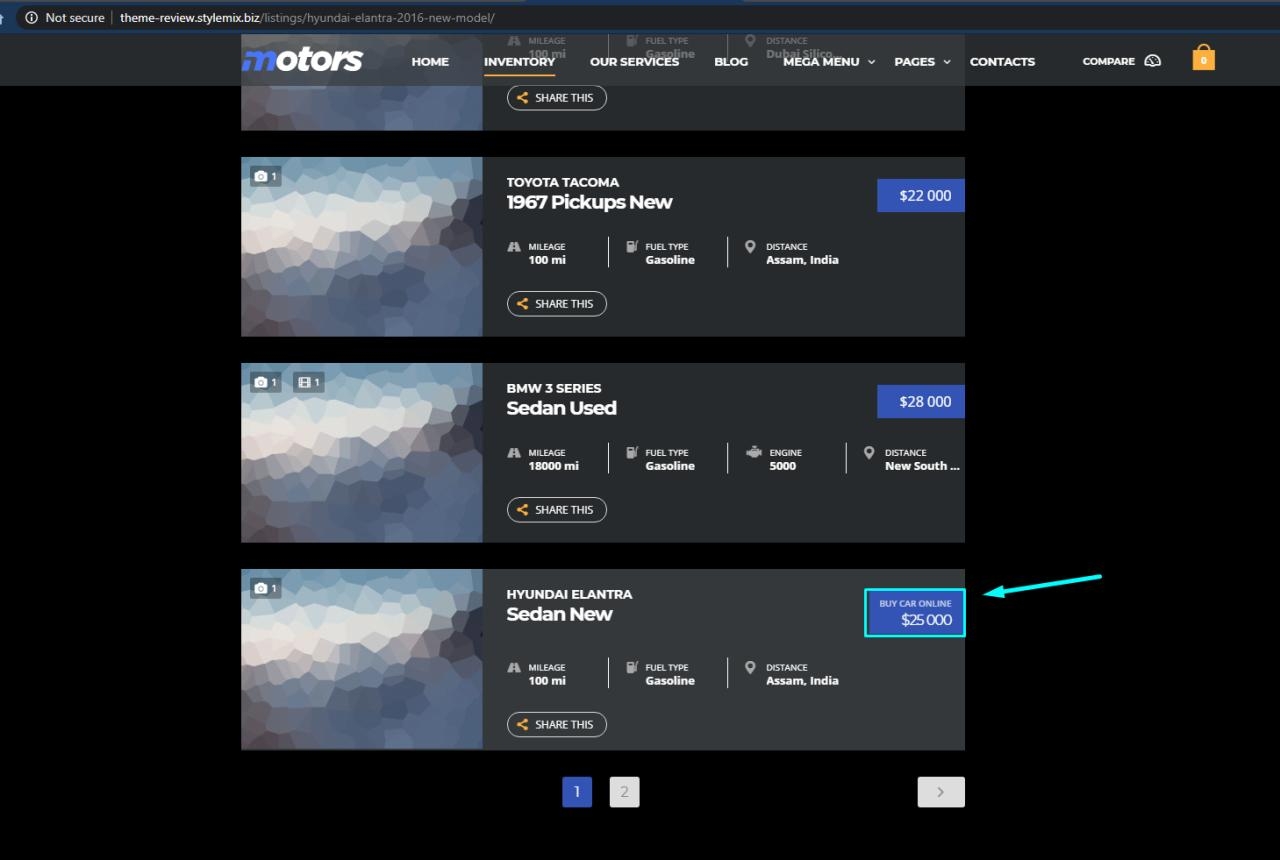

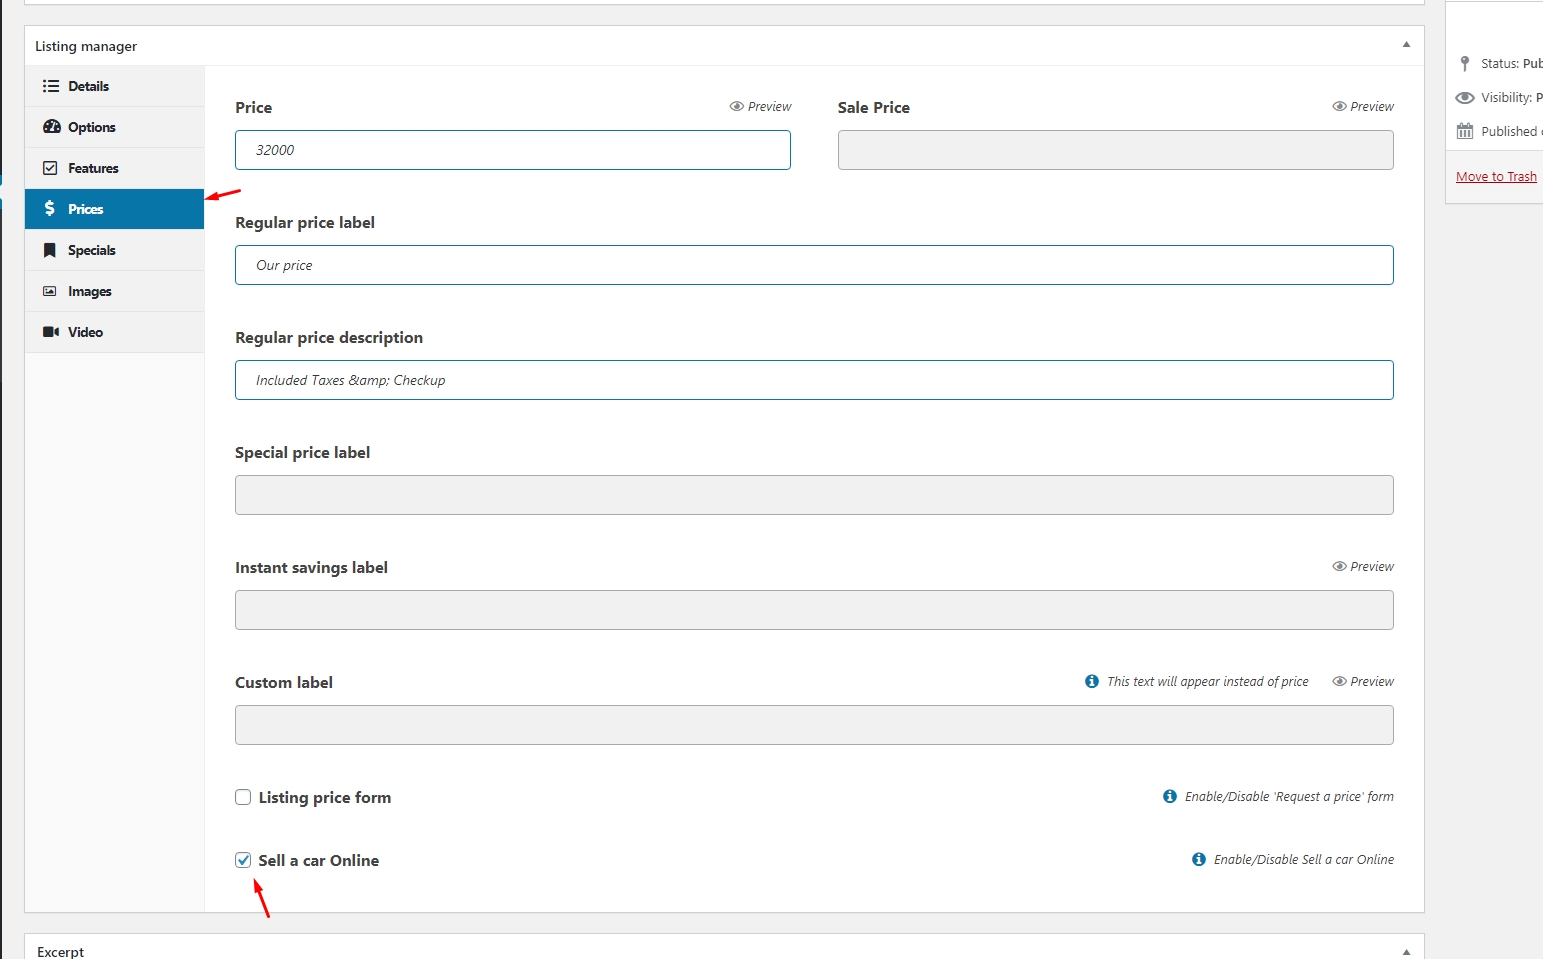
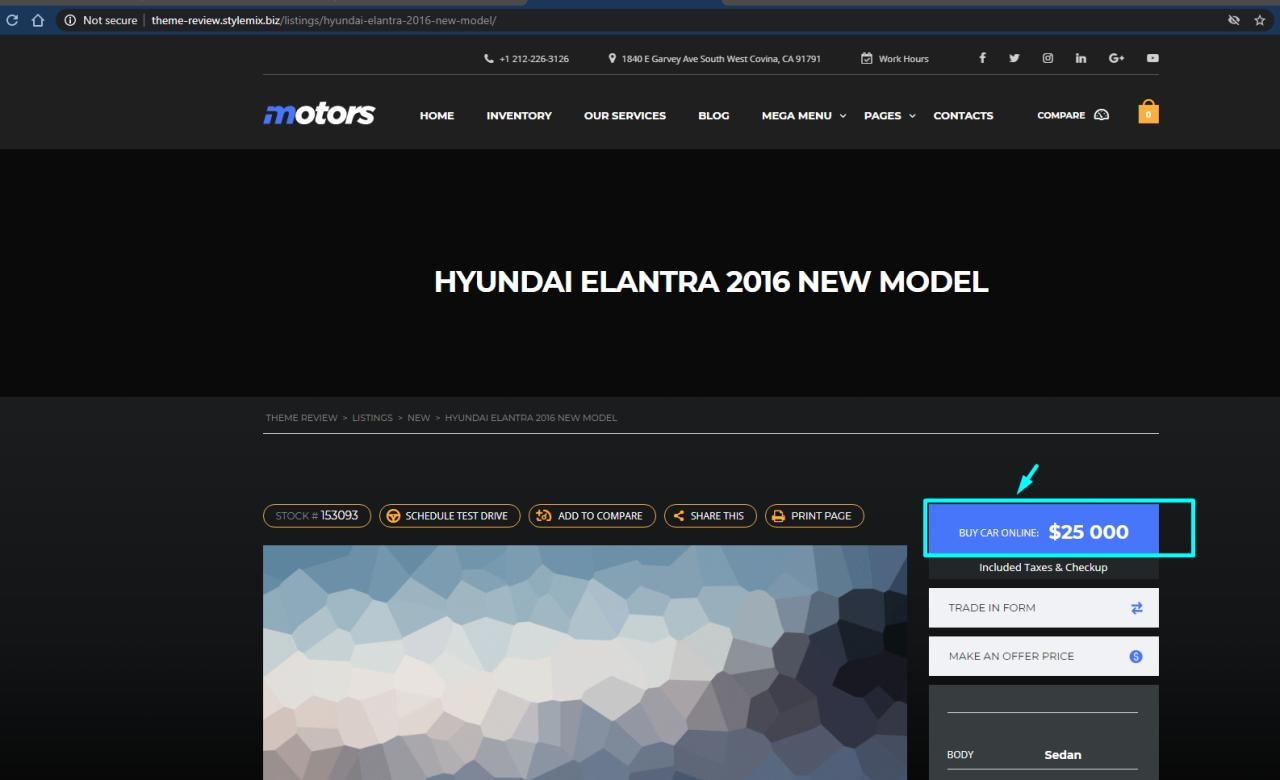

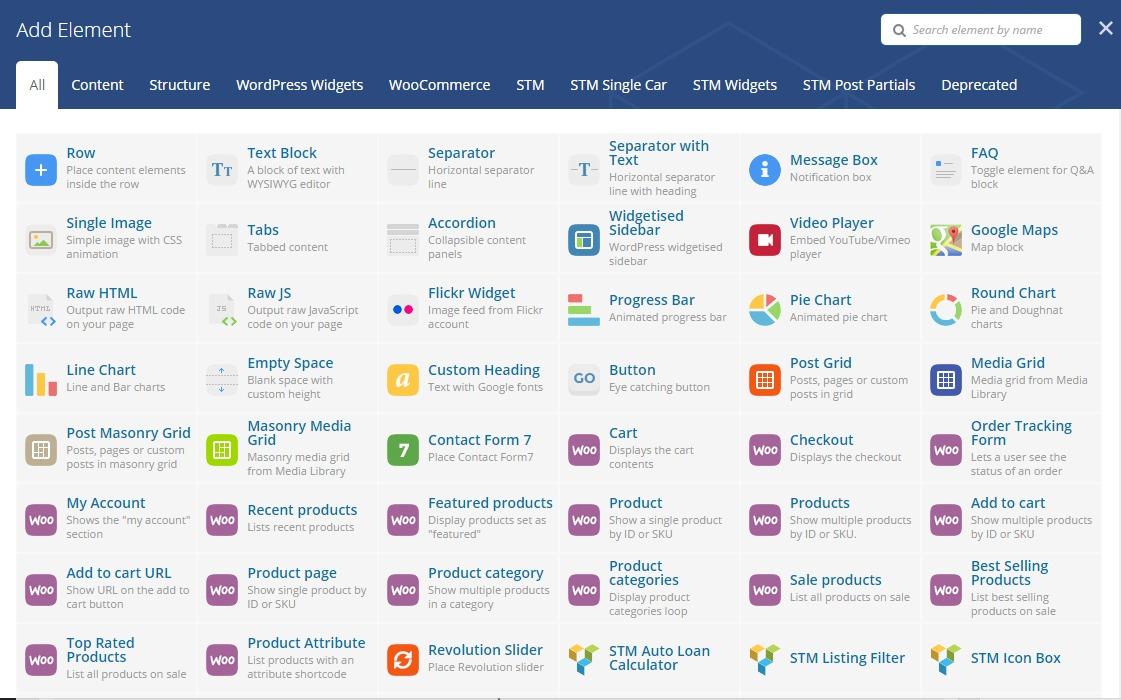
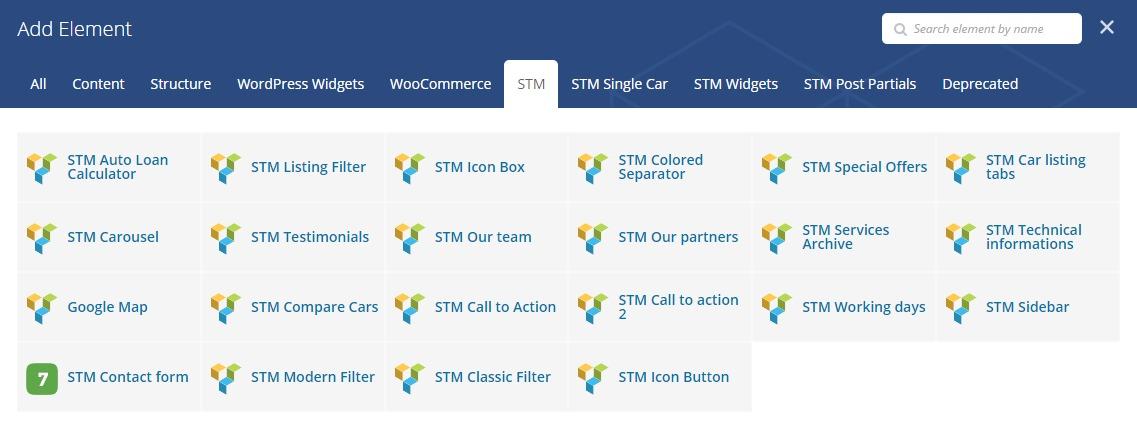


Dealership One, Dealership Two, and Classified Four demo layouts include a Slide in the hero section of the homepage in both Elementor and WPBakery page builders. The Slides were created with the Slider Revolution plugin and a new Hero Banner widget is added to the theme as alternative solution to optimize the performance of these demos. The widget is available for both Elementor and WPBakery page builders.
To use Static Hero Banner, while editing the page the "STM Hero Banner Widget" can be added:
The STM Hero Banner Widget has three styles:
Style 1 - Info Block inside Round shape.
Style 2 - Info Block with the Call to action button.
Style 3 - Info Block with Background overlay and button.
Depending on the selected styles widget has different options:
The STM Hero Banner Widget has following settings for Style 1:
Image - Background image for Hero Banner section.
Info Block Style - Option to select one of the available three styles.


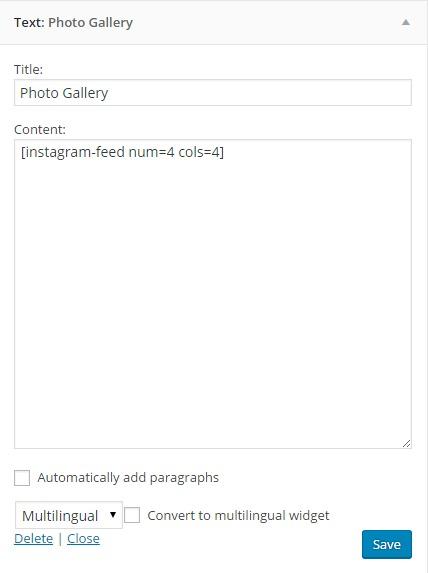
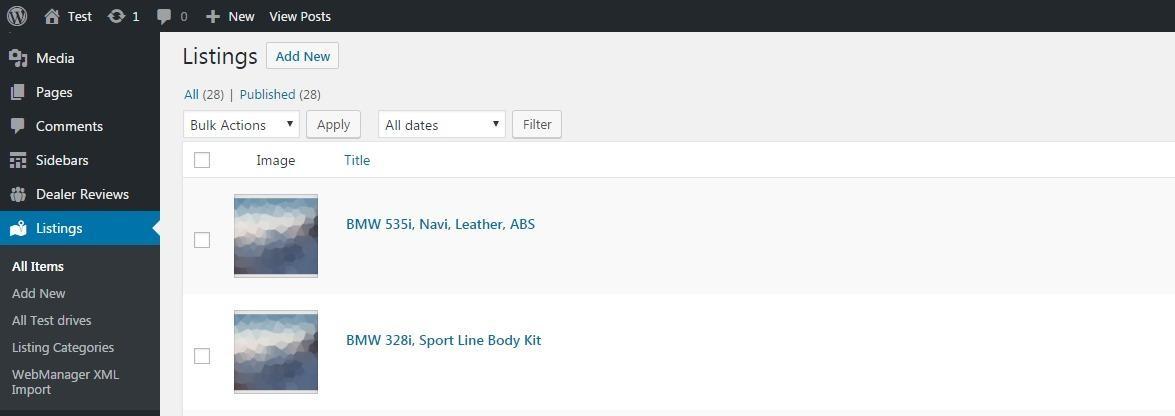
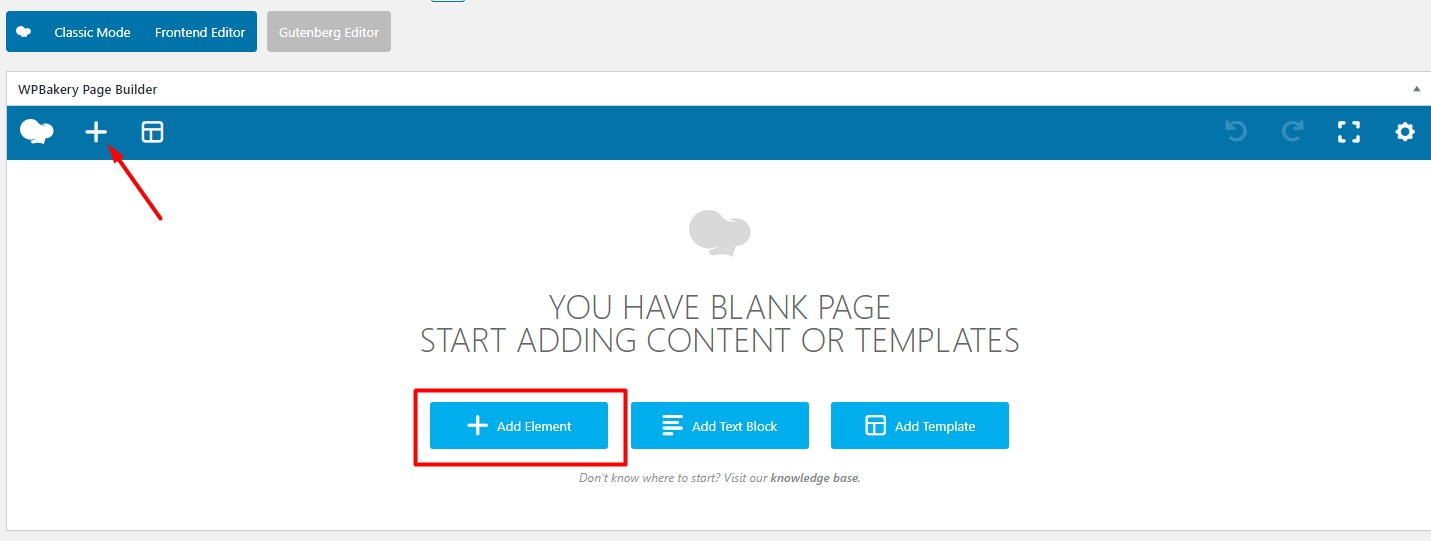
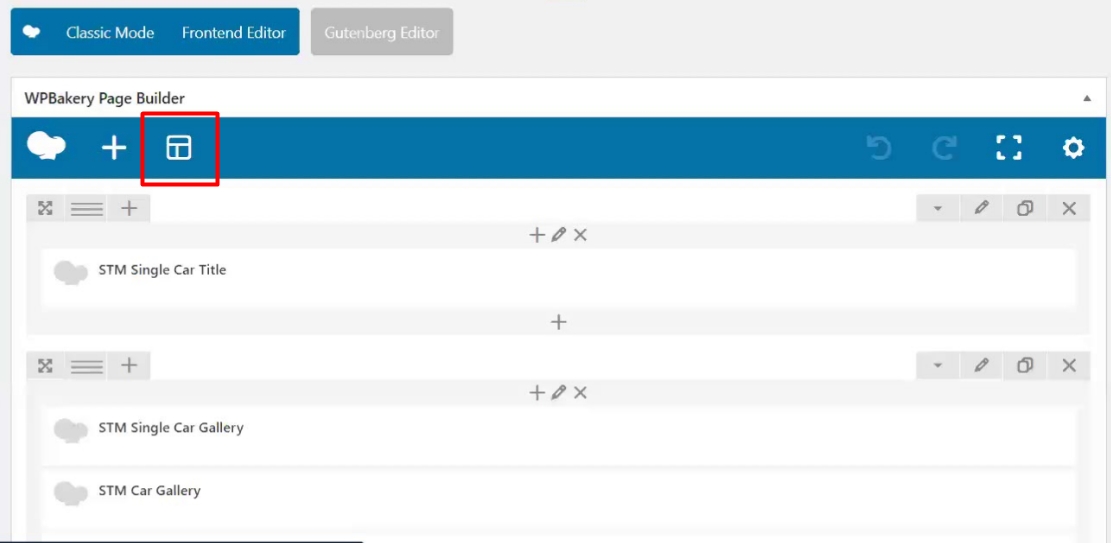


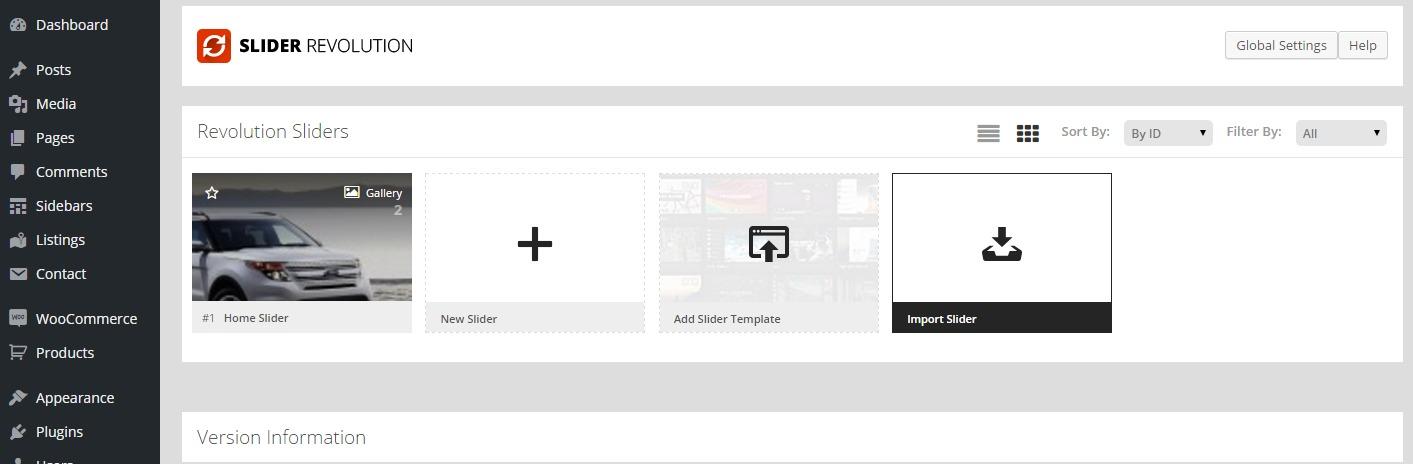
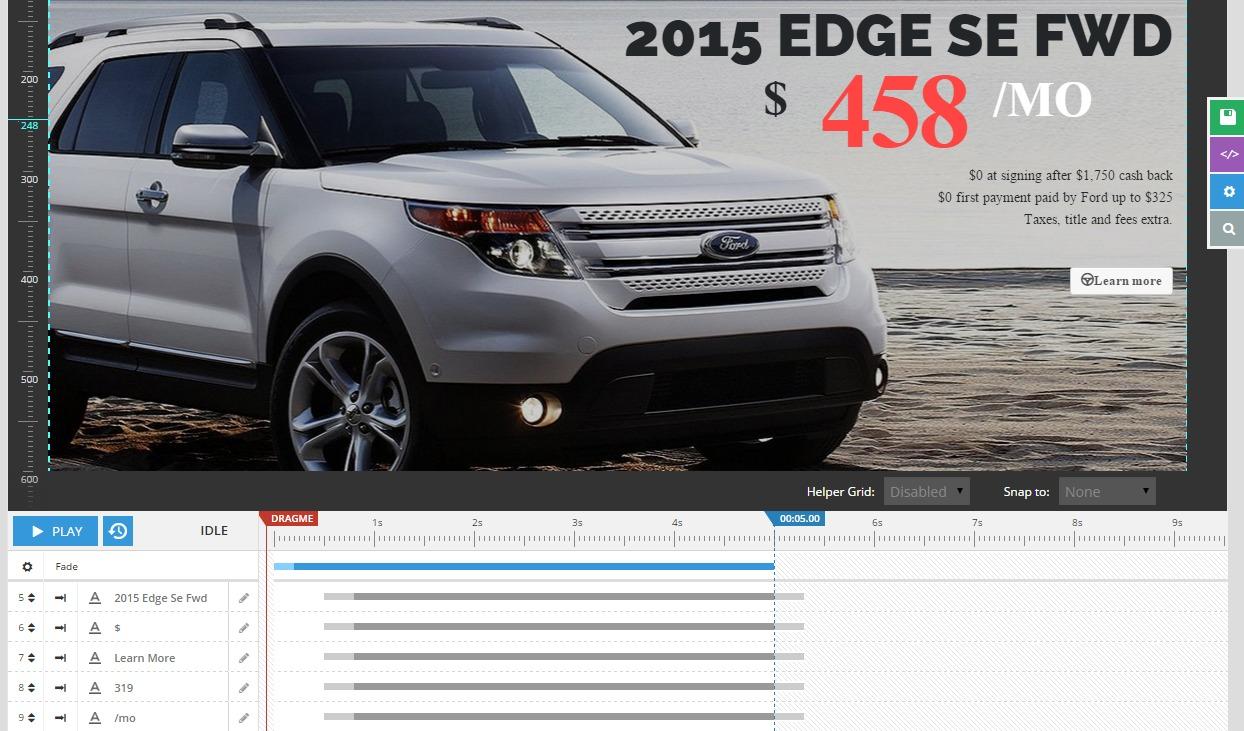
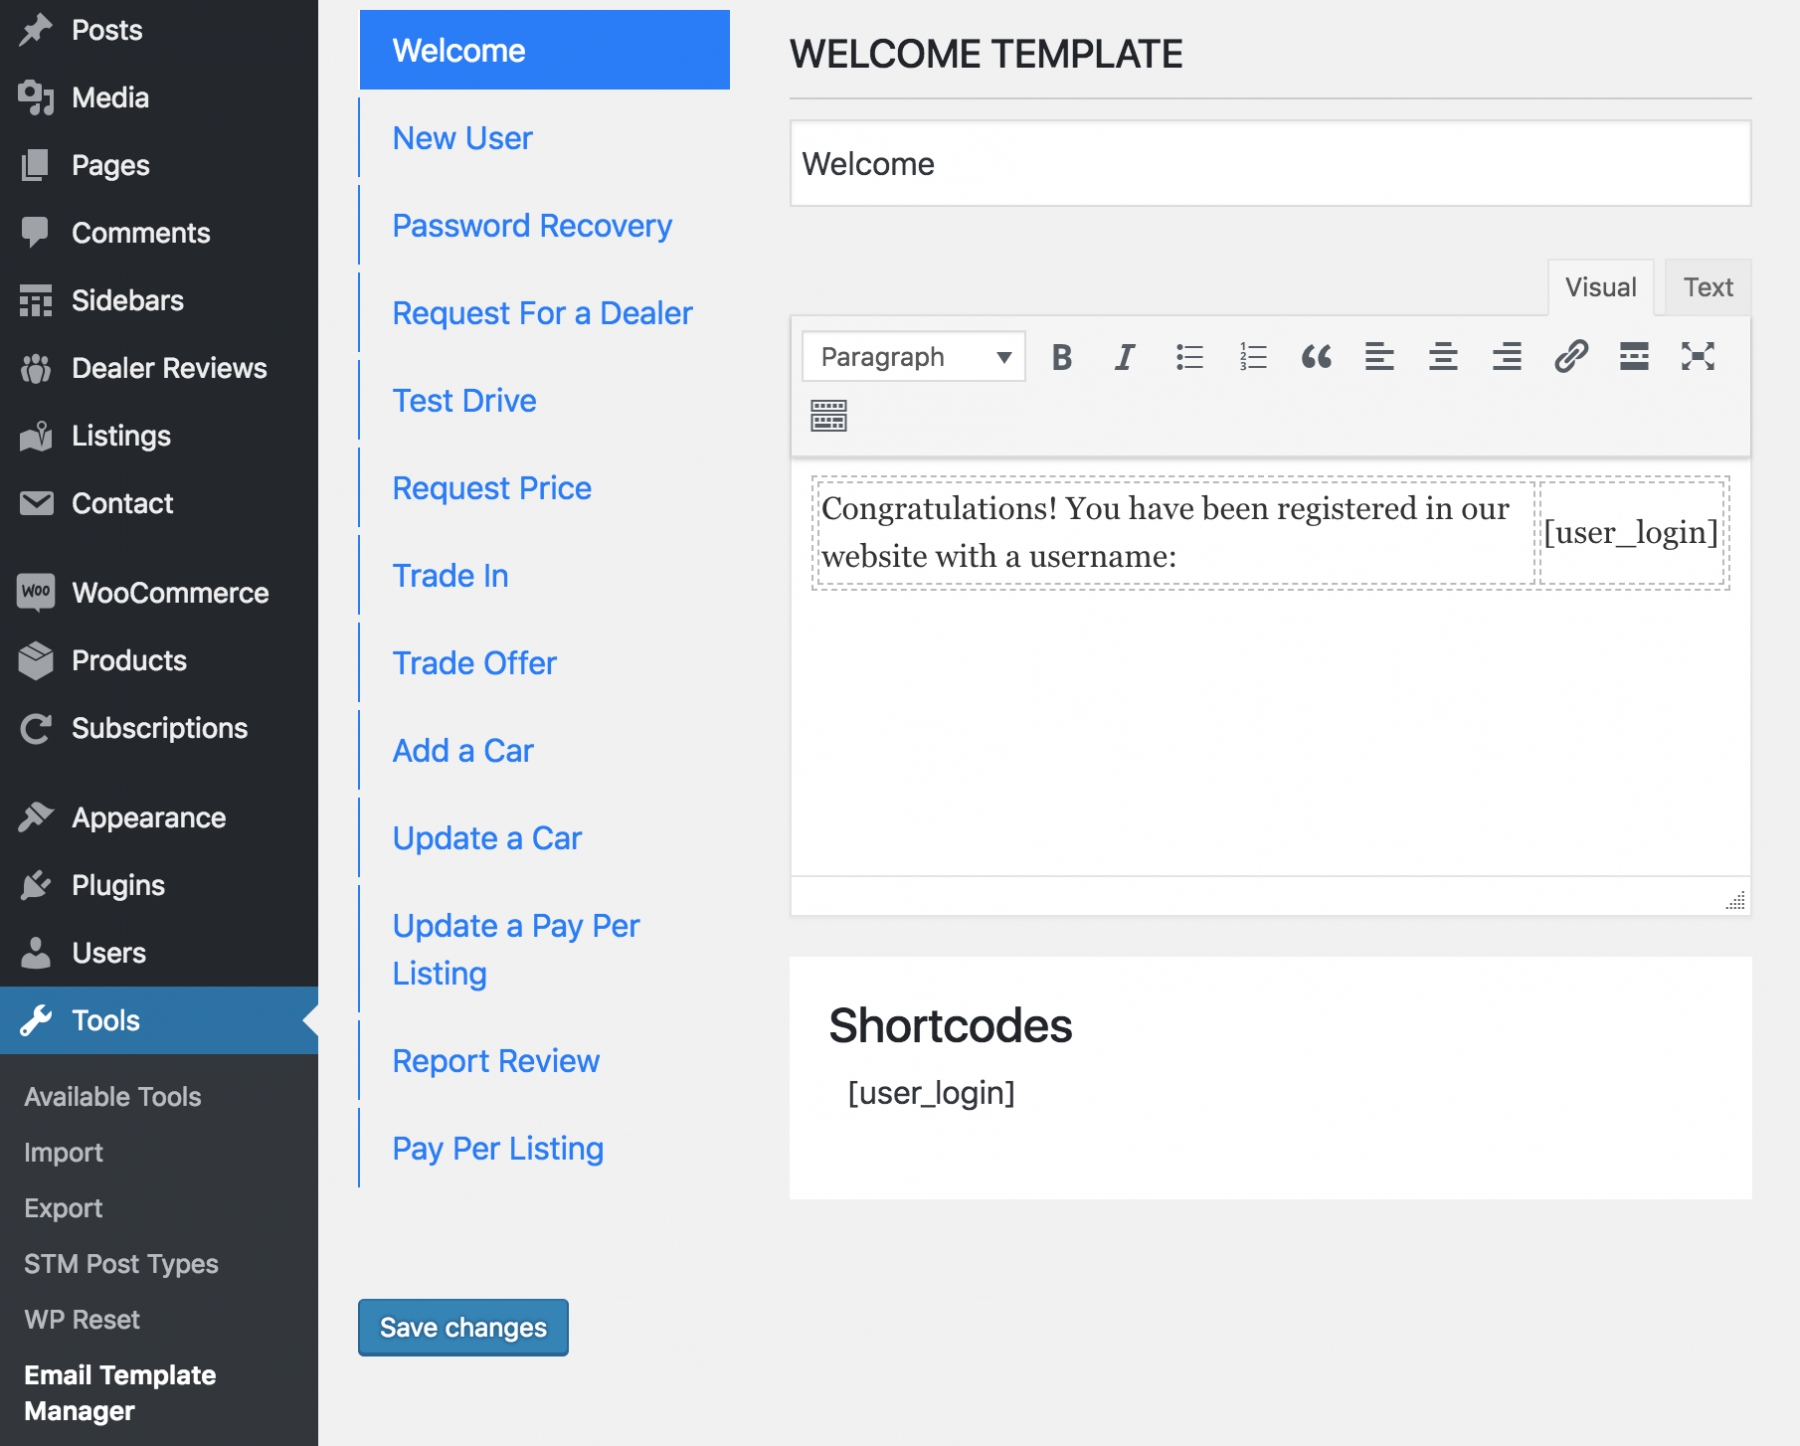
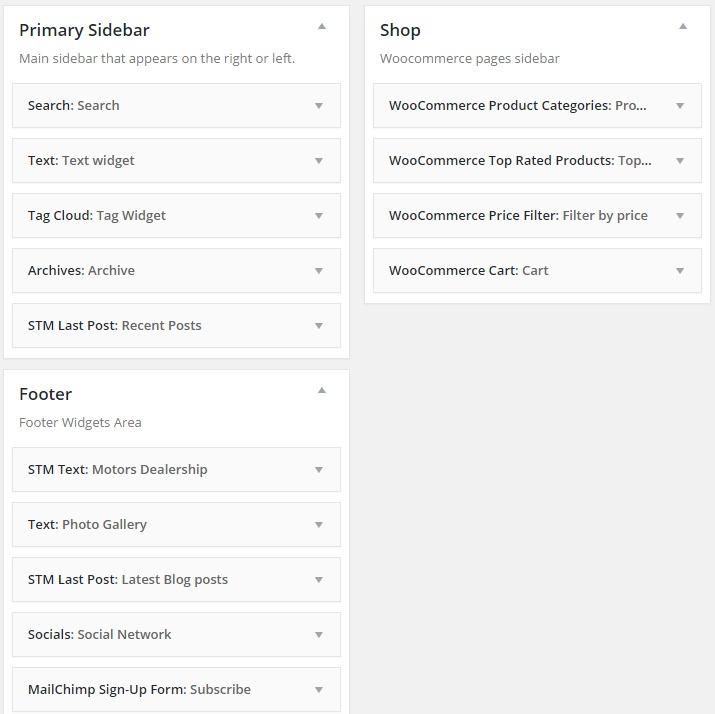
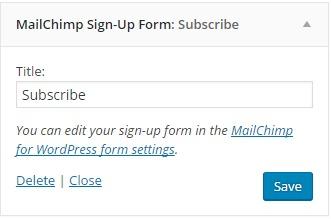


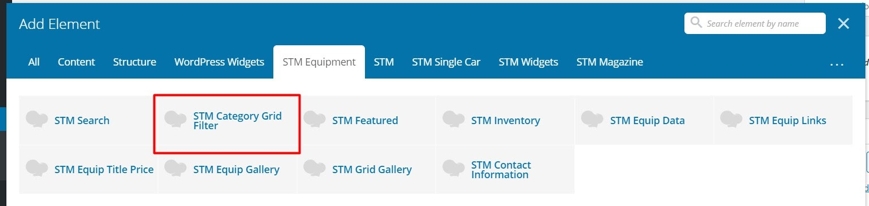
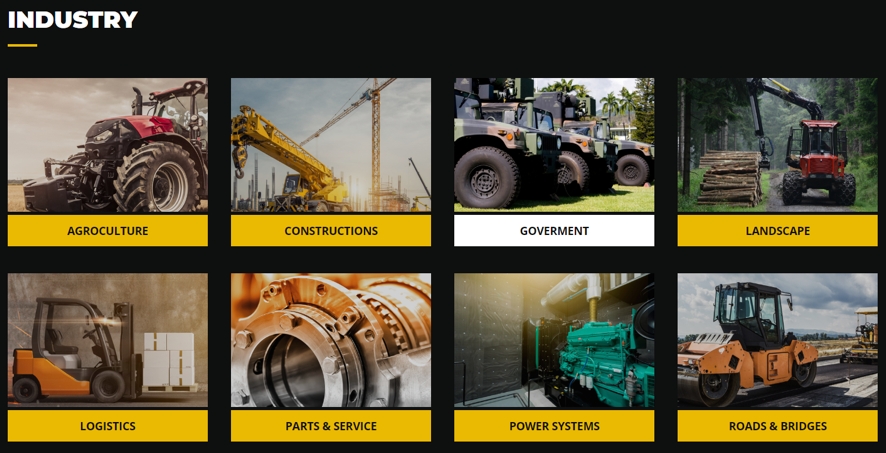
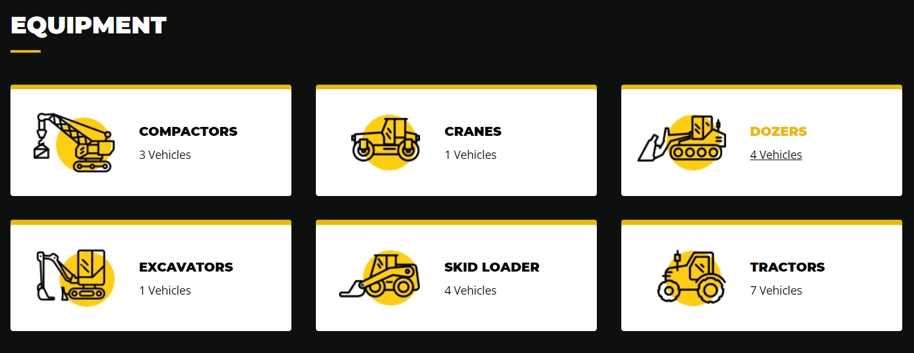
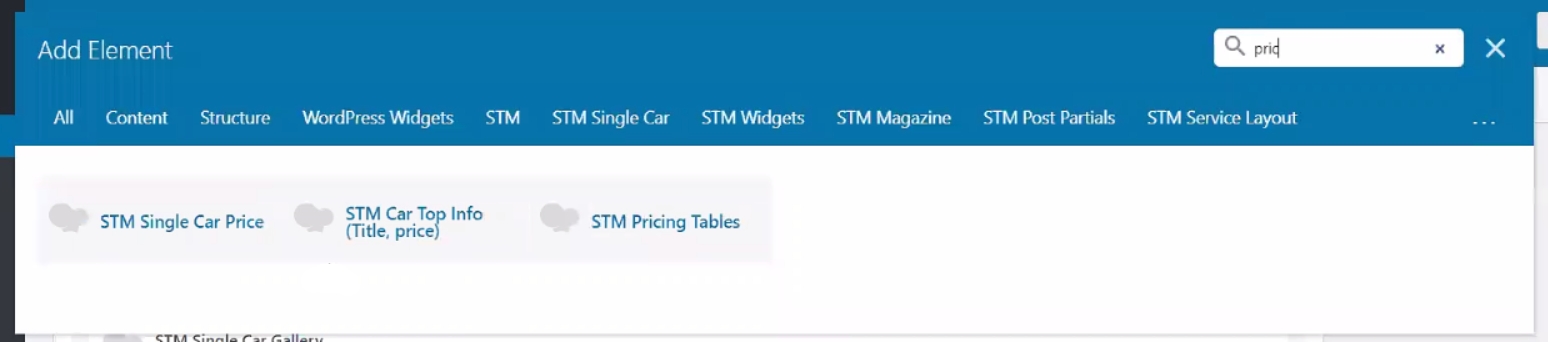
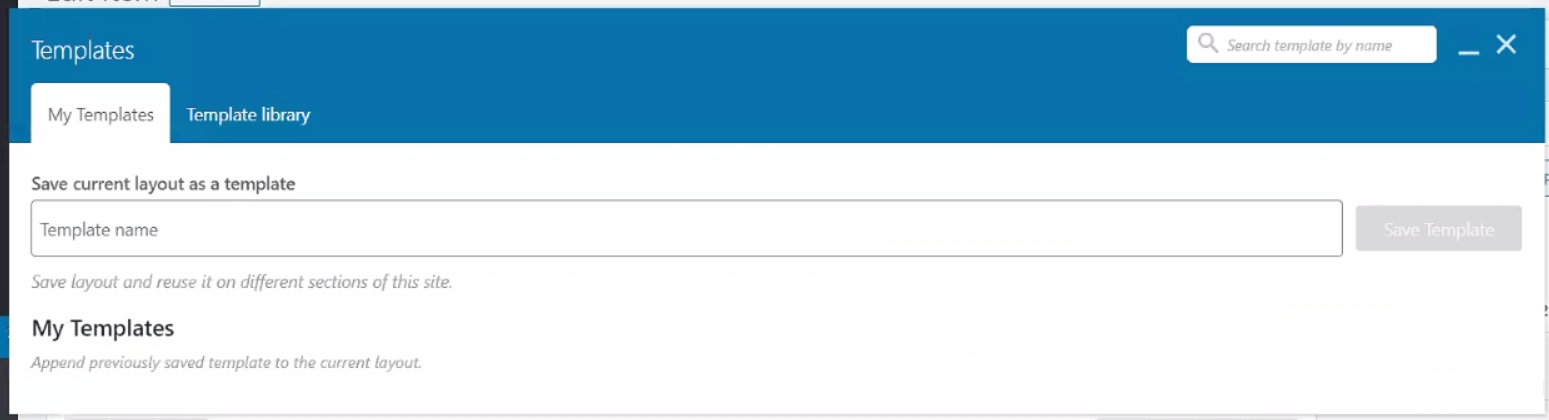

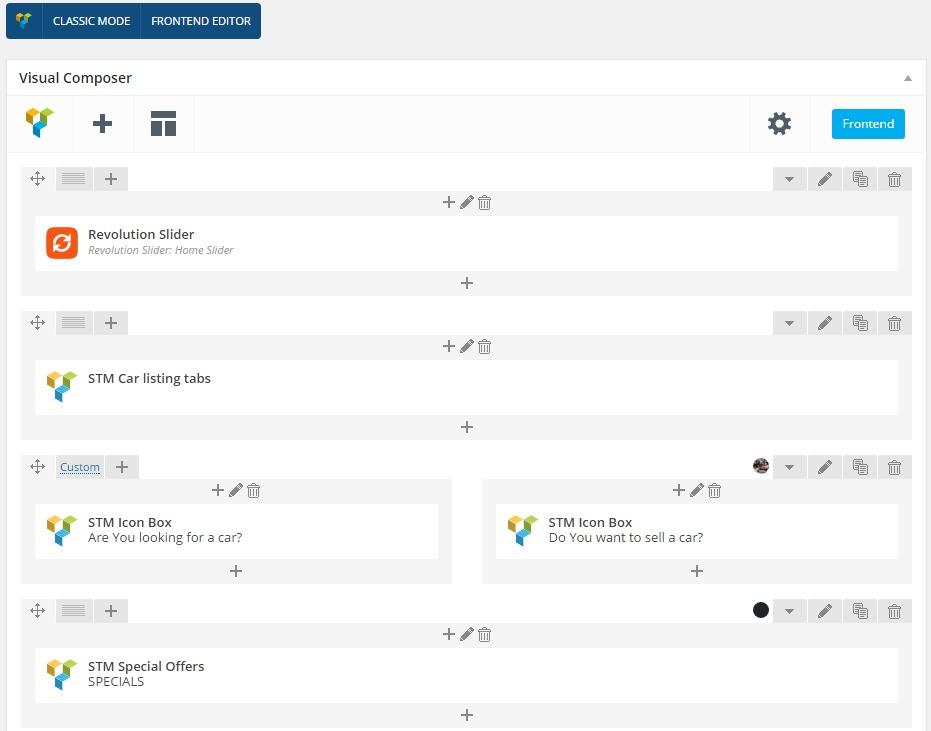
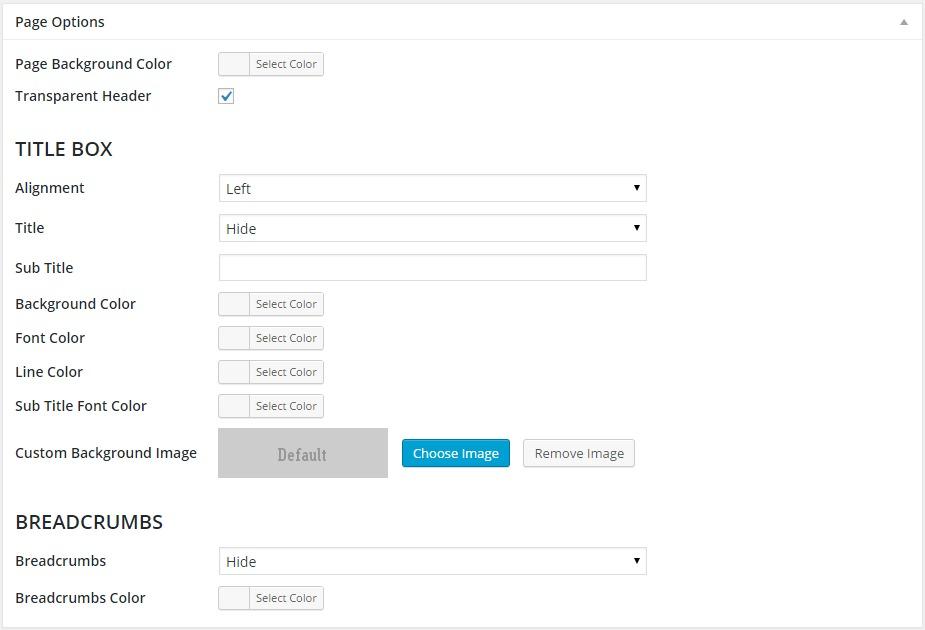


Info Block Position - Option to change the position of the info block to the right or the left.
Title - Info Block title:
Price - Price of the item that is displayed in Info Block:
Per Month Title - Specifies the period unit for which the payment will be made for the vehicle.
Period - Shows for how many months the car payment will be paid:
Description - Text block that displays additional information about the vehicle. The editor supports HTML tags which are useful for structuring and creating description.
The STM Hero Banner Widget has following settings for Style 2:
Image - Background image for Hero Banner section.
Info Block Style - Option to select one of the available three styles.
Info Block Position - Option to change the position of the info block to the right or the left.
Title - Info Block title:
Price - Price of the item that is displayed in Info Block:
Per Month Title - Specifies the period unit for which the payment will be made for the vehicle.
Period - Shows for how many months the car payment will be paid:
Description - Text block that displays additional information about the vehicle. The editor supports HTML tags which are useful for structuring and creating description:
Button Link - Custom link for a button that can redirect users to a certain page or post.
Button Title - The title for the Info Box button.
Button Icon - The Icon that appears behind the Button title.
The STM Hero Banner Widget has following settings for Style 3:
Image - Background image for Hero Banner section.
Info Block Style - Option to select one of the available three styles.
Info Block Position - Option to change the position of the info block to the right or the left.
Title - Info Block title:
Price - Price of the item that is displayed in Info Block:
Per Month Title - Specifies the period unit for which the payment will be made for the vehicle.
Period - Shows for how many months the car payment will be paid:
Description - Text block that displays additional information about the vehicle. The editor supports HTML tags which are useful for structuring and creating description.
Button Link - Custom link for a button that can redirect users to a certain page or post.
Button Title - The title for the Info Box button.
Button Icon - The Icon that appears behind the Button title.


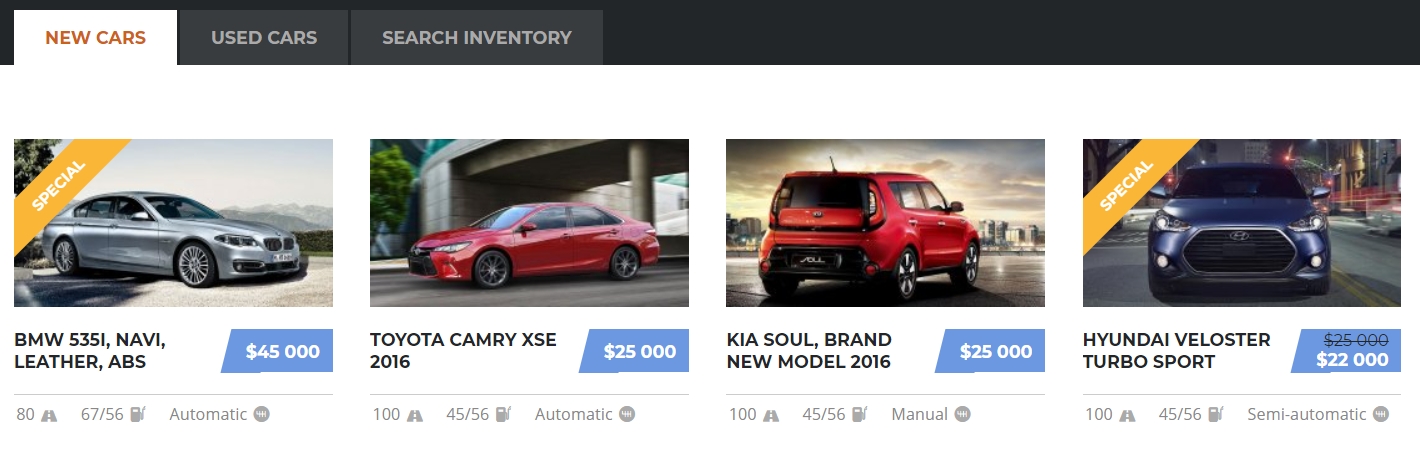
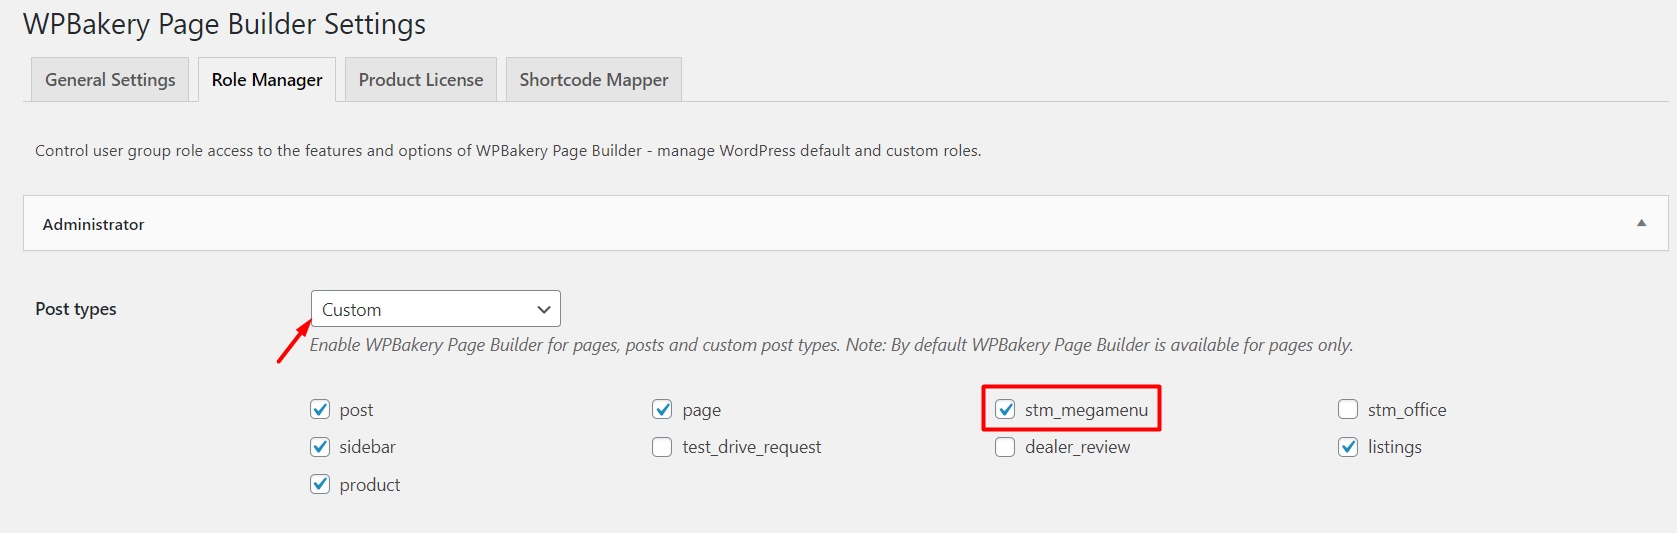
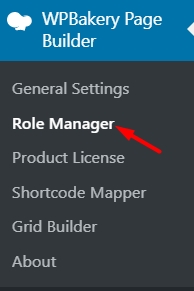
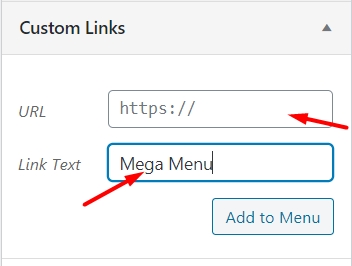
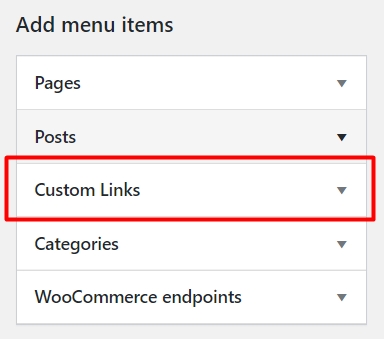

Provide your customers with the safety selling and purchasing the vehicle's service thanks to the integration of the Motors theme with the Motors VIN Decoder plugin. The Motors VIN Decoder plugin allows decoding the vehicle VIN number which contains all the vehicle specifications.
The Motors VIN Decoder plugin can be installed from the default repository of WordPress.
After installing and activating, the Motors VIN Decoder plugin appears on the Dashboard menu.
The VIN-Decoder Specification Providers can be selected on the plugin panel. The NHTSA VIN specification provider is selected by default and gives unlimited vehicle VIN specifications.
Other VIN specification providers and vehicle VIN history features are available in the of the plugin.
Go to the Dashboard > Theme Options > Header > VIN Check in order to enable the VIN code checking feature.
Once the VIN Check button is activated, the new VIN-Check tab will be displayed on the main page.
On the VIN Check Page section, indicate the forwarding page to check the vehicle VIN number.
The VIN Check page displays a form where the vehicle VIN number can be entered.
Vehicle specifications display as shown below.
The Notice for VIN Modal windows is for the notifications to display when the VIN modal pop-ups.
Two additional widgets come with the VIN Decoder plugin.
This widget can be used on the single listing page to check the VIN number of the selected vehicle. The widget can be placed at any location on the single listing page.
By clicking on the View VIN Report button, a popup with the current vehicle's characteristics will be displayed and can be downloaded in PDF file format.
This widget can be used to display the VIN Check Form on the page, where the vehicle VIN number can be entered to see the details.
The integration of the Motors theme gives more opportunities to upgrade the Motors Vin Decoder plugin with the powerful autocomplete feature.
The auto-complete feature fills in the specified fields with vehicle information in the listing creation process according to the information from the VIN number.
In order to enable the auto-complete feature go to the Settings of selected VIN-Decoder Specification Provider from the Motors VIN Decoder plugin.
On the opening page, select the appropriate API options which match with VIN detail and save changes. Mentioned API option fields will be automatically filled by pasting the vehicle's VIN number.
Vehicle's Make, Model, Fuel Type, and Year variables are taken as an example.
After saving the changes go to the new listing creation menu and paste the VIN number of the vehicle that you want to add as a listing.
After pasting the VIN number, the vehicle's Make, Model, Fuel Type, and Year variables filled automatically.
On the Classified layout, dealers can place their listings with the help of Add Your Item button.
Entering a vehicle's VIN number prevents filling the fields manually.
The Pro version of the Motors Vin Decoder plugin contains many comprehensive features extending plugin possibilities. The plugin is highly essential for all automotive industry representatives. This includes car and motorcycle dealers, car rental companies, and repair services.
The Pro version of the plugin shows the number of reported accidents with accident dates and severity of damages. It tracks down stolen vehicles to provide customers only safe and eligible services.
The plugin work is based on API access to decode a VIN number. Pro Plugin supports extra paid VIN services as Marketcheck, Vin Audit, VinDecoder.eu, Databases of the Ministry of Transportation of Israel.
The Pro version of the Motors Vin Decoder plugin contains the following features in addition to the free version:
Four Global (USA, Europe, Asia & Middle East) Vehicle Data Providers
Check Vehicle History (service records, road accidents, repairs, previous owners and etc)
Track Mileage/odometer
Service Records
The Pro version of this plugin also allows accessing dealer maintenance and car classifieds & listings by the autocomplete feature with the integration of the Motors theme.
The Custom CSS section is similar to WordPress default Customize > Additional CSS section. Here you can insert all your custom CSS to overwrite theme styles without editing any theme files.
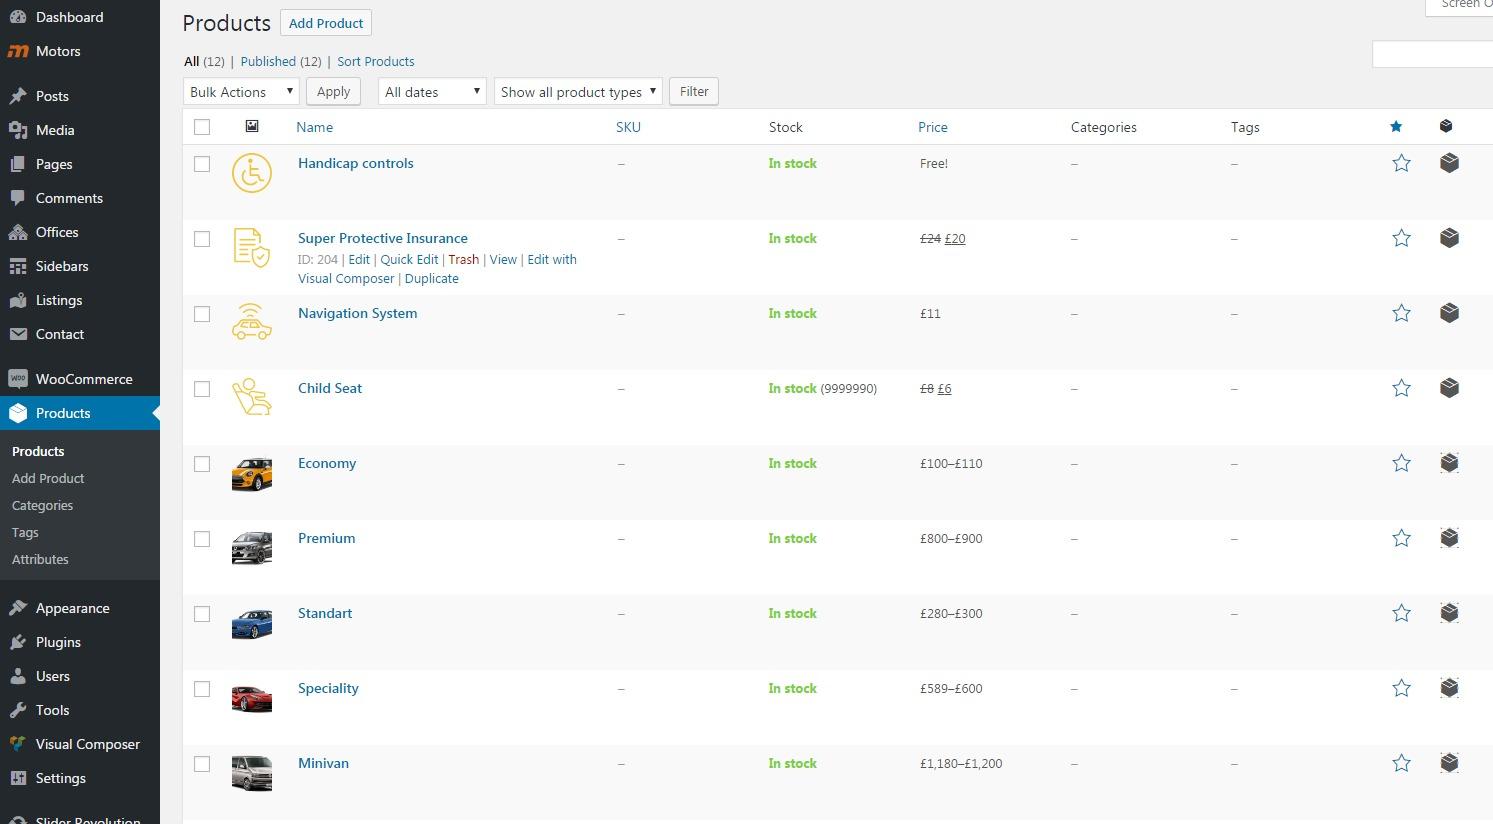
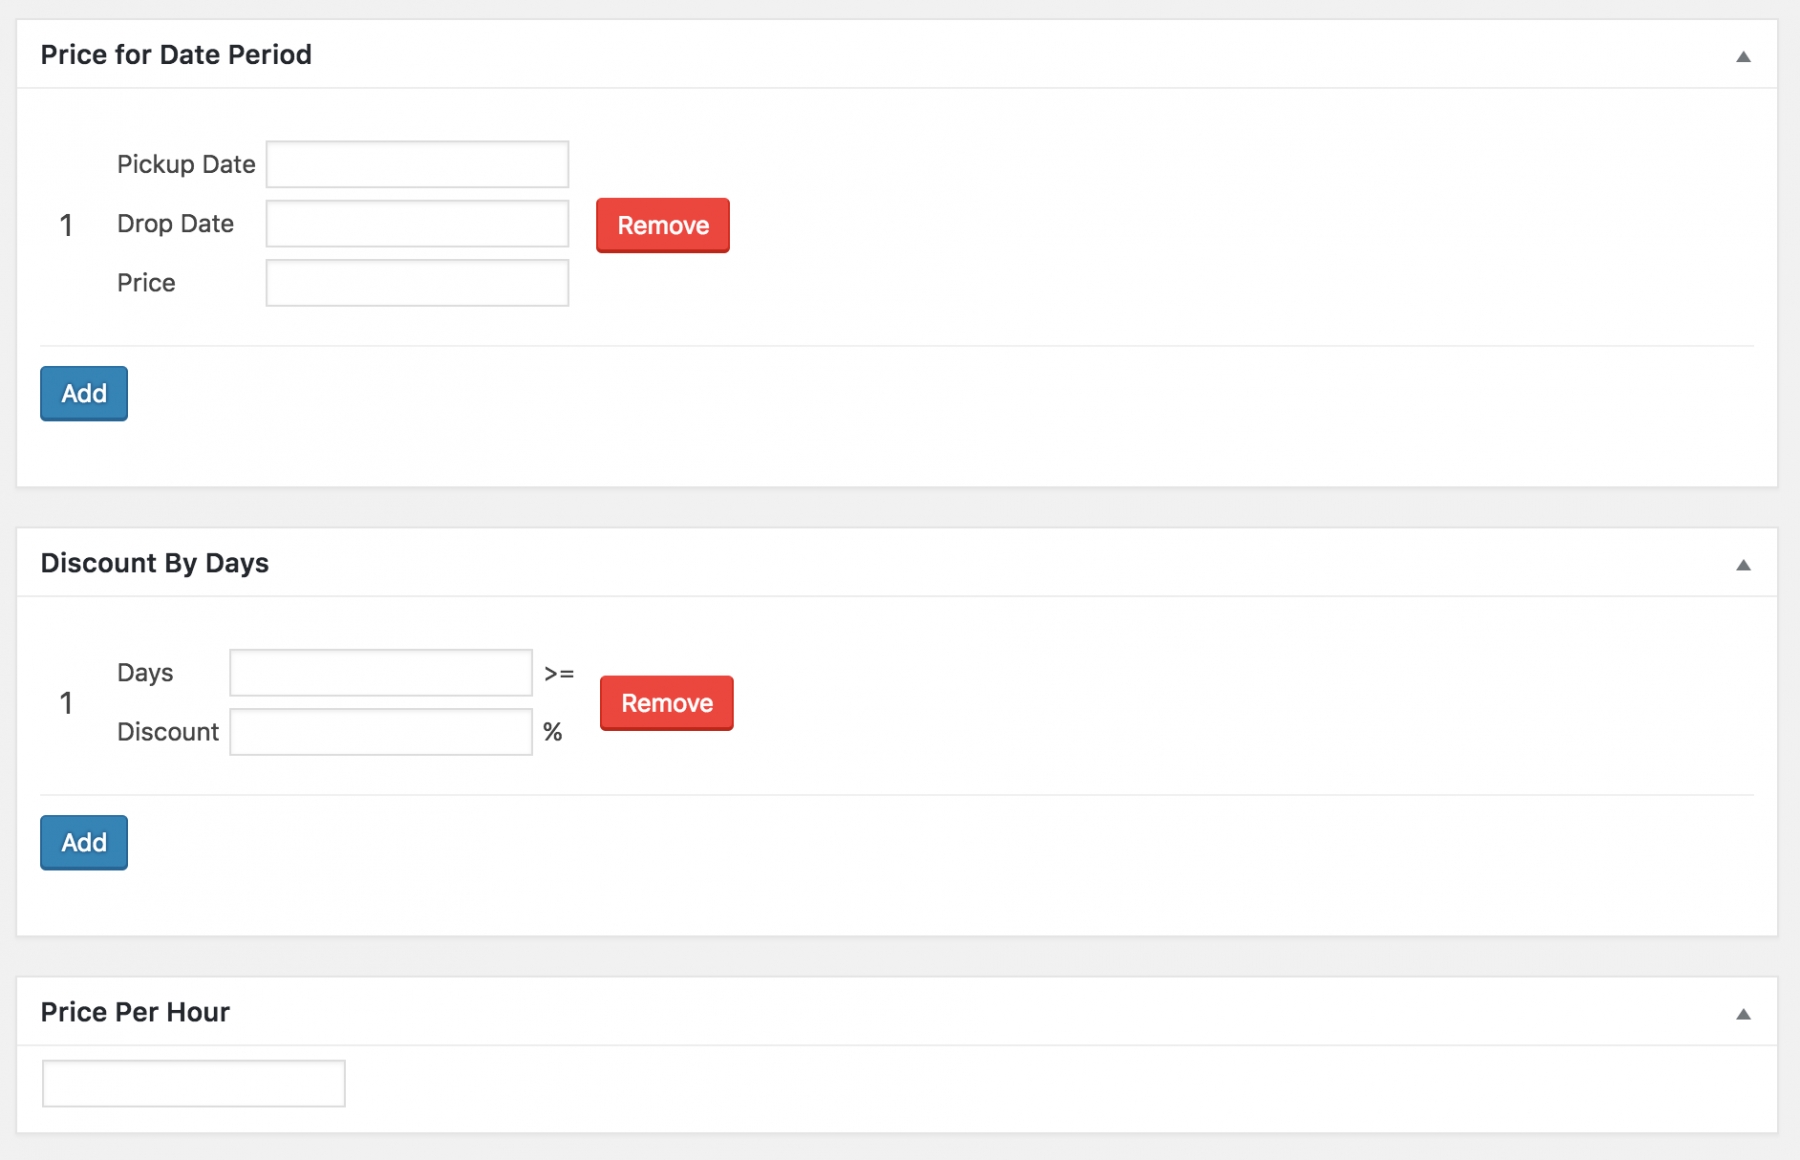
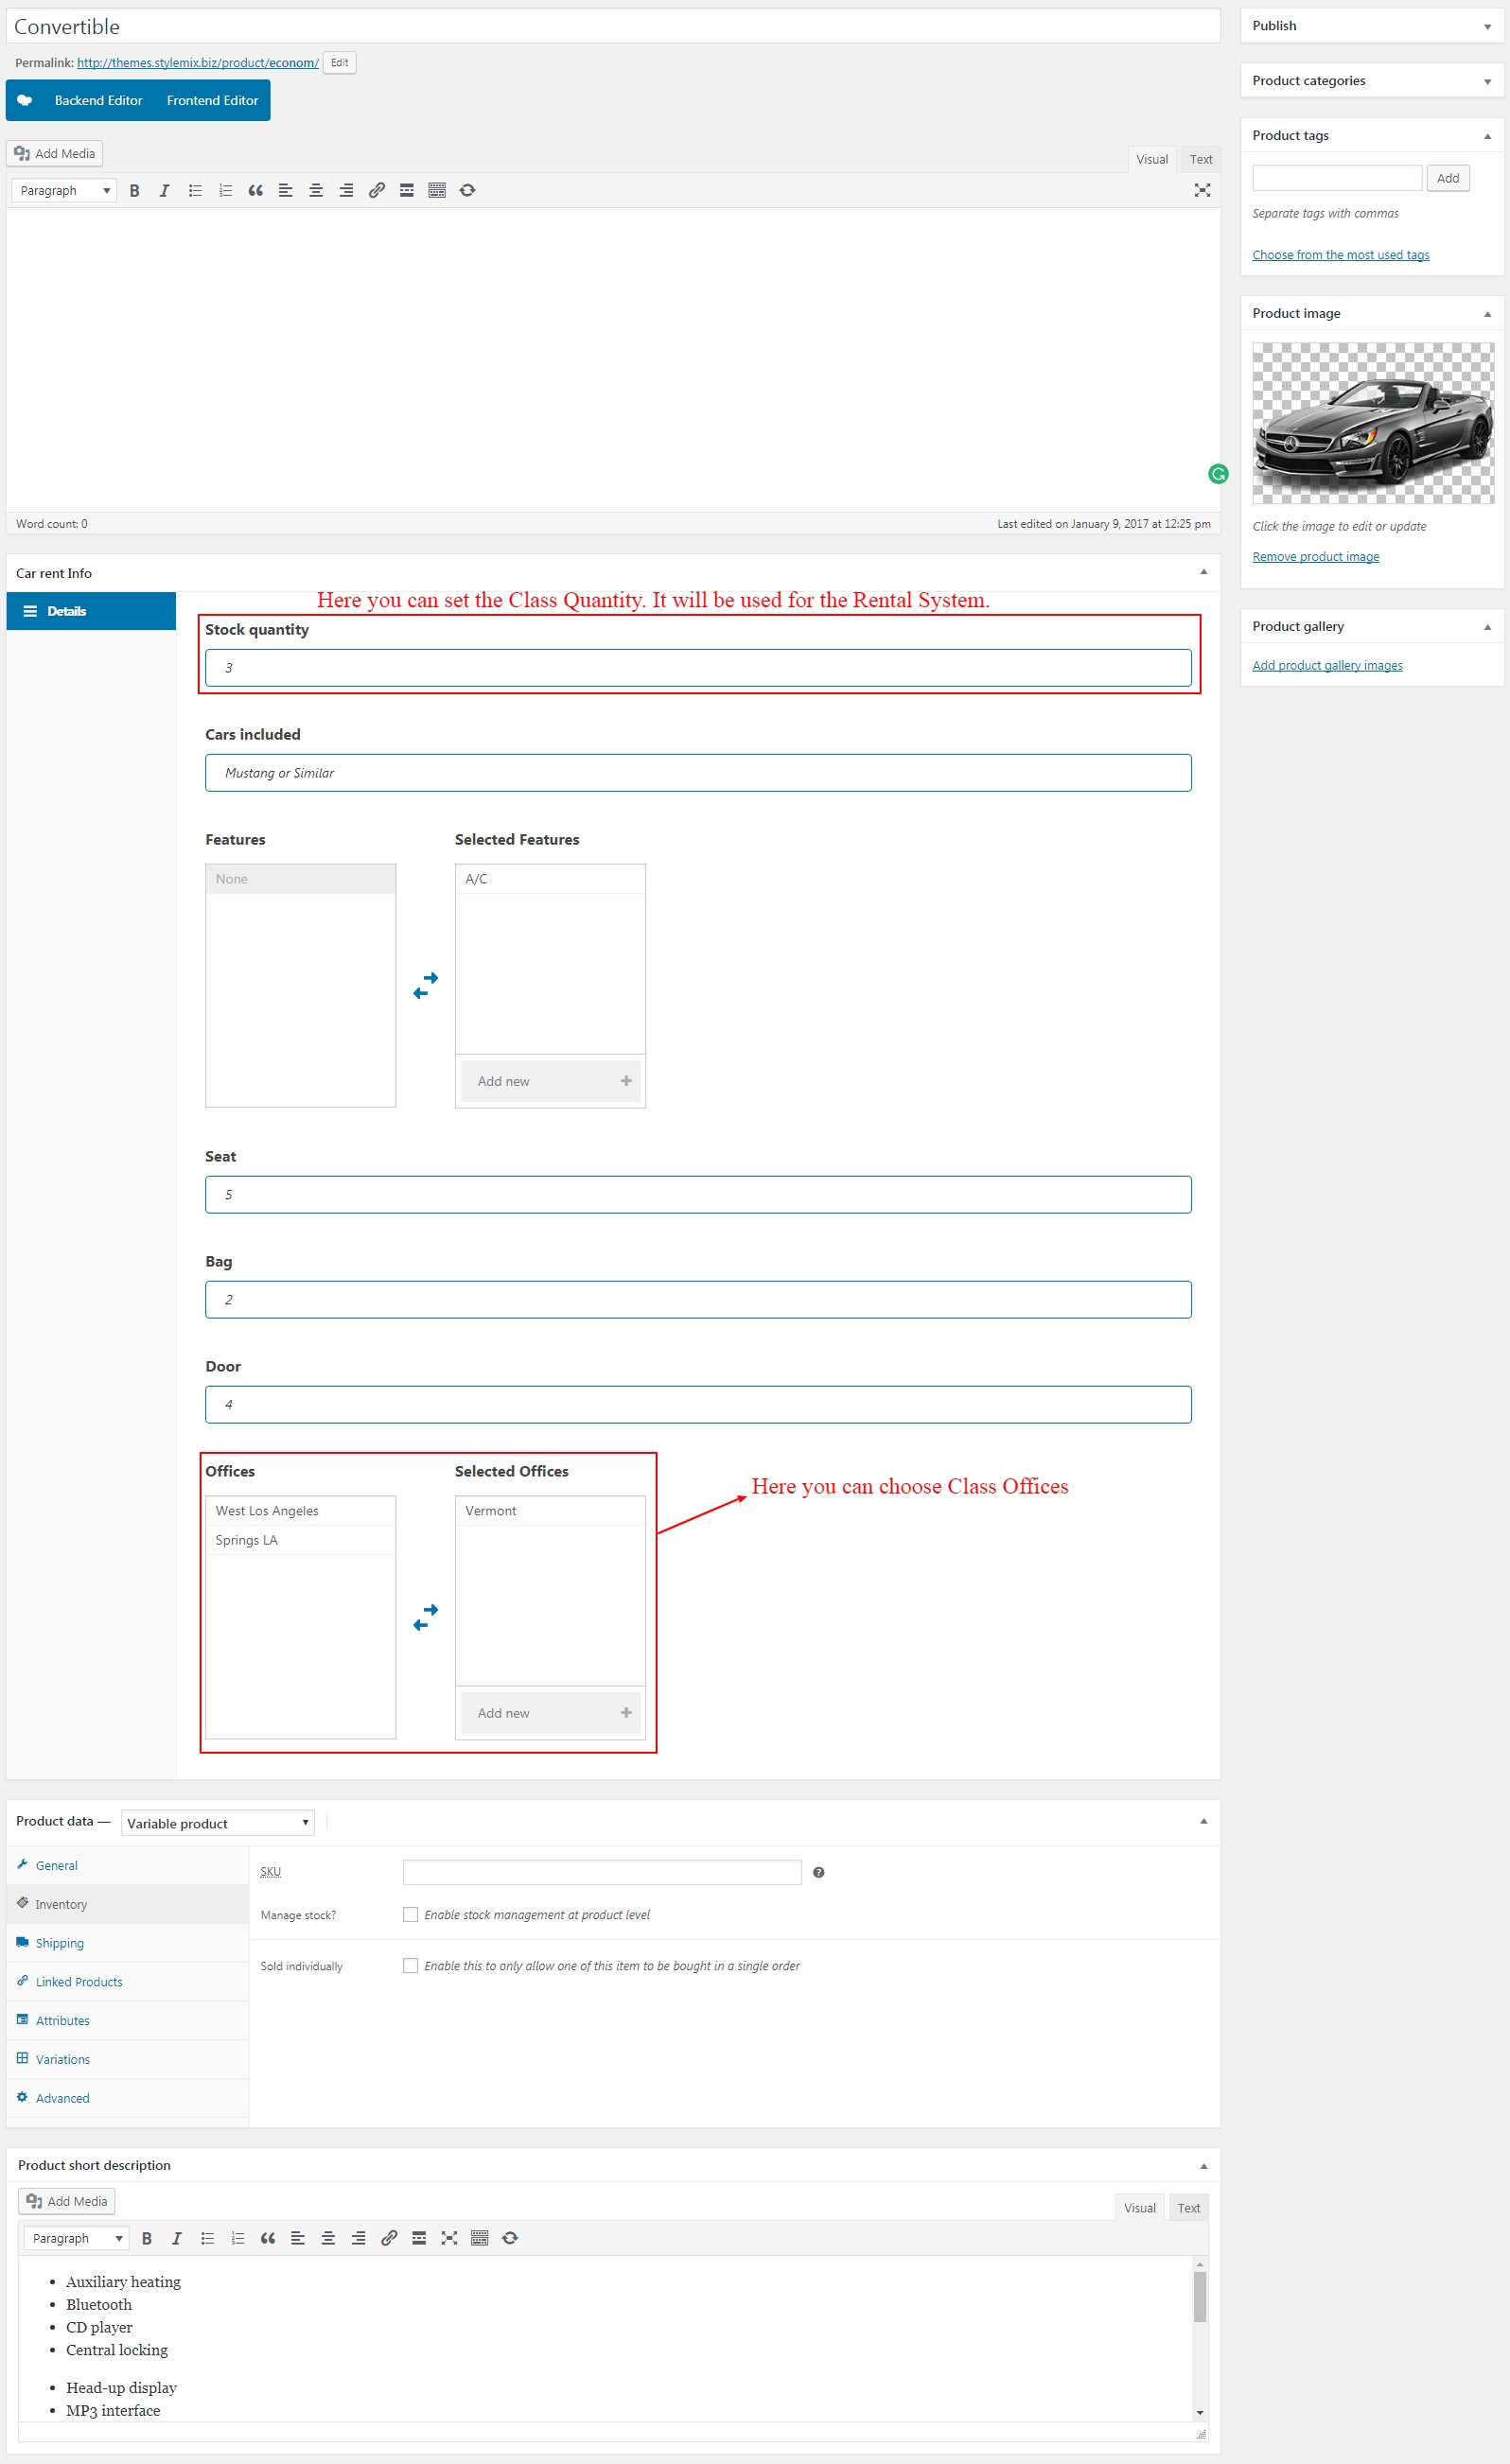

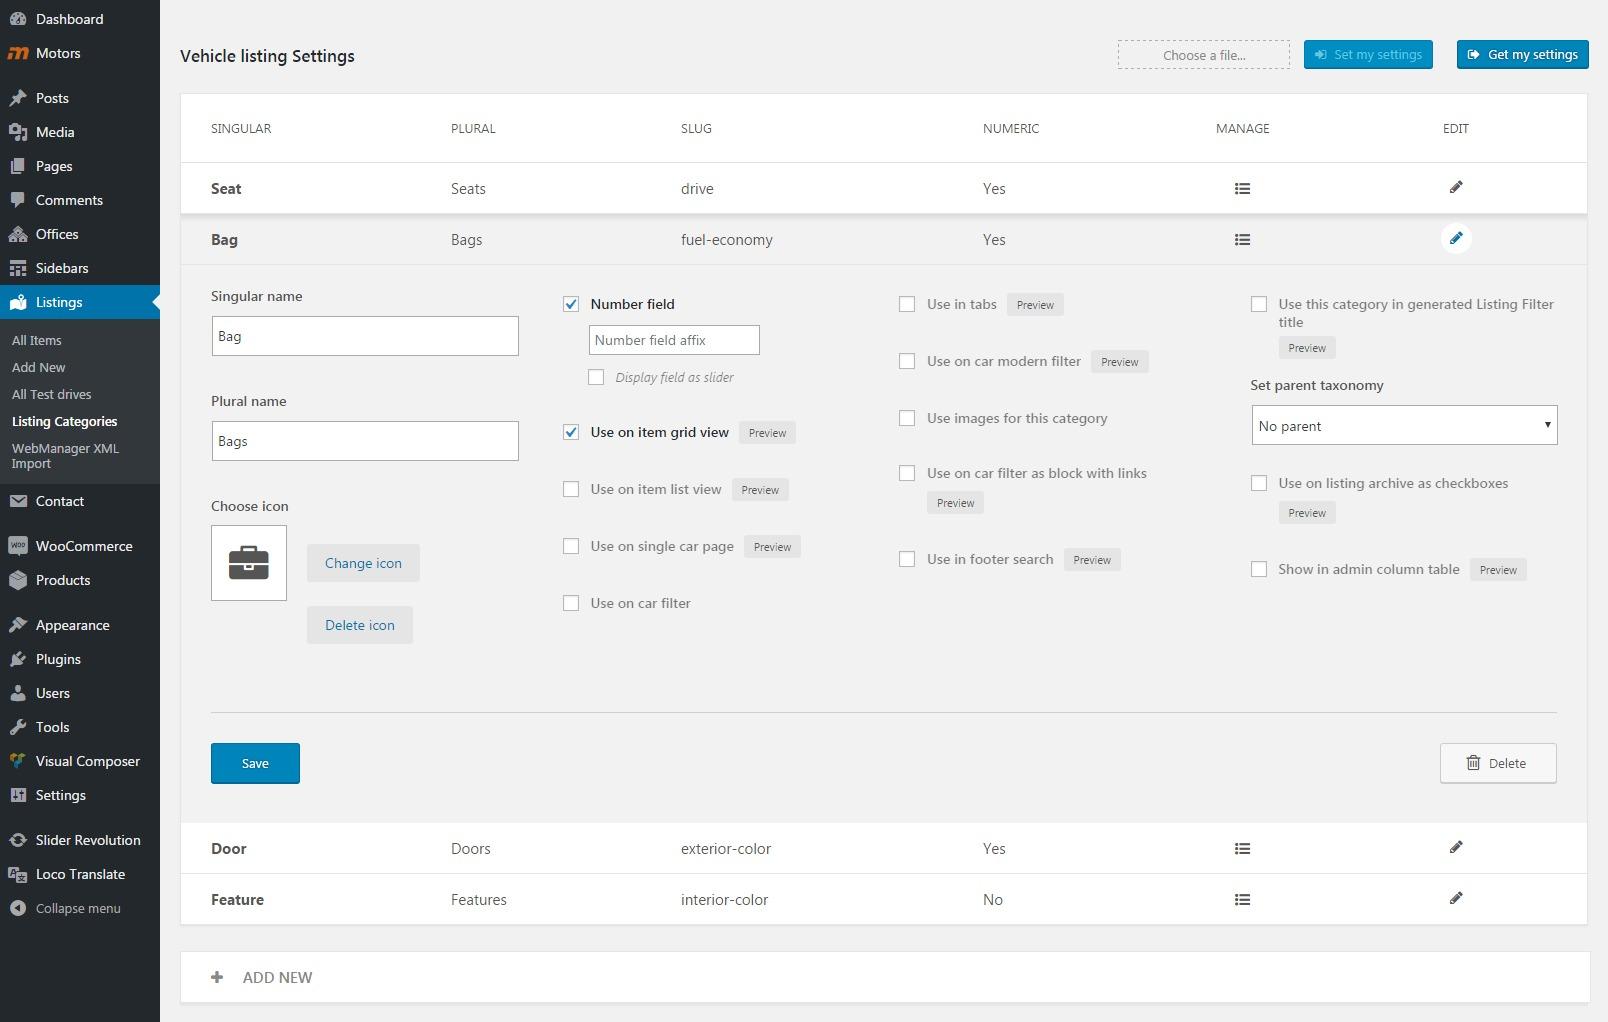


Offering flexible pricing options is the best strategy to expand your business's reach. The following guide includes:
Mega Menu is an effective and beautiful dropdown layout that offers you tons of excellent options to enhance user engagement. Learn how to set it up and make your menu professional and user-friendly.
Here is the video tutorial:
Before getting started please pay attention, that users who install the theme for the first time will get access to Mega Menu automatically. But those, who are already working with Motors should update the theme and activate the Mega Menu plugin.


Damage Check
Theft Check
Last Sale Price
In Classified layouts, users can submit listings using a number of free slots, which can be set up under Theme Options > User/Dealer section:
Users can increase the number of available slots to submit listings by purchasing Pricing Plans.
Initially, WooCommerce Pricing plans should be enabled in Dashboard > Theme Options > User/Dealer > Main section:
After enabling the WooCoommerce plans, Subscription products can be created in Dashboard > Products > Add new section:
After assigning the product title, mark it as "Subscription":
The product's "Catalog visibility" option can be configured as "Hidden." This setting is appropriate since the product will be linked to the Pricing Plans page.
Go to the Product data section to set the regular price for the product and fill out Subscription settings:
The regular price refers to the amount that users will be charged.
The billing cycle is the number of repeated payments. If you refer to the screenshot below, money will be deducted every 30 days.
Lifespan is how long the subscription will run. In the screenshot below, the money will only be withdrawn once. The client will then need to repurchase the plan.
If you need a plan where the User or Dealer needs to pay every month for 1 year, then the billing cycle will be 30 days and lifespan 12 months.
Then, go to the "Pricing Plan Options" section and set limits for the Subscription product:
The Number of Slots is the allowed number of listings that users can publish.
The Number of images per slot refers to the maximum number of images that can be uploaded for each listing.
The Price Plan User Role refers to the specific user role to which the subscription is applicable.
The subscription plans do not encompass slots for "Featured" listings. If users wish to highlight a listing as "Featured," an extra payment is necessary for each individual listing.
Once the Subscription products have been published, they should be showcased on the Pricing Plans page, making them purchasable. This page has been included in the demo import and is automatically assigned within the theme options:
The content on the page is editable using either Elementor or WPBakery, depending on the specific page builder that was chosen during the demo import process. Pricing tables – is one of the new features of the Classified Layout.
The Pricing Plans page can be easily edited with Elementor. By customizing the "Pricing Plan" widget, WooCommerce Subscription Products that were previously created should be linked.
The widget includes the essential settings listed below:
Plan Title: This field allows you to input the main title or name of the pricing plan you're showcasing. It typically represents the name of the subscription level or service being offered.
Subtitle: The subtitle provides a supplementary description to the plan title.
Badge Text: A badge is a small piece of text that highlights a specific feature of the pricing plan, like "Popular" or "Recommended." This setting allows you to define the badge text to draw attention to key selling points.
Price: Input the regular price of the pricing plan. This is the standard cost customers would pay for the subscription.
Discount Price: If applicable, this is where you enter the discounted price for the plan. It's visible to showcase any ongoing promotions or special offers.
Period Text: Specify the time period associated with the pricing plan, such as "per month" or "annually." This provides clarity about the billing frequency.
Button Text: Customize the text displayed on the call-to-action button. It's the text that prompts users to take action, like "Subscribe Now" or "Get Started."
Button Link: Define the hyperlink that the button leads to. Typically, this link takes users to a checkout page or a more detailed plan description. To direct users to the WooCommerce Cart, use the following link:
In this context, "2294" corresponds to the unique ID assigned to the WooCommerce product.
Items: In this section, you can list out the key features or offerings included in the pricing plan.
By utilizing these settings effectively, you can create visually appealing and informative pricing plans with different styles.
You can set the STM Pricing Tables module on your pages to display Pricing Tables.
It's possible to select the number of tables (1, 2, or 3) and set the Price Label under the General tab of the STM Pricing Tables module settings:
Under Table tabs, it’s possible to set the Pricing section Title, Periods, Features, Label, Extra Link, and its options.
You need to set the settings below for each Table under respective tabs.
Create the period for pricing plans. By default, it is available to create monthly and yearly subscriptions:
Then you can choose a subscription product for a selected period in the Pricing Tables module:
After selecting a product for the yearly period, you can list the additional features provided in a plan:
Set a label to attract users or make the table informative:
Finally, set a label for the button and save the changes:
After following all the previous steps, we obtain the subsequent view of pricing tables with WPBaakery Page Builder.
Users change/upgrade their plans on their user account via simple WooCommerce Checkout progress:
After successful payment, the current plan with the next subscription renewal date will be displayed:
Now you can start setting up. As settings differ for the Dealership and Classified layouts, we will describe them separately.
To begin your work with the mega menu, open Appearance > Menu from the dashboard panel.
On the Menus page, you can edit, add and manage menus of your website.
To build a new mega menu you need to add a new item first - the parent item you want to have the dropdown menu on. Proceed to the panel Add menu items on the left side of the page and expand the Custom Link.
In the spaces provided enter the URL and Link Text for your mega menu and click on the Add to Menu to apply changes.
Now you need to select a type for the mega menu. Find your recently added item in the menu structure. And in the type section choose Boxed.
After this, you can add other items (columns) to display in the mega menu and set up your grid. Just go back to the Custom Links and add a new item.
For instance, you want to show some special offers right away on the menu panel. Create a Special offer submenu (Custom Links > Enter URL and Link Text > Add to menu).
You can use two ways to place it under the Mega Menu. Simply drag the container to the right.
Or choose Under Mega Menu among the Move options.
Check the box Menu as title to use the name you entered in the Link Text. Also for special offers column mark the box Show Special Offers to automatically import offers to this menu.
Move on to creating the next column. Go back to Custom Links, enter the information and add an item.
Draw your attention to the setting you have for each sub menu, they may vary a little depending on the structure. Dropdowns that identify columns have the following setups: icon selection, image adding, text content.
If you create column’s sub-item you will have other options as well.
Let’s assume we want to create a Quick Search column with 3-4 sections to speed up the searching process. Create a New Vehicle subsection under the Quick Search. Add a URL for a quick forward to the new vehicle page. It helps to simplify website navigation.
You can add different details to each section to make it well organized. Enter text items, supplement it with icons, add images.
Continue building your mega menu and pay attention to the structure. You can create any number of columns.
The final form of your mega menu should look similar to this:
Unlike Dealership Layouts settings, the mega menu in the Classified type mostly adjusted via WPBakery builder. That is why the first thing you need to do is enable WPBakery for mega menu, as by default the builder is activated only for pages.
Open WPBakery Page Builder > Role Manager from the dashboard menu.
After this, on the newly opened page find the Post Type section and select Custom from the drop-down menu. Now you can enable builder for anything you need. Check the option stm_megamenu to activate the WPBakery.
Now you can start your work. To add new menu items go to Mega Menu on the dashboard panel and click on the Add New button.
On the Add New Item page enter the title for your new menu, use the WPBakery builder to set it up and publish.
Click on the Plus icon from the builder toolbar and reveal popup.
Here you need to open an additional menu and follow to the STM MegaMenu.
You will have three options here to choose from:
STM MegaMenu Top Categories
STM MegaMenu Top Vehicles
STM MegaMenu Top Makes Tabs
Each of them can be customized depending on the categories, vehicles and makes respectively. Let’s Create All makes section in the mega menu, to display all available makes on the website.
Click on the STM MegaMenu Top Categories. Enter a title for the section, select a listing category and select taxonomies (autocomplete available). Save changes and publish the menu.
This option allows you to display items according to the vehicle type and its quantity presented on the website.
Open STM MegaMenu Top Vehicles settings and enter a title for this section. All necessary data will be loaded automatically from the respective categories on your website.
The next option works with the same principle. Open STM MegaMenu Top Makes Tabs Settings and enter the title for this section on the menu. Check the makes you want to display in this tab.
Now go to Appearance > Menus and organize the structure of your mega menu. Use the panel Add menu items where you can find the Mega Menu section.
If you don’t have this option you can easily add it to the panel. Find the Screen Options tab in the top right corner. Reveal it and check the MegaMenu.
Go back to the Add menu items. Select the mega menu and choose items you want to add.
Mark the SubMenu Use PostId in the parent menu (in our case it is called Mega Menu) so all the data in sub items could be displayed properly.
Now organize the structure of the menu by dragging items.
Once you finished setting up check the menu on your site. The overall look should be similar to one that is below:
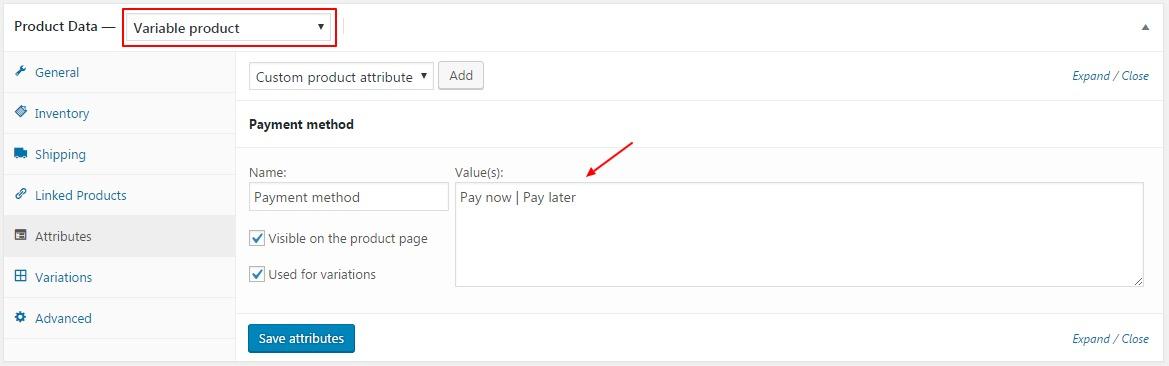
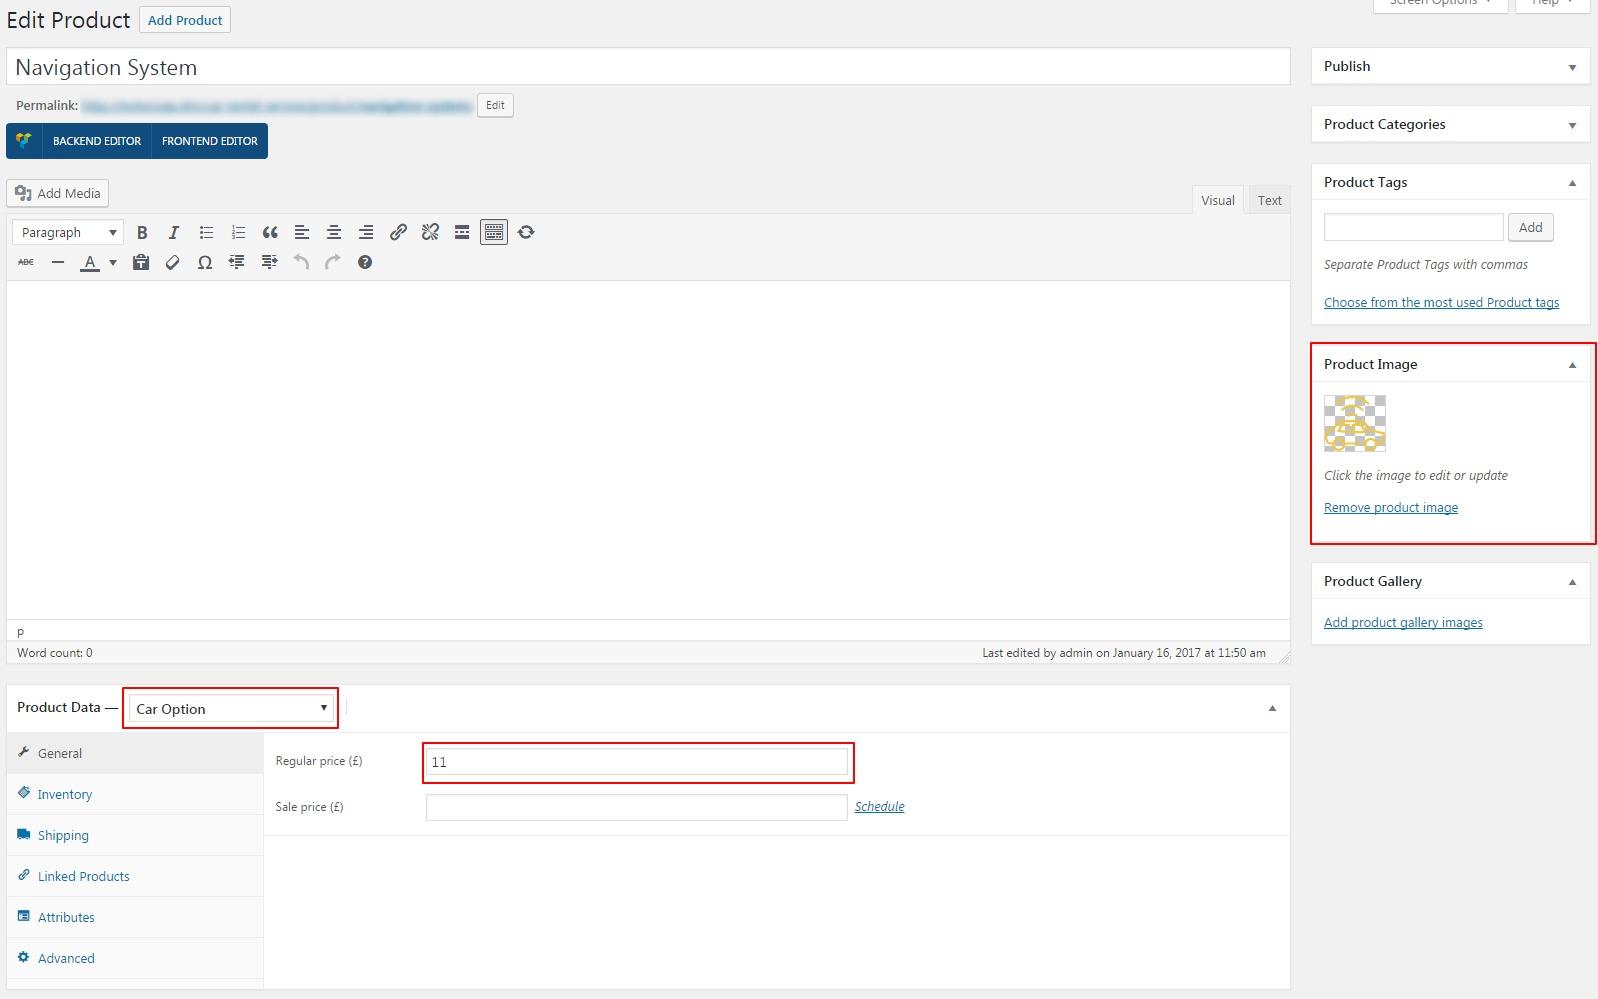


stm_filter_listing_filter - Hook in filter response(json).
stm_filter_locate_template - Hook in template loader.
stm_filter_price_view - Hook in price view (Also simply changes in WP Customizer).
stm_filter_price_currency - Hook in price currency (Also simply changes in WP Customizer).
stm_filter_ajax_filter - Hook in filter response after ajax (json).
stm_filter_user_restrictions - Hook in user restrictions.
stm_filter_user_fields - Hook in user fields.
stm_filter_display_user_name - Hook in user displayed name.
stm_filter_custom_login - Hook in custom login (json).
stm_filter_custom_register - Hook in custom registration (json).
stm_filter_price_view - Hook in price view.
stm_filter_add_a_car - Hook in add a car (json).
stm_filter_add_car_media - Hook in add a car media (json).
stm_filter_add_car_page_url - Hook in add a car page url (link).
stm_listing_filter_before - Before filter inside.
stm_listing_filter_after - After filter inside.
stm_car_user_info_before_action - Add a car user info Before.
Classified demo layouts have unique features that allow the creation of multi-vendor sites. In these layouts, users can register and publish their own listings. There are 3 types of users in the Classified version of the theme. They are:
Administrator
Private Seller (Subscriber)
STM Dealer
/?add-to-cart=2294


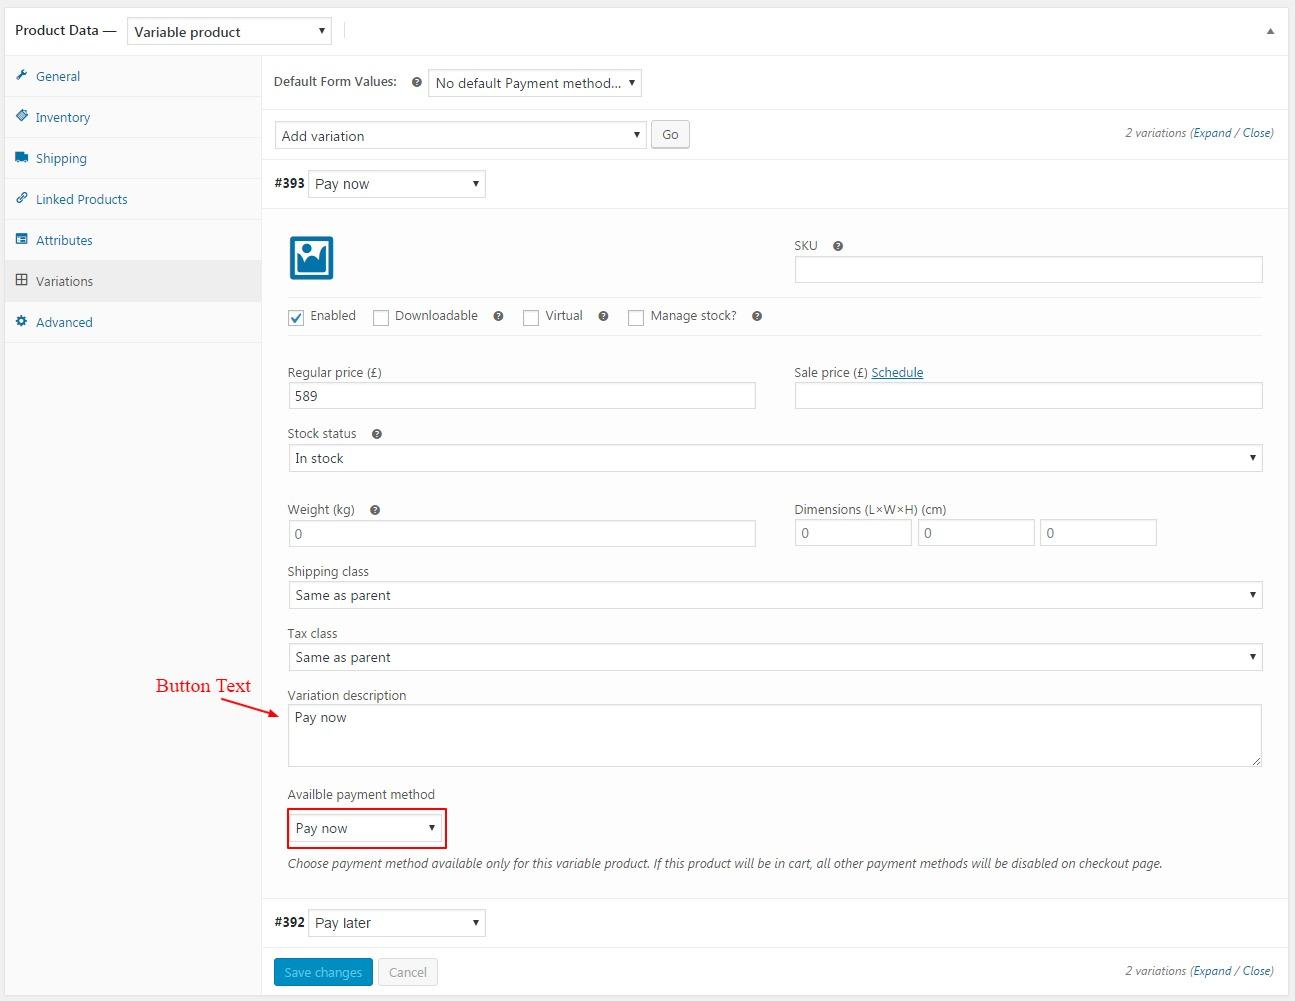


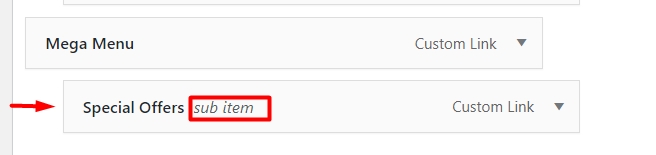
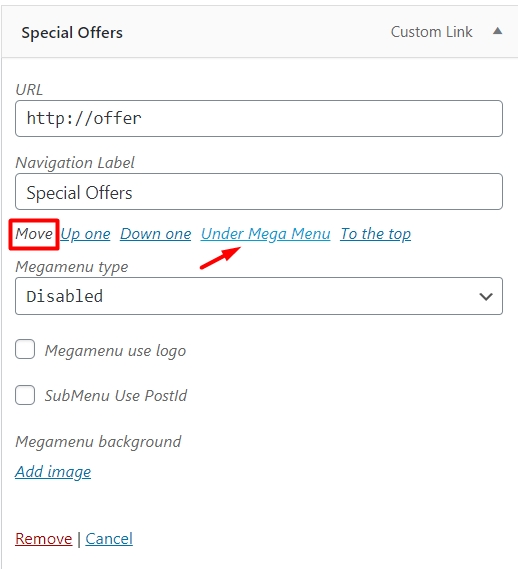
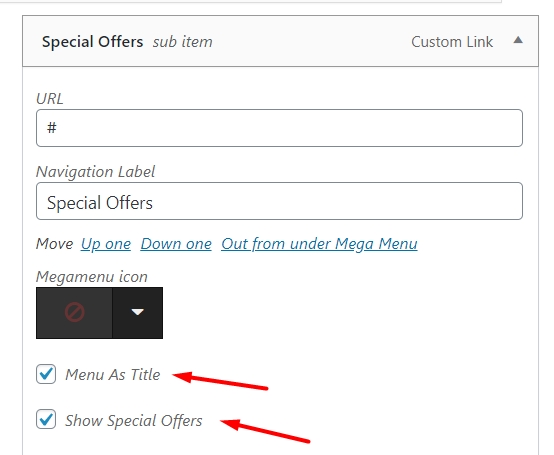
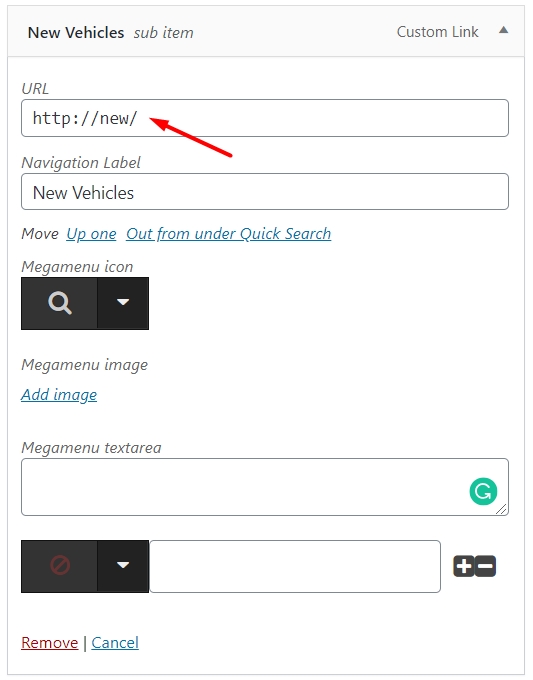
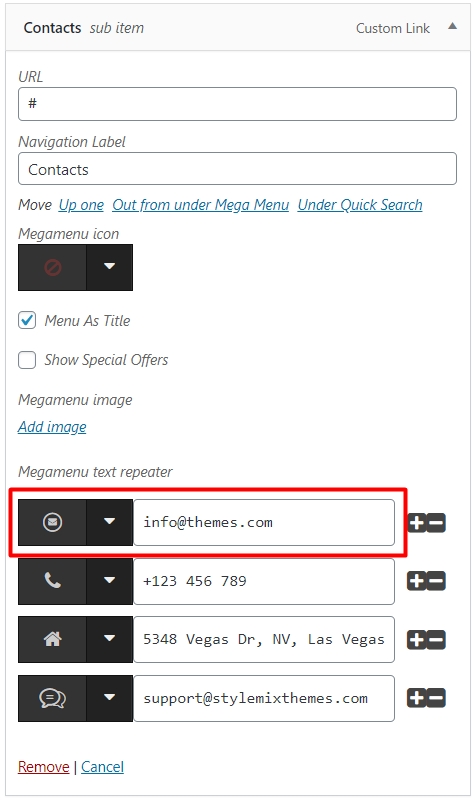
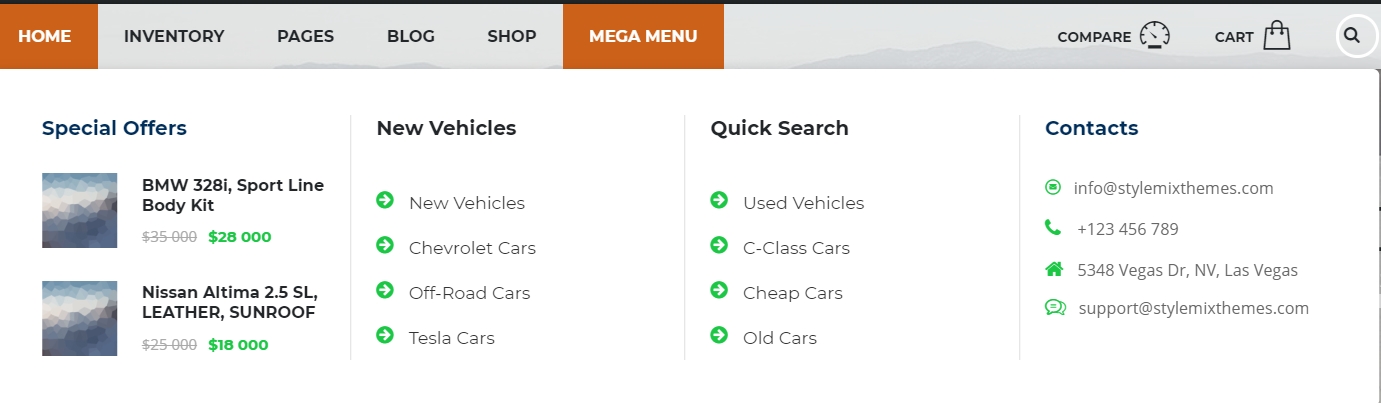
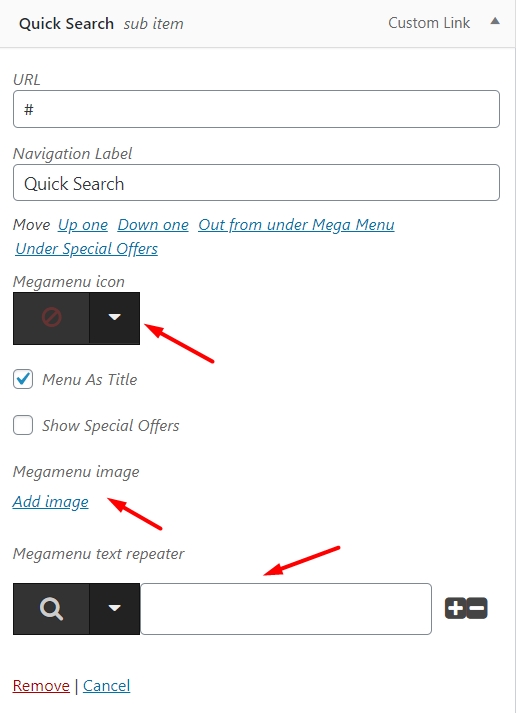
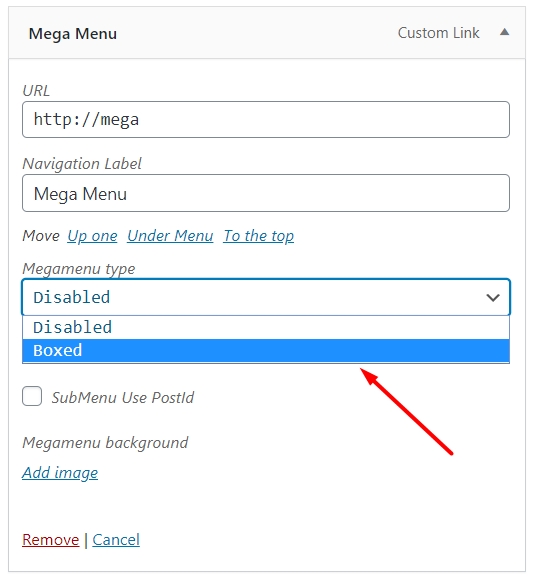
All user roles can submit listings on the "Add listing" page.
In the following manual, we will review how to create users, change user roles, and manage listings.
Users can create an account through the Login/Register page:
Registered users will receive the "Subscriber" user role and will be identified as Private Seller on their account and single listing page.
To enable login through social media platforms such as Facebook, Google, Twitter, and more, the theme has been integrated with the "WordPress Social Links" plugin. You can download and install the plugin from the attached file.
You can create a new page and add a "Login Register" widget while editing the page with Elementor:
In the widget settings, select a page that contains your Terms of Service, and publish your changes.
You need to add the STM User/Dealer login/register module in the content in order to create a Listing authorization page:
The page can be published by selecting "Link to Terms of Service page."
As previously mentioned, when users register, they will be assigned the "Subscriber" user role, which we refer to as "Private Sellers."
This role is designed for individuals looking to sell their personal vehicles or those operating small businesses.
After logging in users will be redirected to their profile page. Here they can see all existing Ads and other profile settings:
Private Sellers users can use the profile settings to perform several actions, including setting profile pictures, adding social links, defining a phone number, or changing their current password.
Their public account of the Users displays contact details and published listings as follows:
Private sellers can expand their abilities by transitioning to the status of a "Dealer."
After logging in Dealers will be redirected to their profile page. Here they can see all existing Ads and other profile settings:
Dealers can use the profile settings to perform several actions, including setting profile pictures, adding social links, defining a phone number, or changing their current password.
Their public account the Dealer displays contact details, reviews, and published listings as follows:
This dealer role is designed for individuals who own a dealership and specialize in selling a high volume of vehicles.
One of the main differences between dealership accounts from private sellers, they can be rated by customers:
Logged-in users can leave reviews for dealerships in their public account:
The site administrator can enable moderation for these reviews and change labels for stars in the Dealer settings in the theme options.
It is possible to add a filter to find local dealers that suit search parameters. To accomplish this, the "Dealers List" widget should be added to the page based on the page builder being used.
To include the filter for displaying local dealers, edit the page by adding the "Dealers List" widget to it:
In the widget general settings, select the necessary listing categories to include on the filter and publish the page.
To display local dealers with the WPBakery page builder, add the "STM Dealer List" widget to the page:
In the widget general settings, select the necessary listing categories to include on the filter and save the changes.
The page enables users to locate local dealerships based on search results:
Private sellers have the option to change their user role either by making a Membership Payment through PayPal or by subscribing to a Pricing Plan specifically designed for Dealers.
To allow users to become dealers, you can choose only one option. Therefore, it is necessary to select the method that best fits your business requirements.
We will review both options and provide detailed steps on how to set them up.
The PayPal payment method enables private sellers to transition into becoming dealers with just one payment.
Initially, you have set up your PayPal settings under Theme Options > Inventory Settings > Pay Pal Settings.
Private Sellers can submit requests on their user account:
After clicking the "BECOME A DEALER" button, it is required to fill out the company info:
After completing the submission User will be redirected to the PayPal system to make payment.
When a user submits a request to become a dealer, both the user and the admin will receive an email notification. Additionally, the user's payment status will be set to "pending" in their account.
After completing the payment, the Admin will be notified automatically by email about it and the user’s Payment status will be completed.
Then Admin can easily set/change the user role to STM Dealer manually.
The next popular option for changing user roles is purchasing pricing plans specifically designed for dealers.
Initially, the site administrator should create a pricing plan for dealers:
On the user account, users can click on "UPGRADE PLAN" to purchase a new pricing plan.
The user will be redirected to the page with Pricing plans and should select the plan labeled "For Dealers".
When a user with a "Simple user" role purchases a pricing plan that is intended for "Dealer" roles, their role will automatically be changed to "STM Dealer" upon successful payment.
After becoming the Dealer, the Company info should be updated in profile settings.

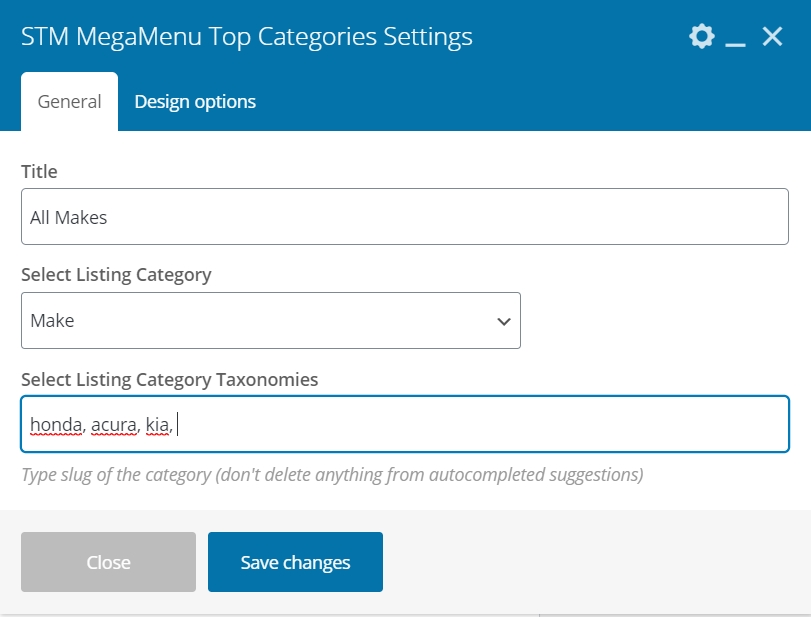
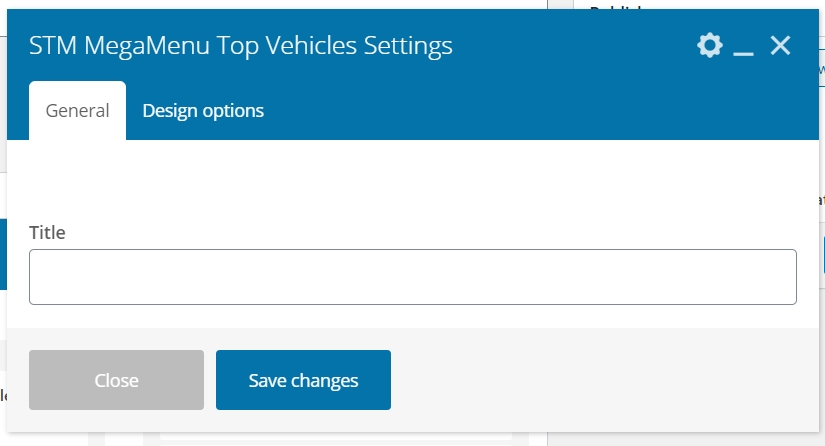
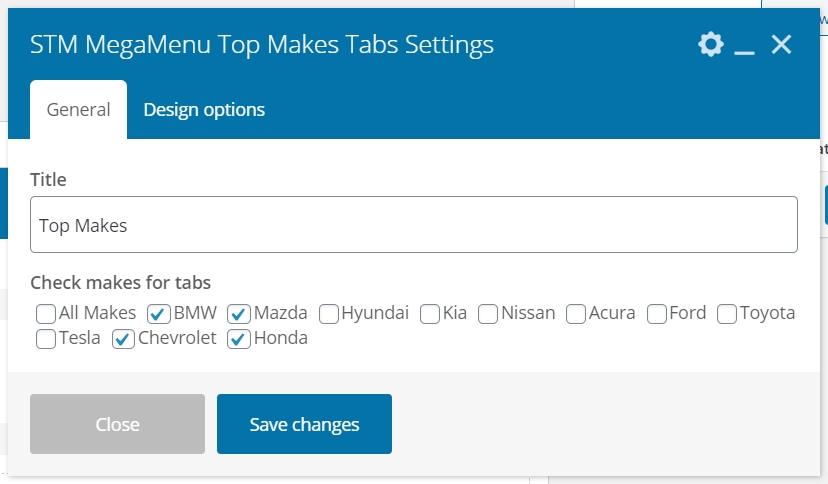
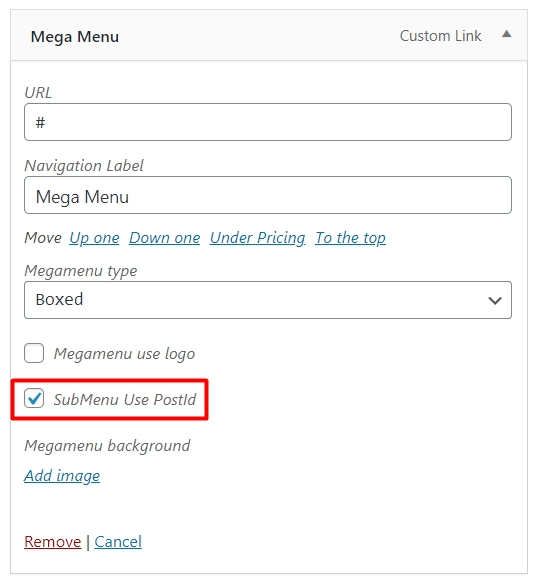
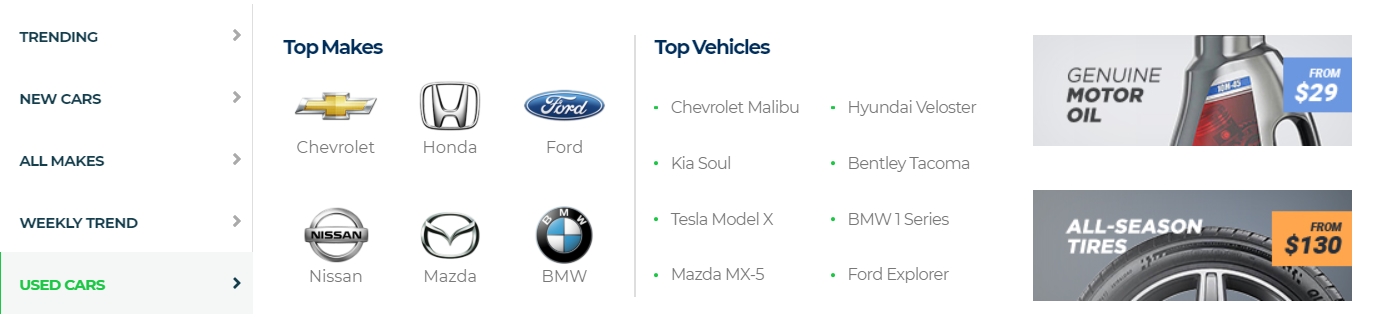
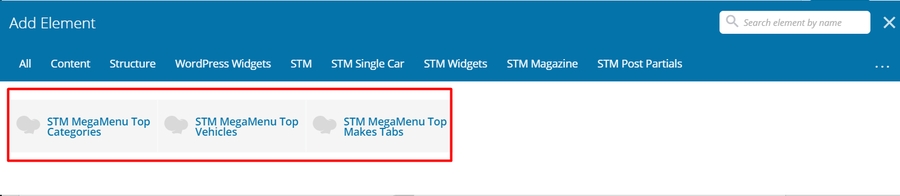
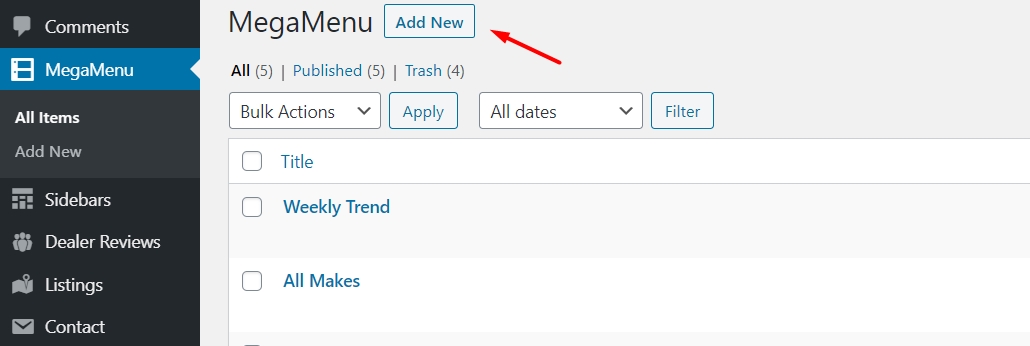
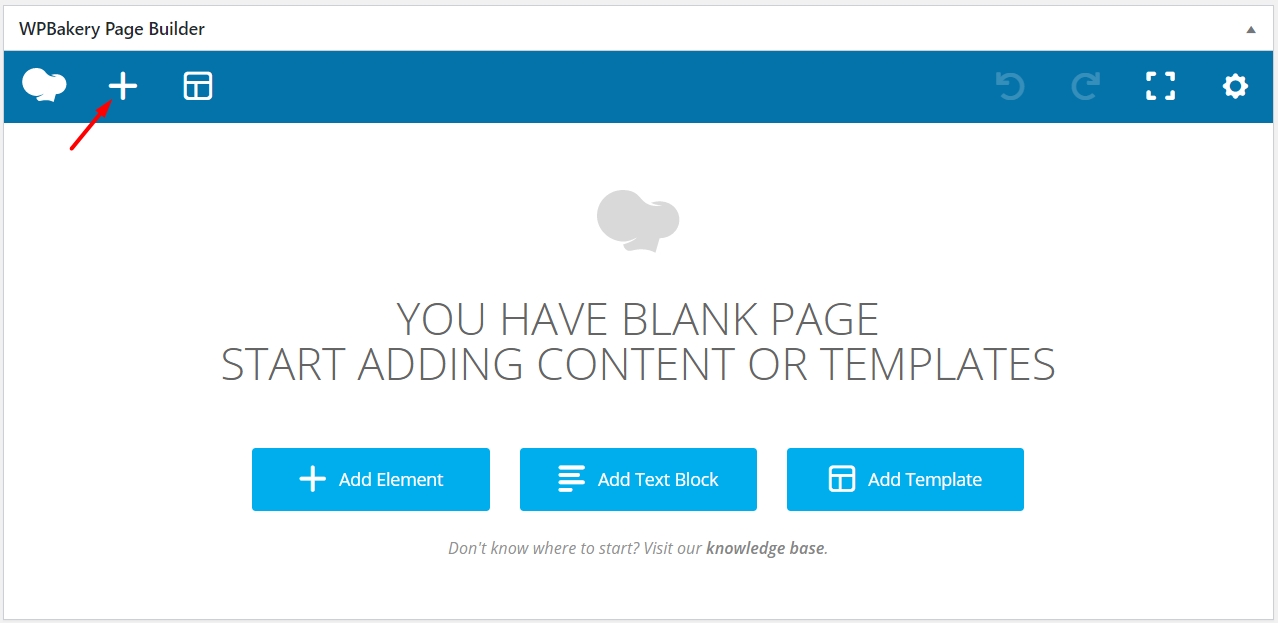
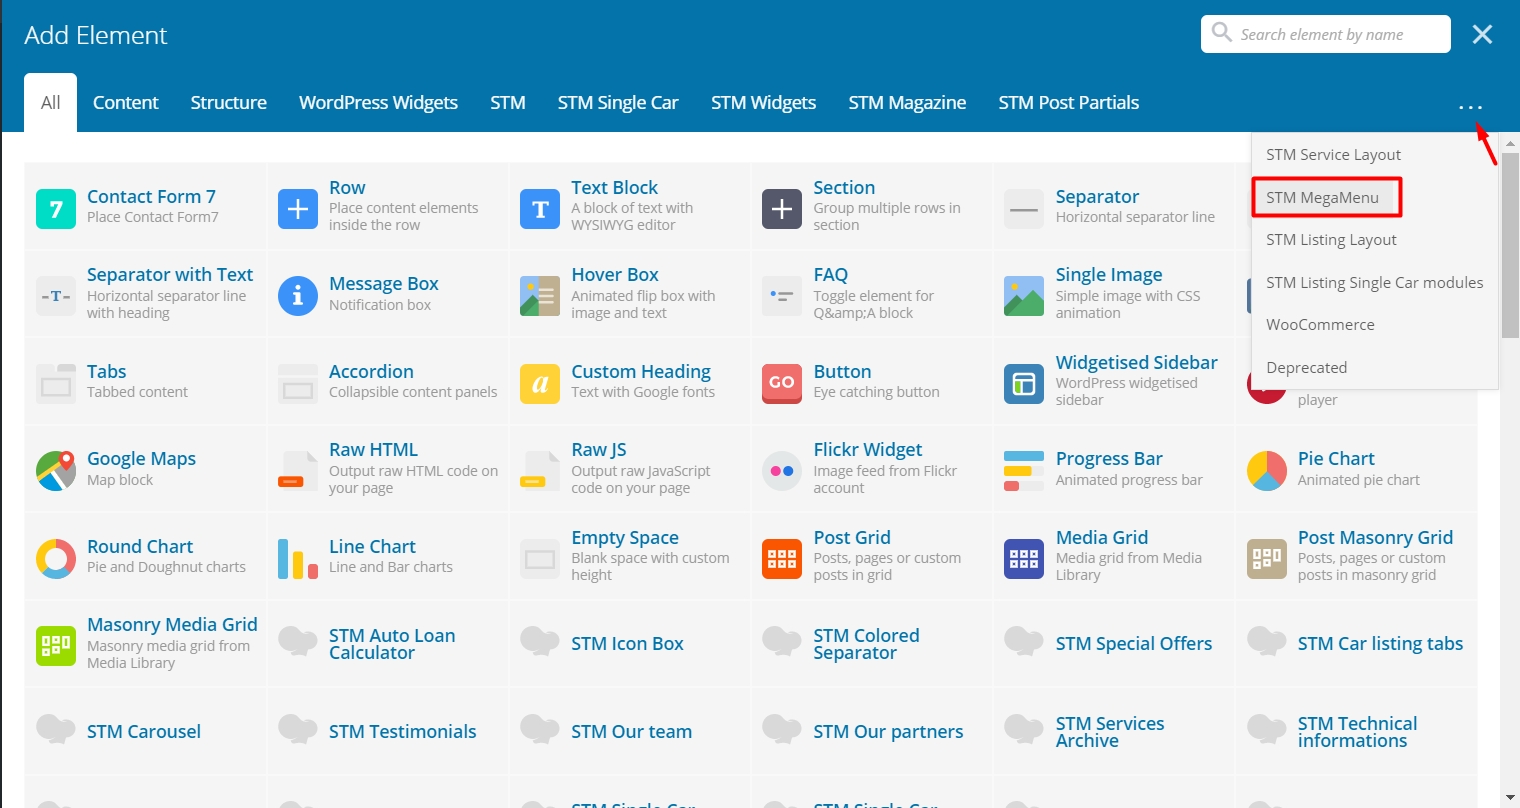
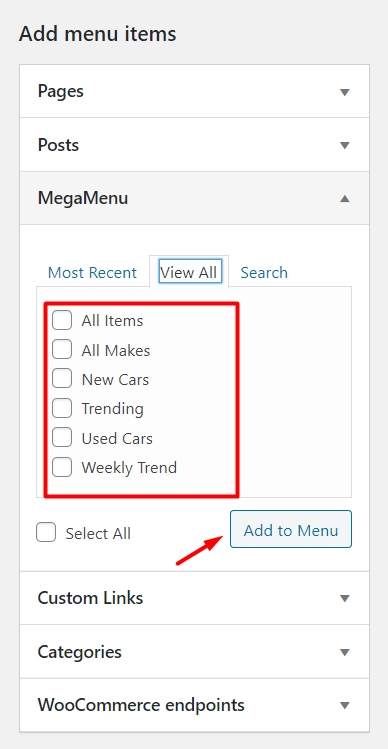


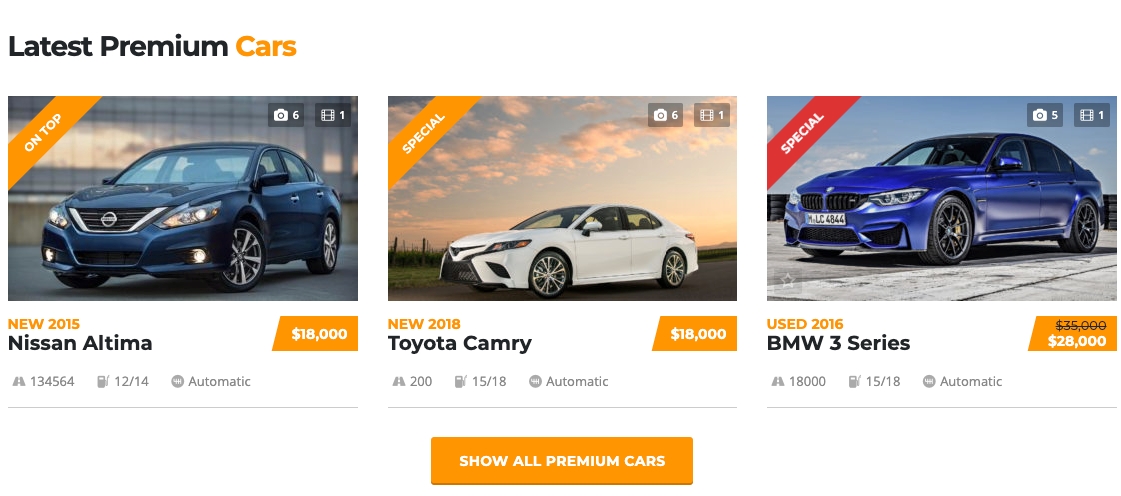
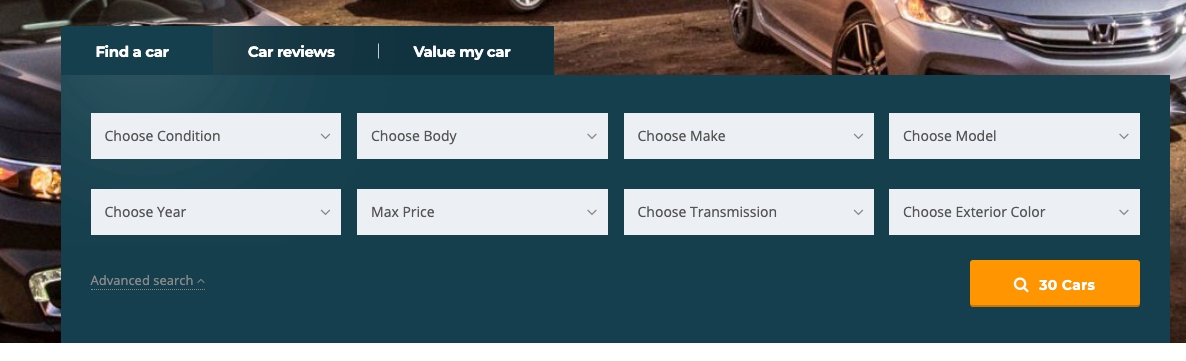
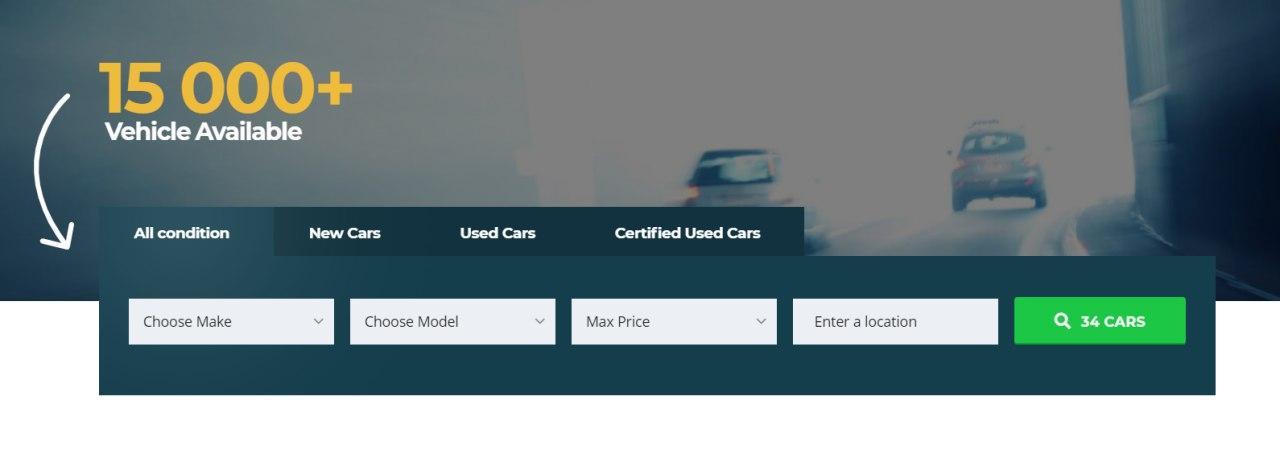
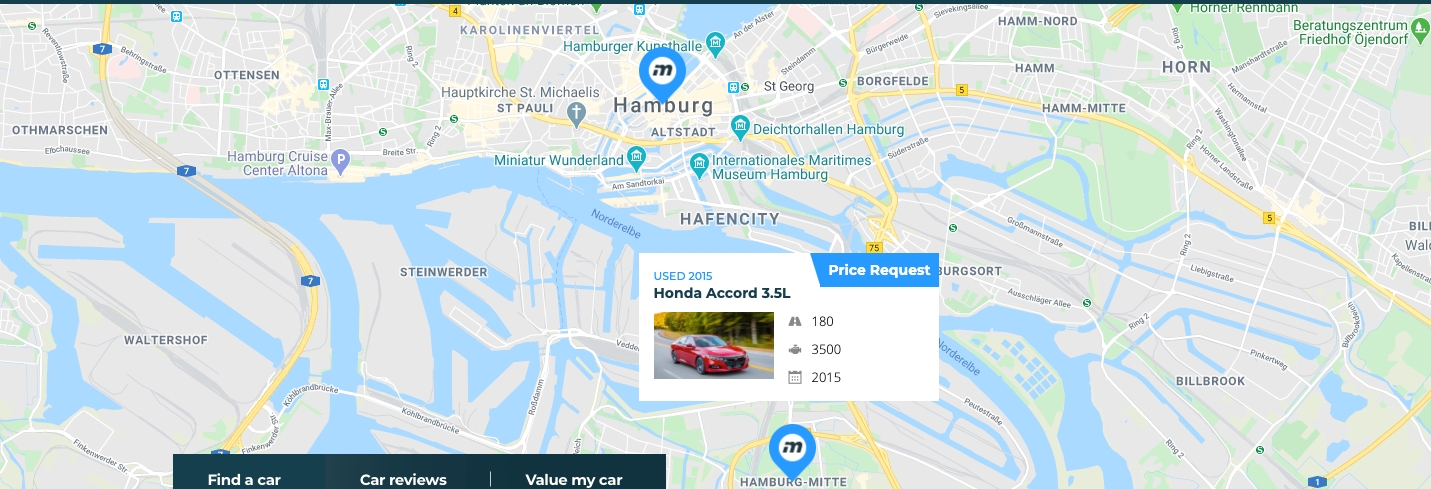
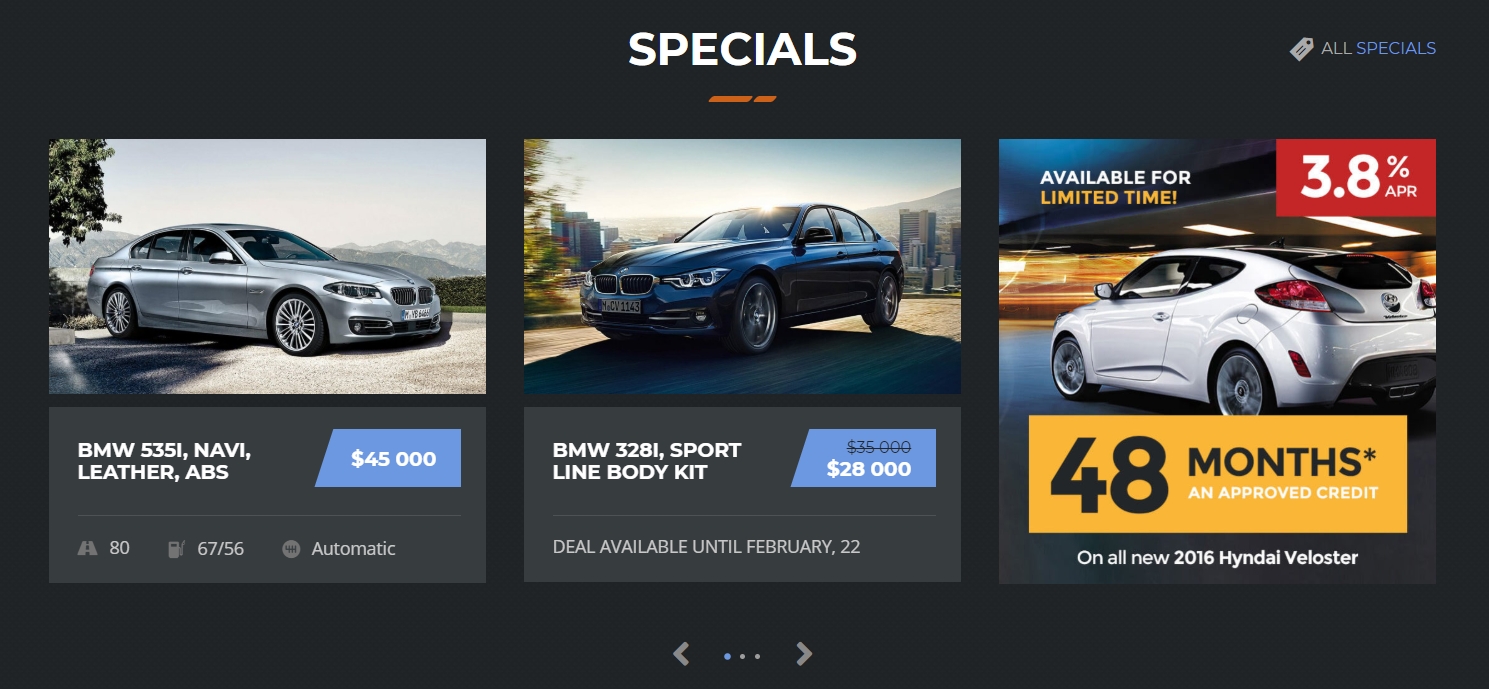
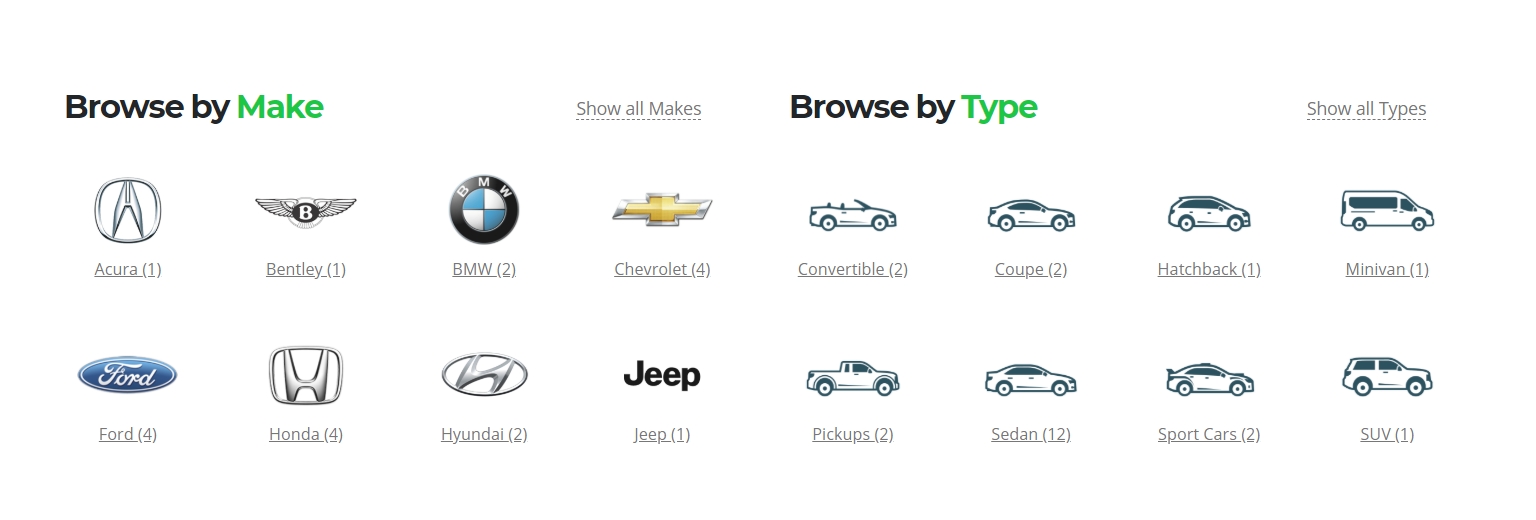
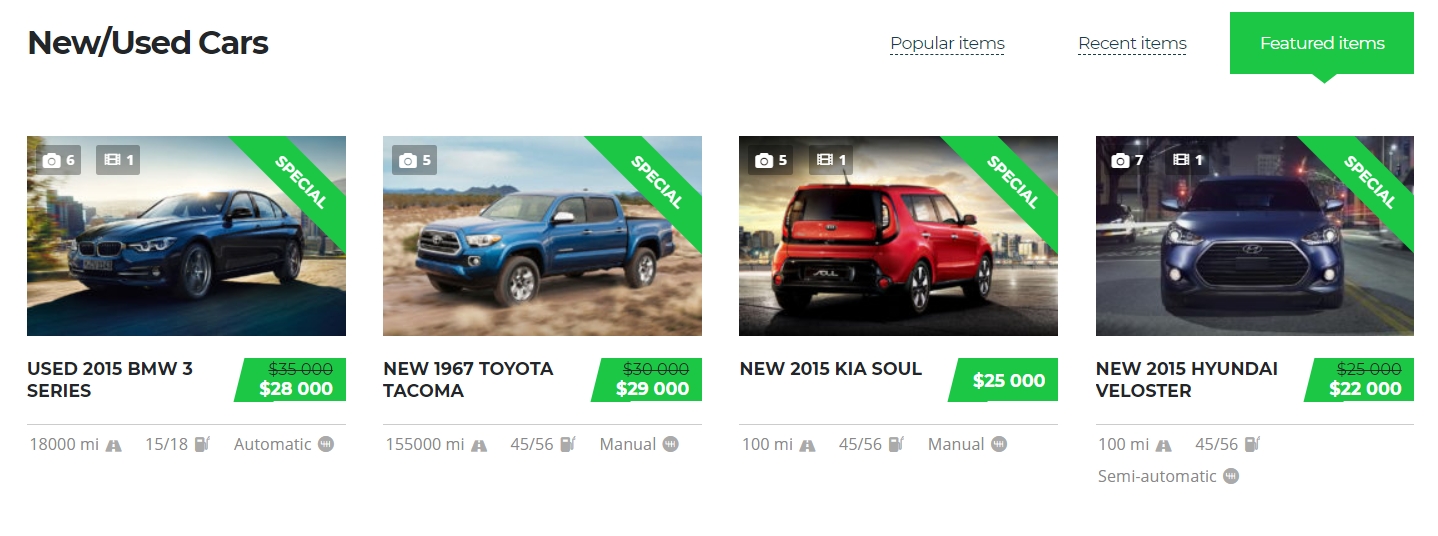
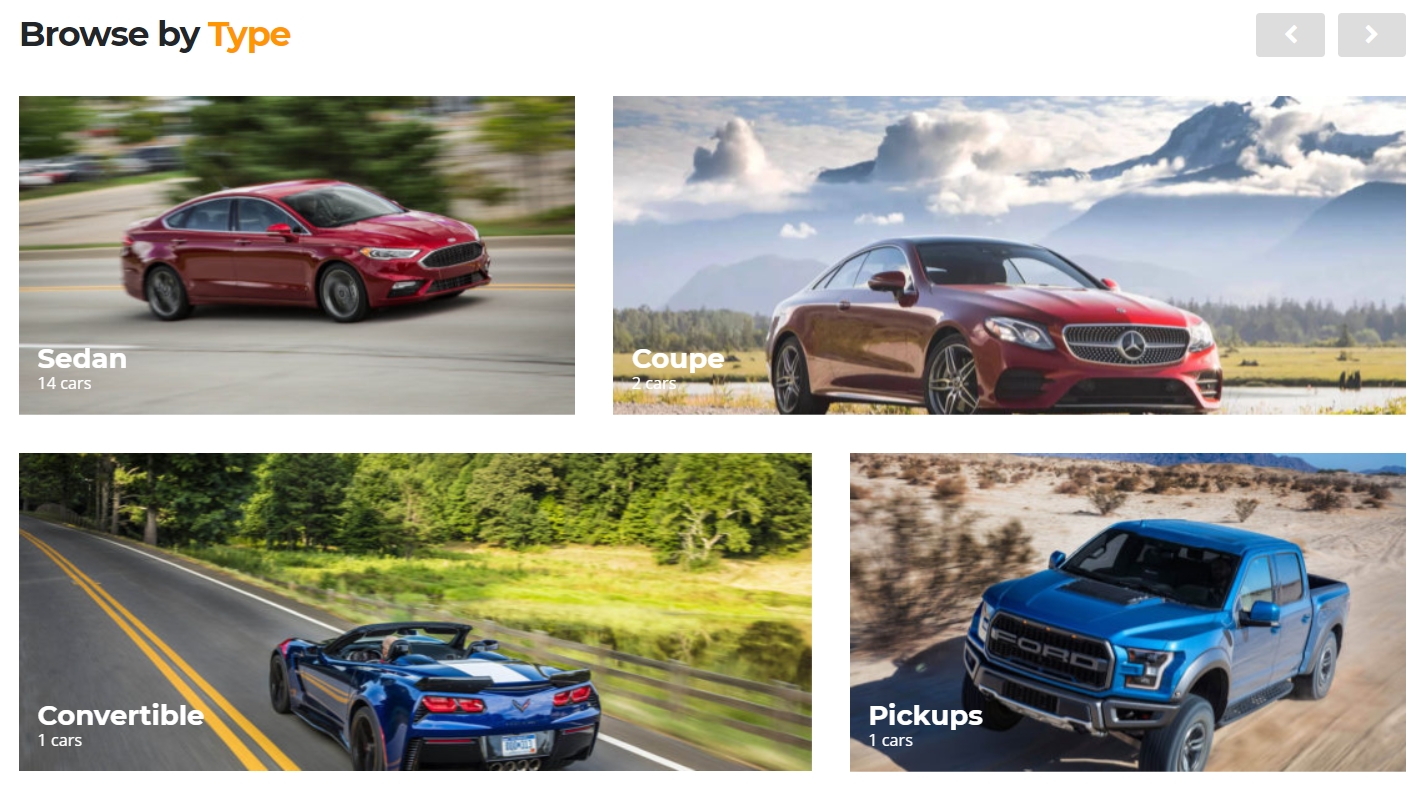


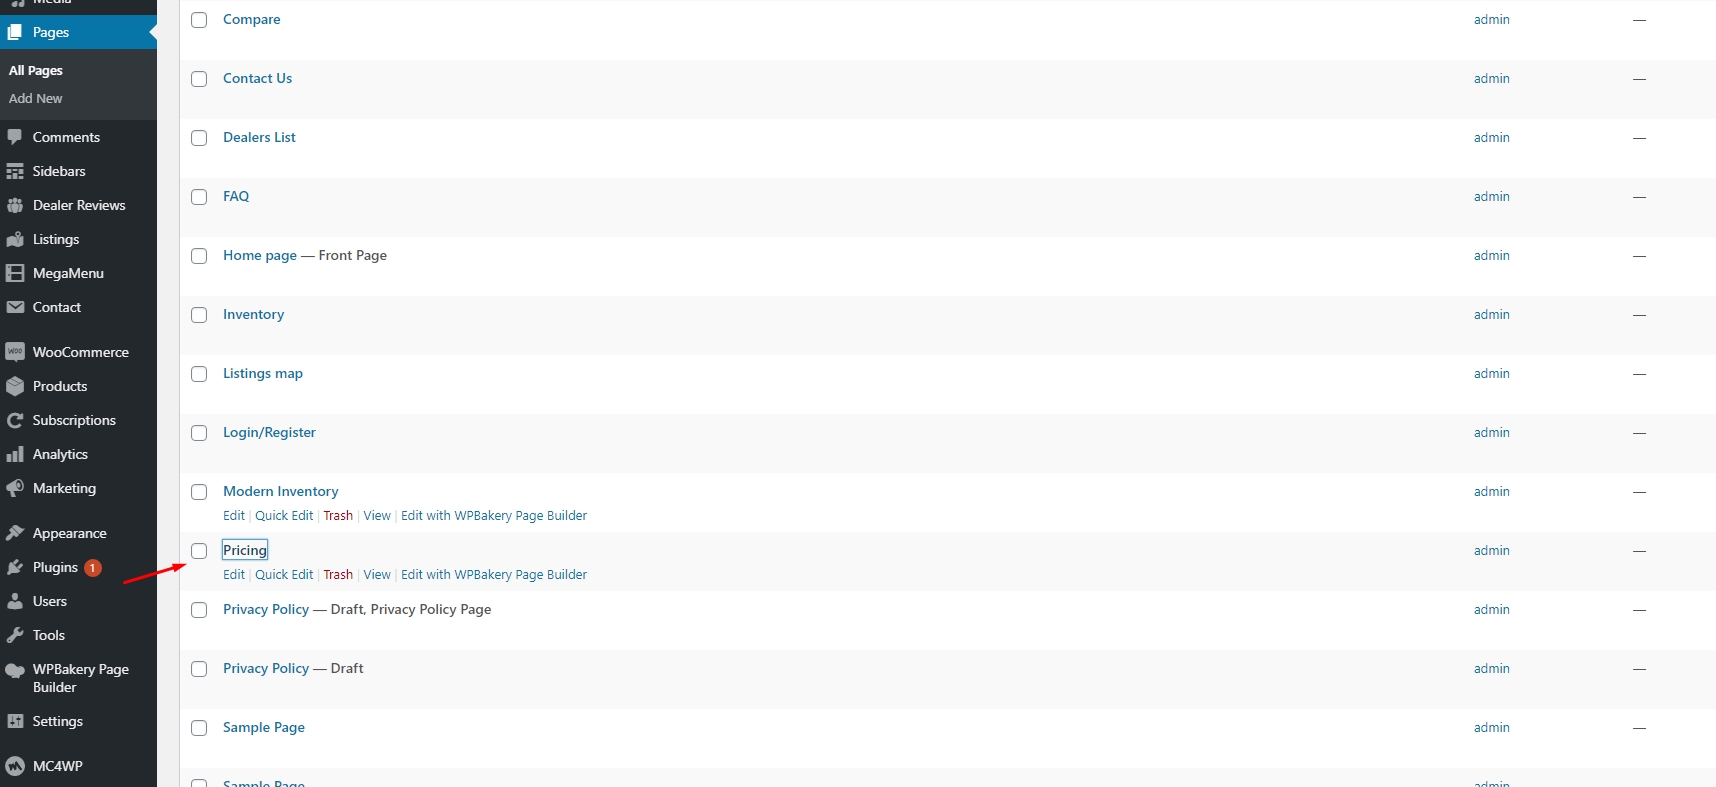

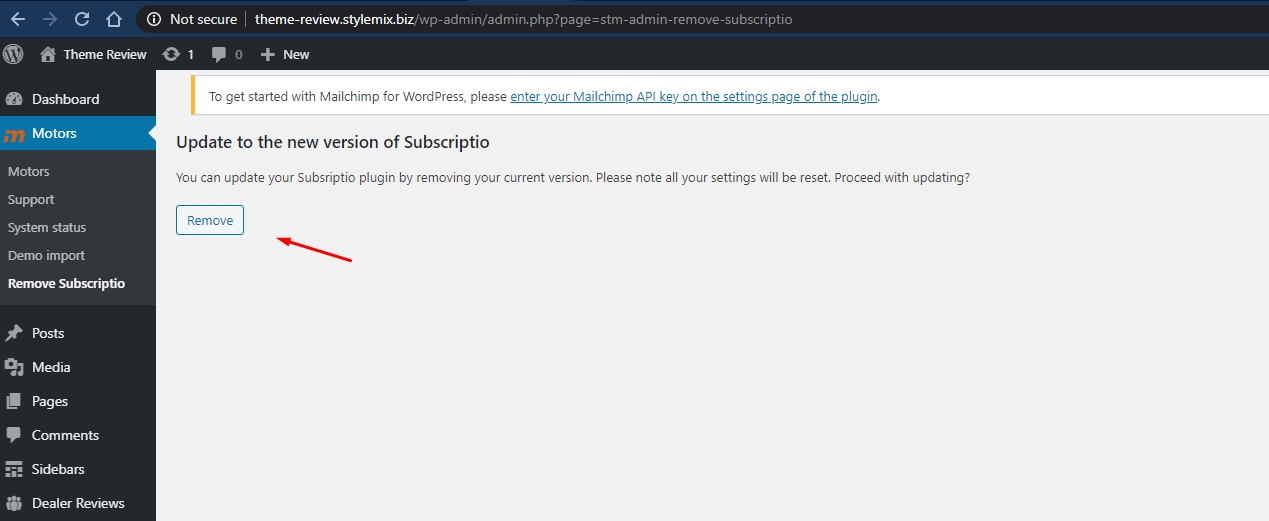
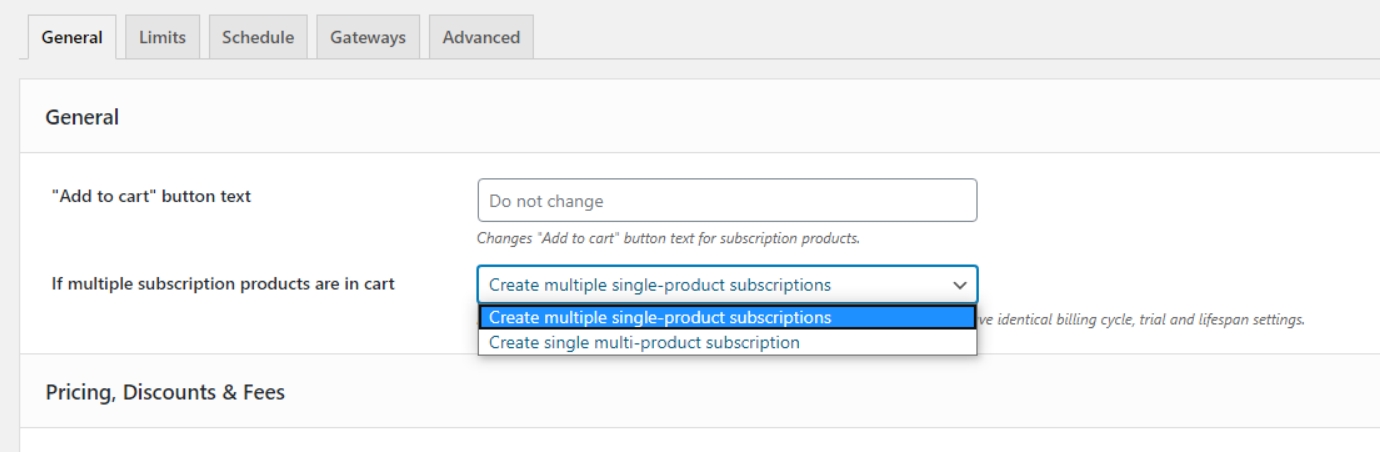
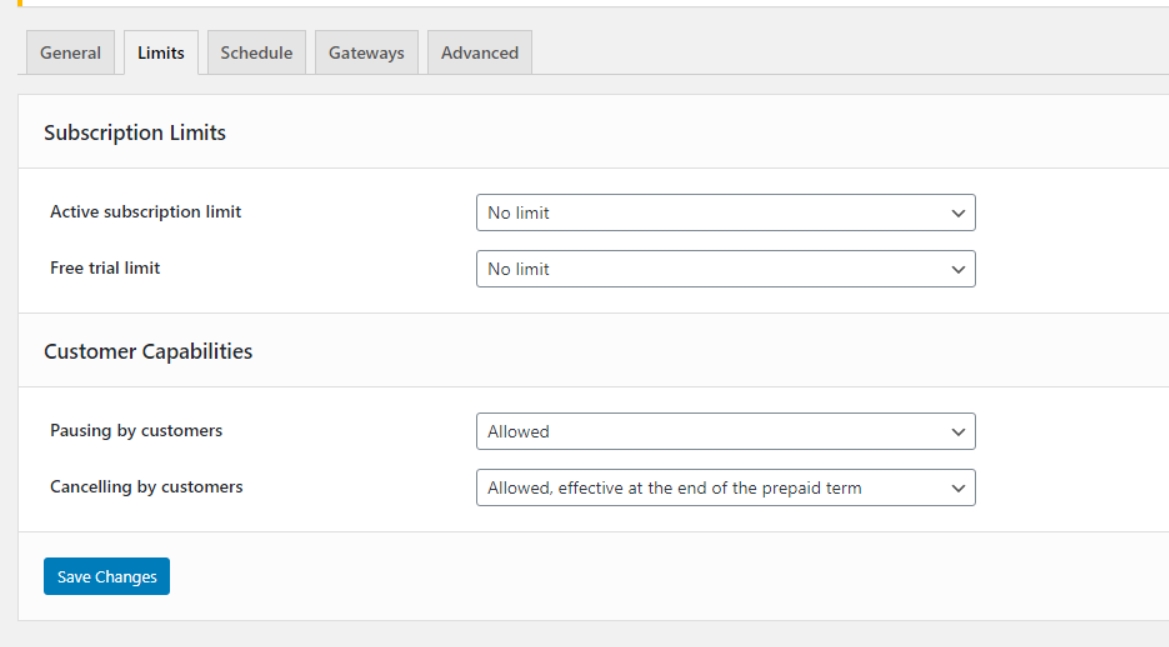
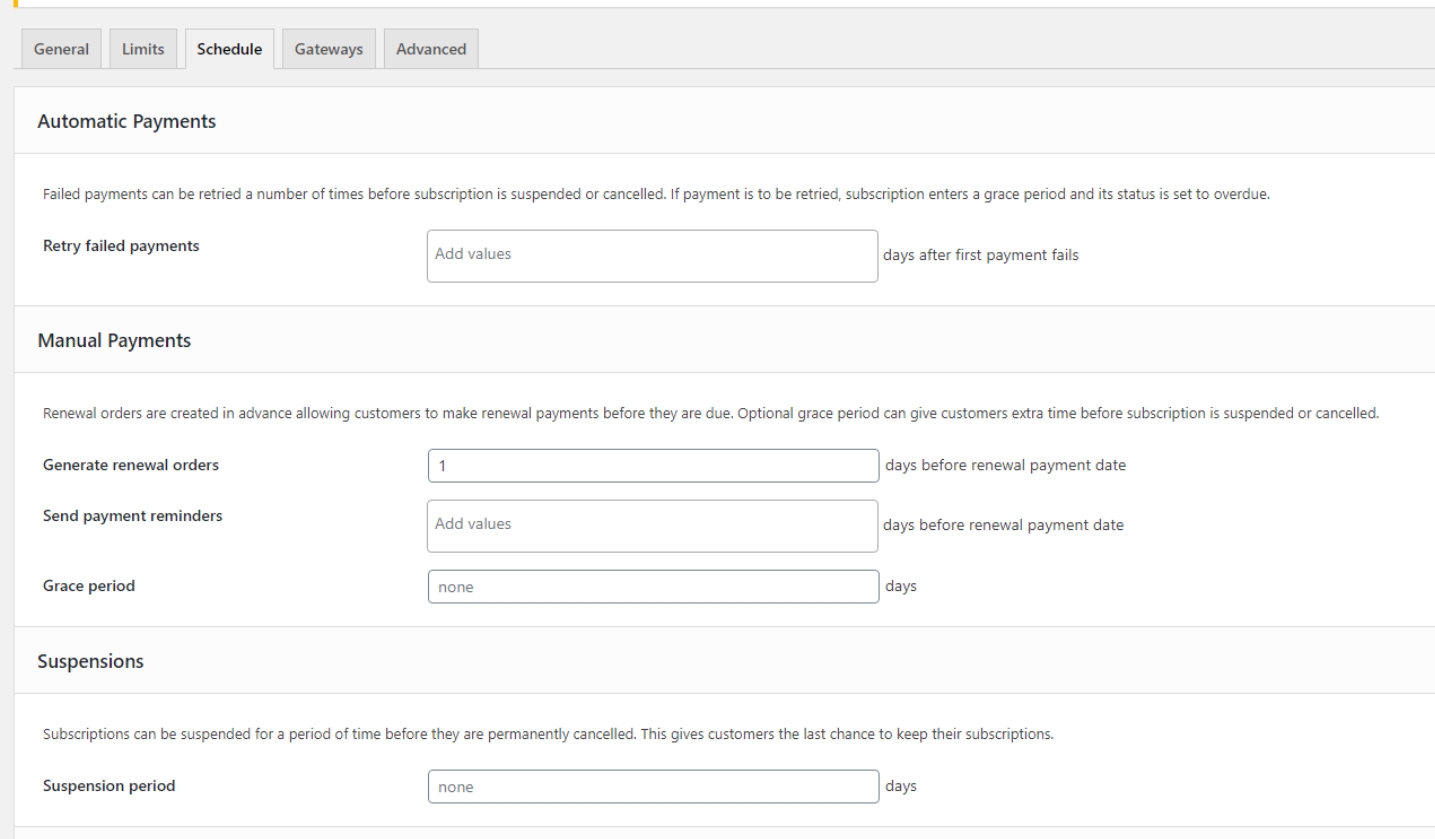
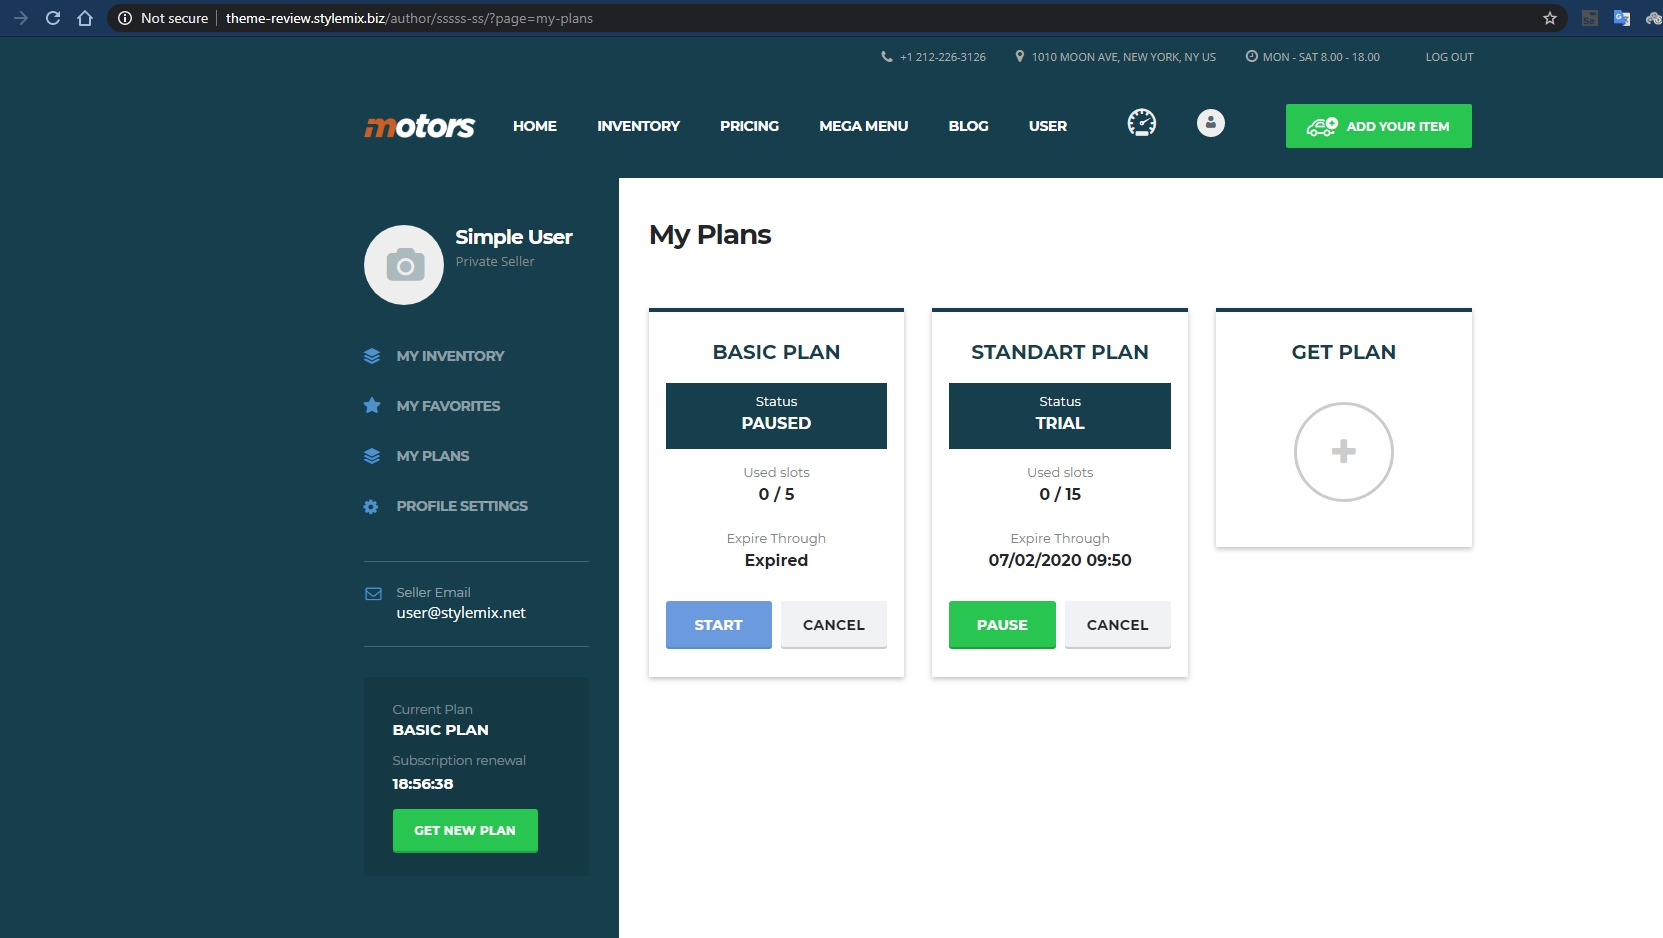
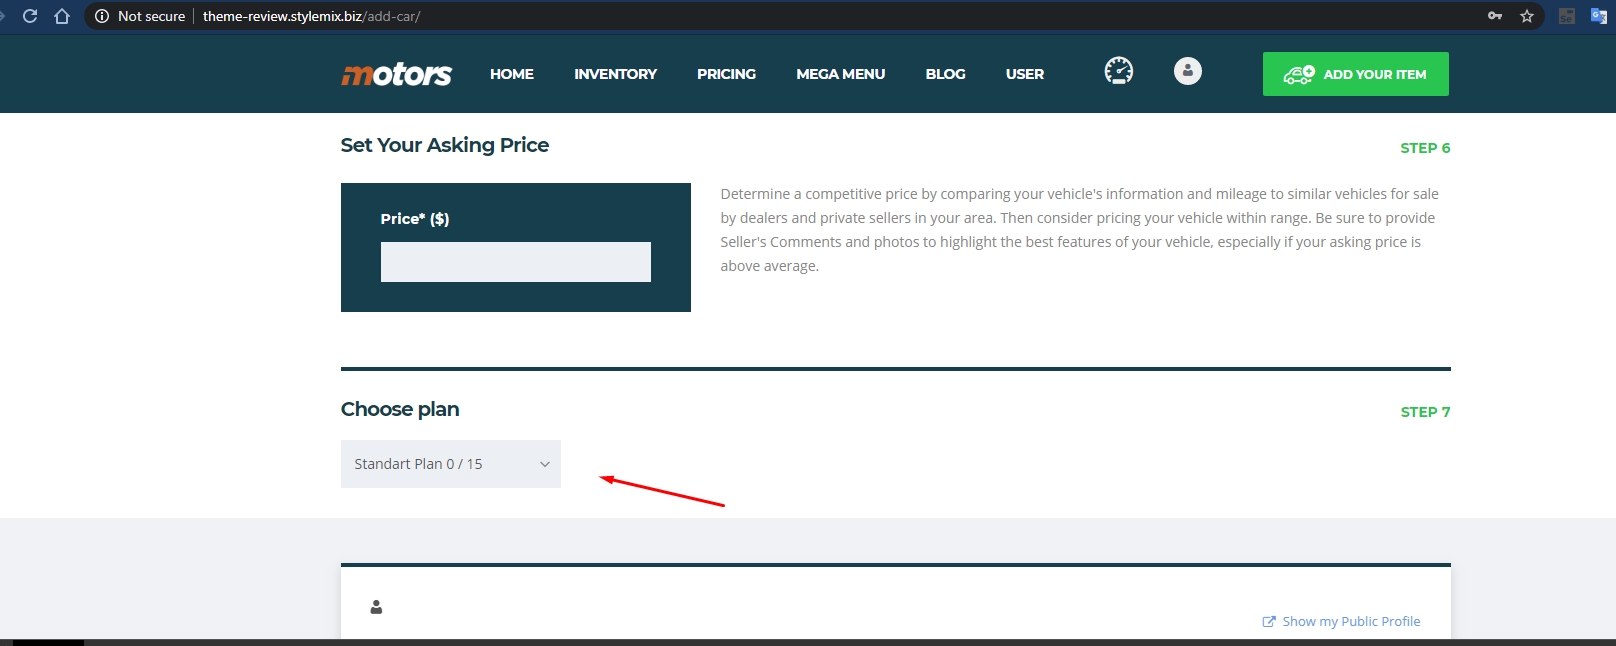

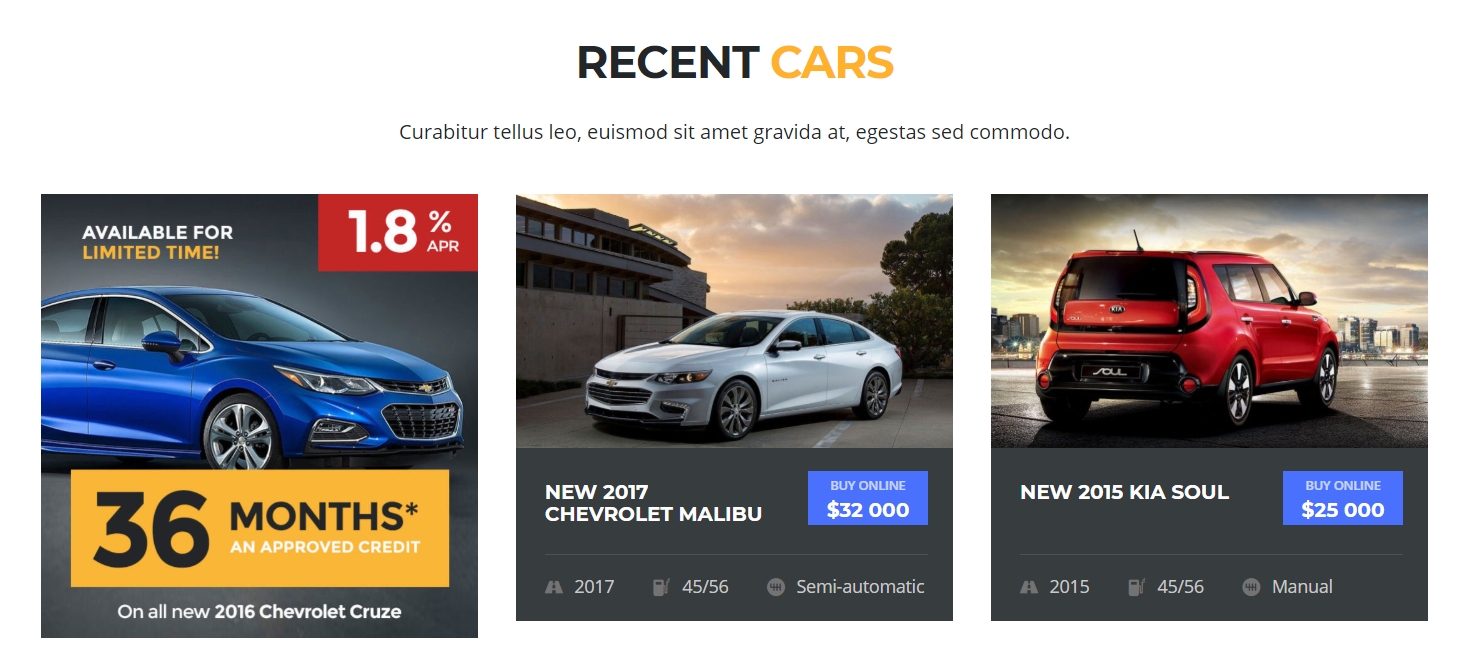


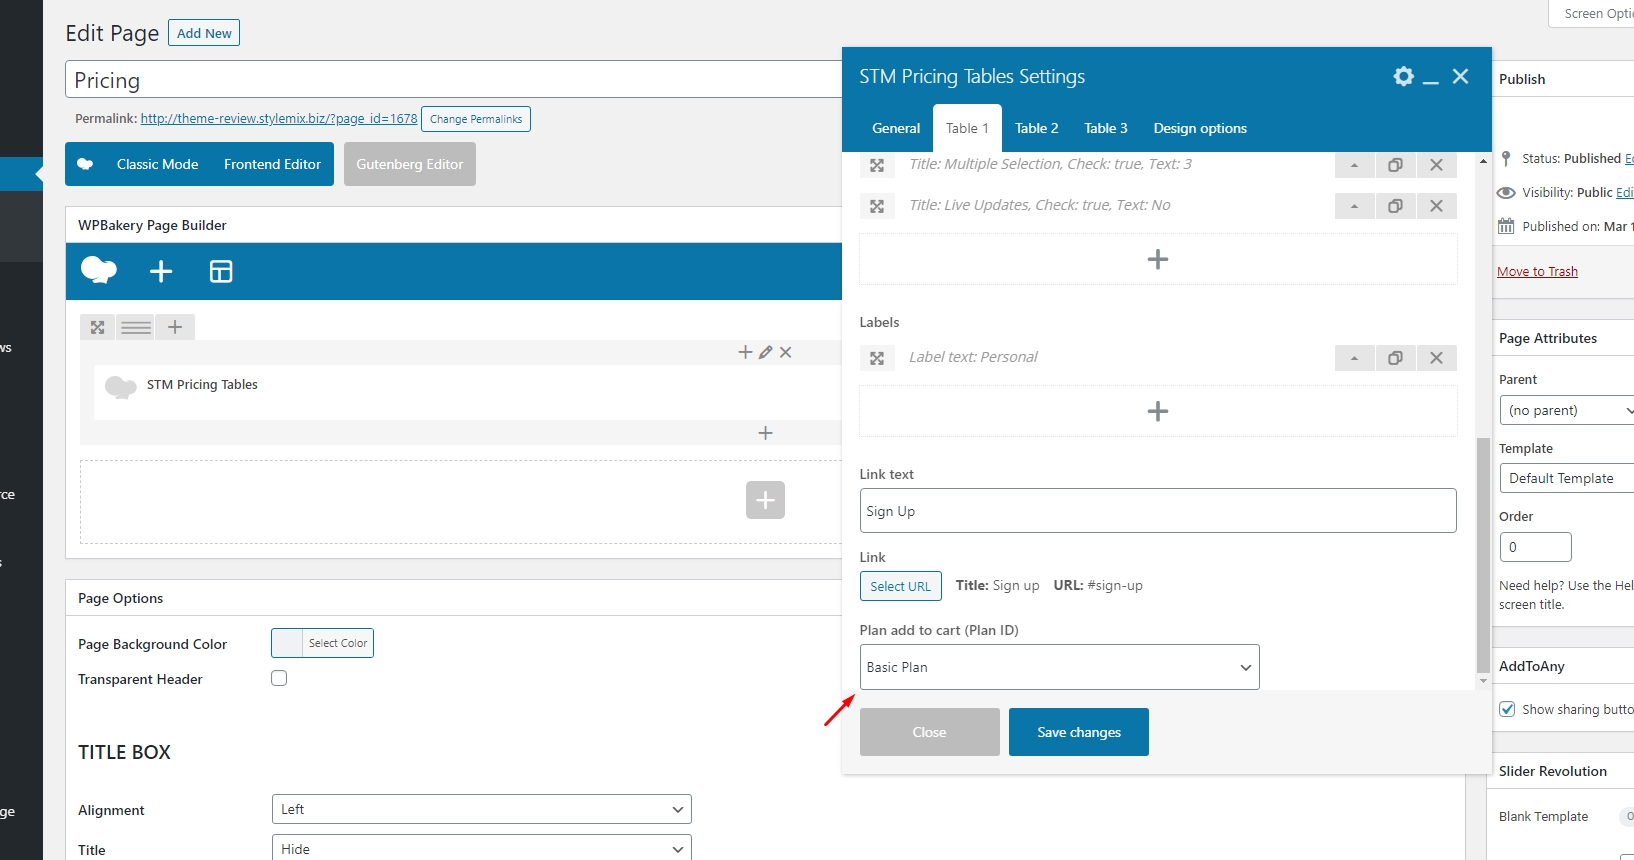
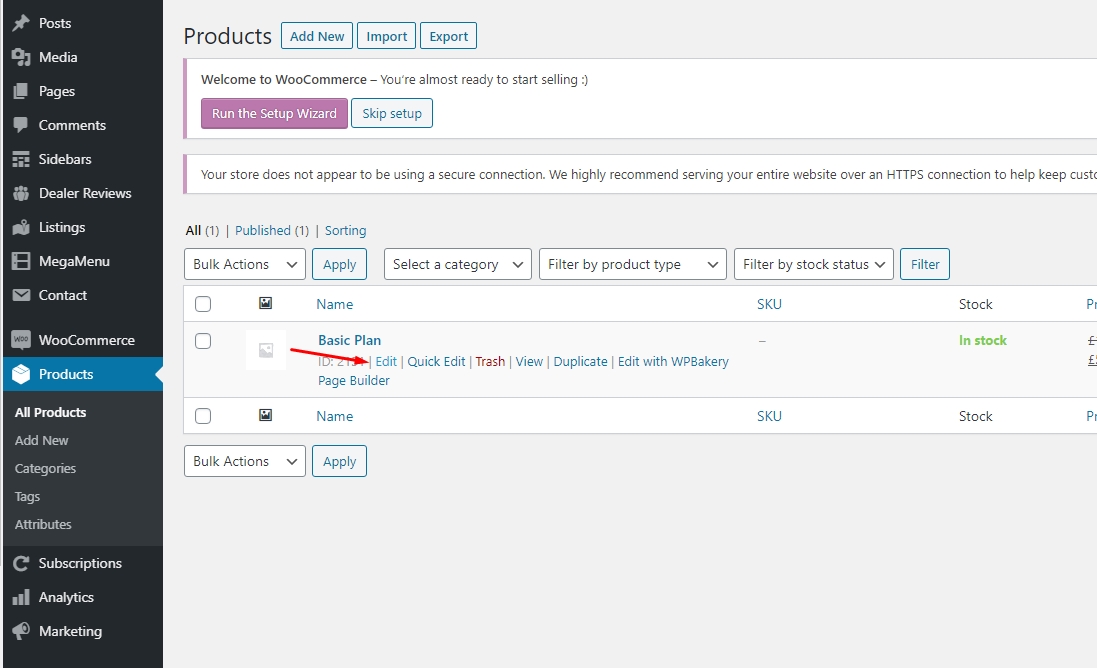
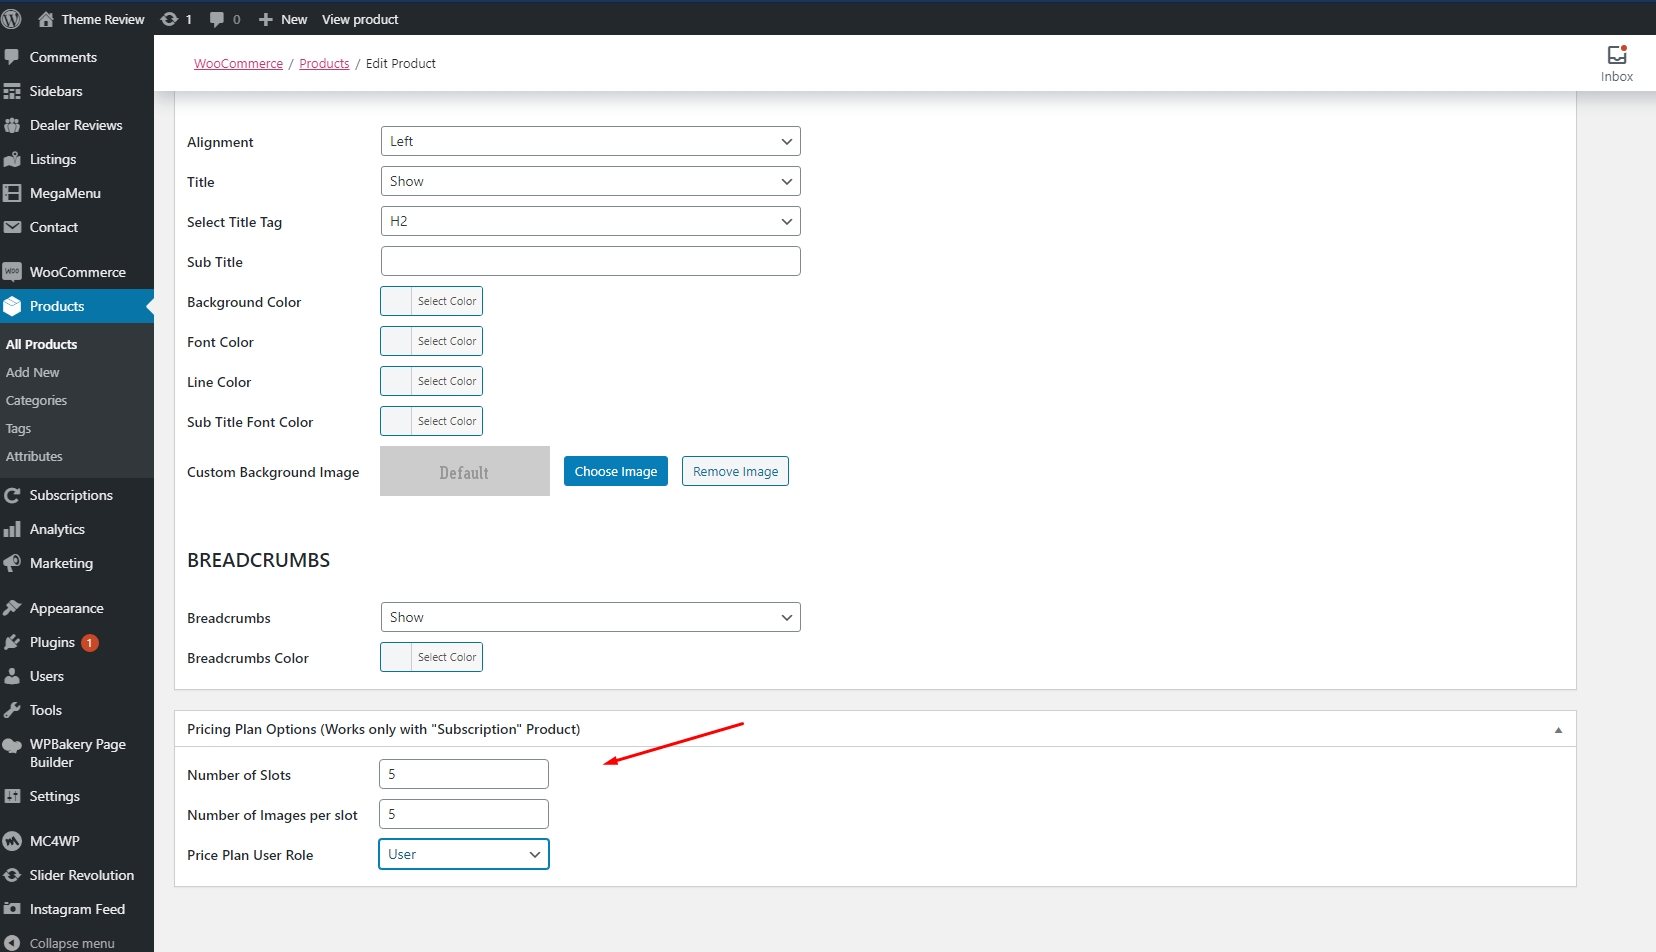

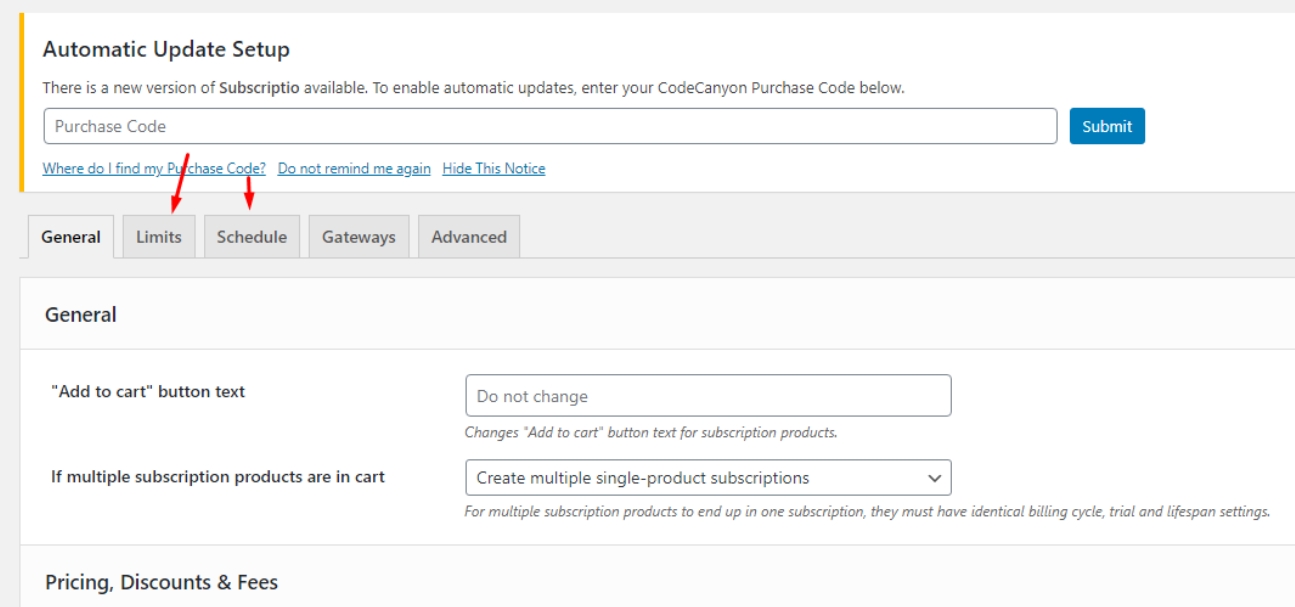
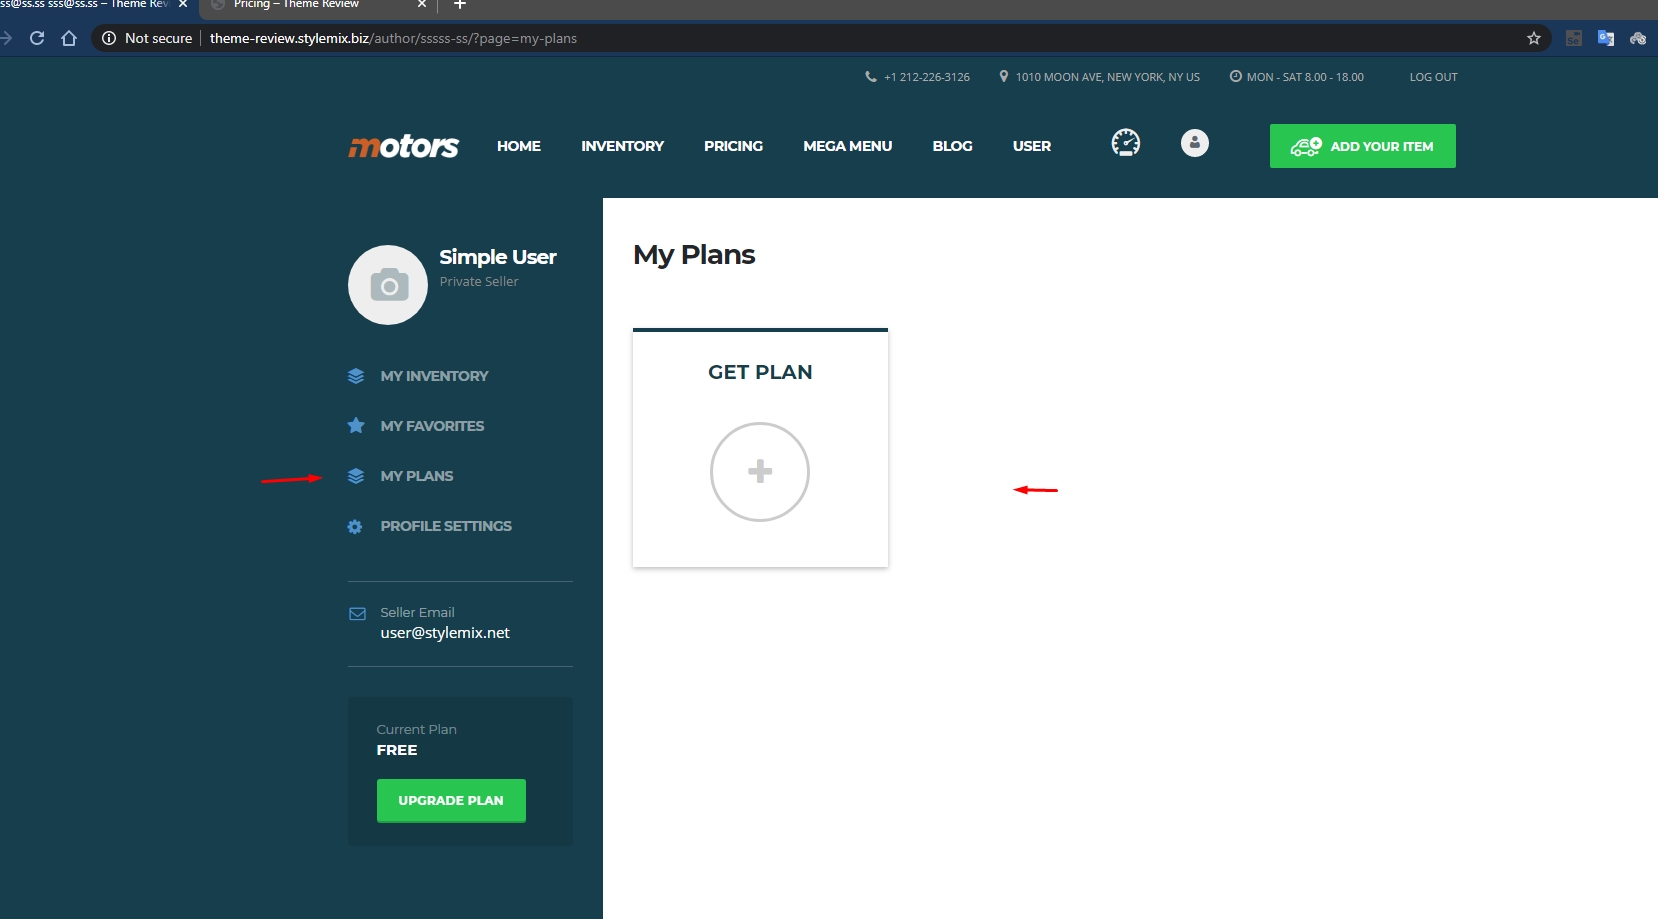


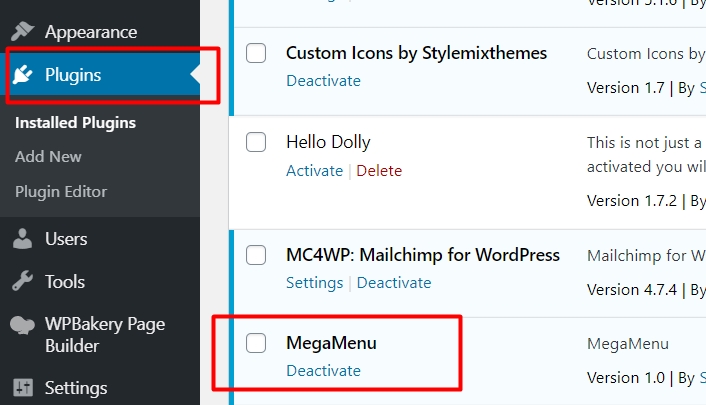


It is recommended to create a special page where private sellers and dealers can publish their listings.
In Classified layouts, the "Add a Car" button can be displayed in the header navigation. To do this go to the Dashboard > Theme Options > Header > Buttons/Actions and enable "Show Add a Car Button":
Customize the label, change colors, and set a link for the page with the Add a car form.
To make the button work, the page should contain "Add Listing" or "STM Add a car" widgets based on the page builder.
The page where users submit listings comes with demo import and it has the following view by default:
By editing the page it is possible to apply the default Advanced settings of Elementor:
The Content of the page is managed from theme options directly.
In Elementor demos, by opening Dashboard > Theme options > Add Listing > General section, the layout of the Add Listing page can be managed by dividing it into sections.
The number of available slots can be disabled when it is not necessary to show.
Default view:
When the number of available slots are disabled:
When the option is enabled, Users/Dealers can set a custom title for the listing.
Default view:
When the "Title" disabled:
To display the custom title of the users to the cars, go to Theme options > Inventory settings > Grid/List Card then edit “Display Generated Car Title as” need to leave the input empty.
In this section users/dealers provide details about the vehicle by selecting to which category it belongs.
Required Categories - Select which categories are compulsory to select before submitting the listing.
Transform numeric categories to input fields - When the option is enabled users can type numbers on themselves. Otherwise, the system displays a drop-down with numbers to select.
Registered Date - When enabled, the field with Datepicker will be added to the Add Car page.
VIN - The input field to type the vehicle's VIN number will be added. Using this number buyers can check car history.
History - Allows users to provide external reports for the vehicle through the link.
Allowed Histories - Car history providers that dealers can use.
In this section, users and dealers can select additional features for the car they are publishing.
Site administrators can group the listing features by assigning a title to the group in the settings. Please type the car features separated by commas without any additional spaces.
The listing images will be uploaded in the Gallery section.
Site administrators can provide guidelines on how to upload images, including recommended resolution and size.
This section allows for the inclusion of a video listing through external links.
Users can upload multiple videos from hosting services like YouTube and Vimeo.
In this section, users and dealers can provide a short description of their listing.
In the settings, it is possible to define template phrases by separating them with commas.
Default view:
When the "Add Template Phrases" button is clicked, it is possible to select several pre-written sentences to use as a car description.
You can set the price for uploading a listing in this section.
Price label - The label from settings appears behind the price.
Show Sale Price label - When Enabled, users/dealers can set the sale price while uploading the listing.
Sale Price label - Custom label for the sale price.
Show Custom label - When enabled, the price is hidden and a custom label appears. Customers must request the car price through a form.
Default view:
With pricing pan:
When a guest user tries to upload a listing, they will be offered the option to create a new account or log into an existing one.
Administrators of the site have the ability to notify users who are in the process of creating their accounts.
Elementor demo layouts have the option to rearrange or disable certain sections from the "Add Listing" page. To do this, Dashboard > Theme options > Add Listing > Layout Manager and move fields to the "Disable Layouts" column:
The sections for Details and Price are mandatory and cannot be disabled.
The page where users submit listings comes with demo import and it has the following view by default:
It is possible to adjust settings and add custom content by editing the page.
The STM Posts Available widget - shows the number of slots available for the user to upload their listings.
The STM Add a Car widget generates a form for adding listing details with the following customizable settings:
Include car title - When the option is enabled, Users/Dealers can set a custom title for the listing.
Main taxonomies to fill - select which categories are compulsory to select before submitting the listing.
Show number fields as input instead of dropdown - when the option is enabled users can type numbers on themselves. Otherwise, the system displays a drop-down with numbers to select.
In this section, users and dealers can select additional features for the car they are publishing.
Site administrators can group the listing features by assigning a title to the group in the settings. Please type the car features separated by commas without any additional spaces.
The listing images will be uploaded in the Gallery section.
Site administrators can provide guidelines on how to upload images, including recommended resolution and size.
Users can upload multiple videos from hosting services like YouTube and Vimeo.
In this section, users and dealers can provide a short description of their listing.
In the settings, it is possible to define template phrases by separating them with commas.
Default view:
When the "Add Template Phrases" button is clicked, it is possible to select several pre-written sentences to use as a car description:
You can set the price for uploading a listing in this section.
Price label - The label from settings appears behind the price.
Show Sale Price label - When Enabled, users/dealers can set the sale price while uploading the listing.
Sale Price label - Custom label for the sale price.
Show Custom label - When enabled, the price is hidden and a custom label appears. Customers must request the car price through a form.
Default view:
When the Sale price
When a guest user tries to upload a listing, they will be offered the option to create a new account or log into an existing one.
Administrators of the site have the ability to notify users who are in the process of creating their accounts.
When the Sale price and Custom labels are enabled:
Allowed histories - Car history providers that dealers can use.


