Theme Customization
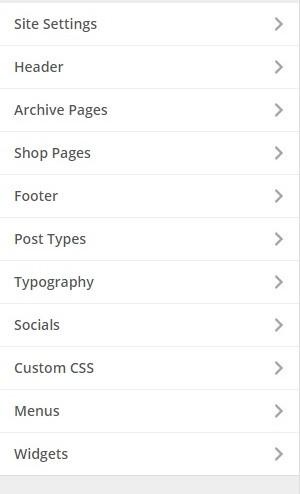
WordPress Customize allows you to setup the general styling of the website visually. In WordPress menu go to Appearance > Customize. Here you can setup most important options of your theme.

Site Settings:
Logo & Title: You can setup basic site options like: Site title, Tagline, Logo & its dimensions and Favicon.
Static Front Page: You can select default Front and Blog pages here.
Style & Settings: There are Color Skins and default Layout options. Here you can set your custom colors, enable/disable Boxed version and show/hide Frontend Customizer.
Archive Pages: Choose archive pages layout, sidebar and its position.
Shop Pages: Here you can select Sidebar and its type/position and number of displaying products on Shop page.
Footer:
Layout: Here you can change the footer logo & its dimensions, the copyright text and split the footer into widgets. Also specify the number of widget areas.
Footer Socials: Here you can select displayable social icons.
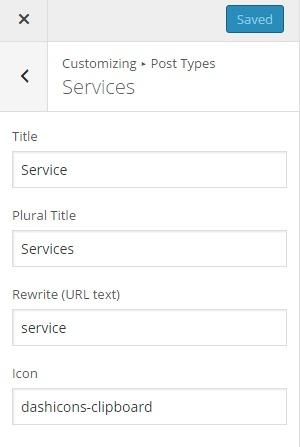
Post Types: You can setup/change Title, Plural Title, Rewrite URL and Icon for custom post types

After these changes you need to RE-SAVE your site Permalinks.
Typography: Set up the fonts out of free google fonts. Besides this you can setup font weight, font size and line height also.
Socials: You can add your company social URLs here.
Custom CSS: Here you can add your custom styles.
Menus: You can add/edit menus here
Widgets: You can set up the widgets into the precreated areas. You can do the same later Appearance > Widgets.
Header Builder
You can set up the theme header individually. Every section of the header can be modified and it’s possible to add different elements like: dropdown, text, menu, popup, button, infobox, etc.
To change the header layout:
1. Click on Header Builder in the WordPress menu. 2. Drag & Drop needed elements. 3. Click on the Submit button to save your changes.
Here you can see detailed video tutorial:
Last updated
Was this helpful?