Installing MailChimp
Installing the free plugin is easy
Like other free WordPress plugins, installing the MailChimp for WordPress Lite plugin is quite easy-going. All you need is a MailChimp account and a self-hosted website.
1. In your WordPress admin panel, go to Plugins > New Plugin, search for MailChimp for WordPress and click "Install now"
2. Alternatively, download the plugin and upload the contents of MailChimp-for-wp.zip to your plugins directory, which usually is /wp-content/plugins/.
3**.** Activate the plugin
4. Set your MailChimp API key in the plugin settings.

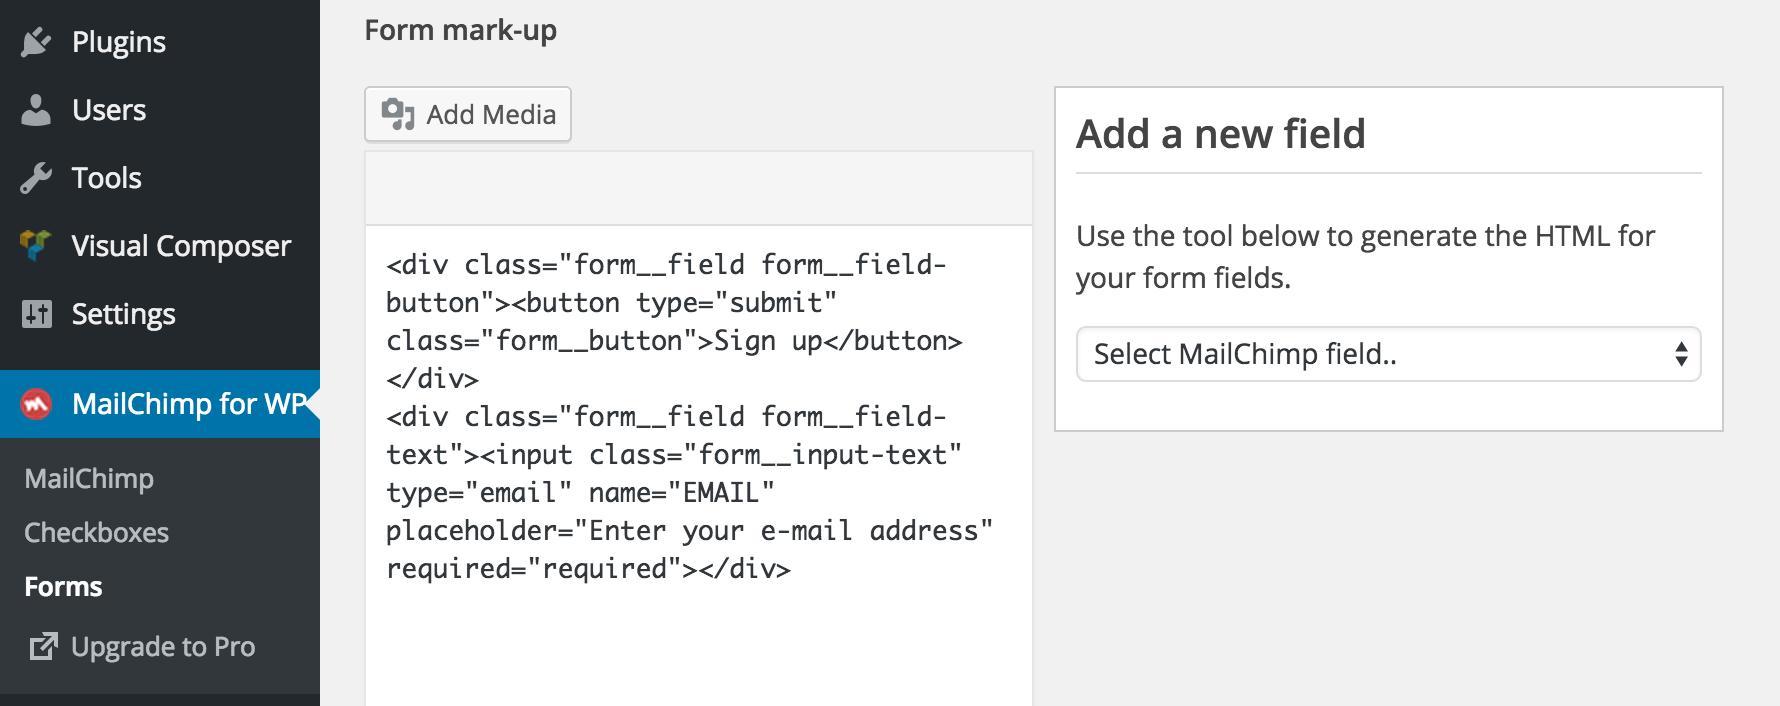
5. Insert the code into the input field Form mark-up:

<div class="form__field form__field-button"><button type="submit" class="form__button">Sign up</button></div>
<div class="form__field form__field-text"><input class="form__input-text" type="email" name="EMAIL" placeholder="Enter your e-mail address" required="required"></div>
If you see the green square that says Connected, that means your website can communicate with your MailChimp account. You can now start to collect subscribers through your website!
Again, thank you for purchasing this theme!
If you have any questions that are beyond the scope of this document, feel free to pose them in the dedicated support forum at www.stylemixthemes.com
Last updated
Was this helpful?