Theme Customization
Once the Pearl Theme is installed, you will now have to customize the theme to suit your needs. The following are some of the tasks you need to complete to customize the theme:
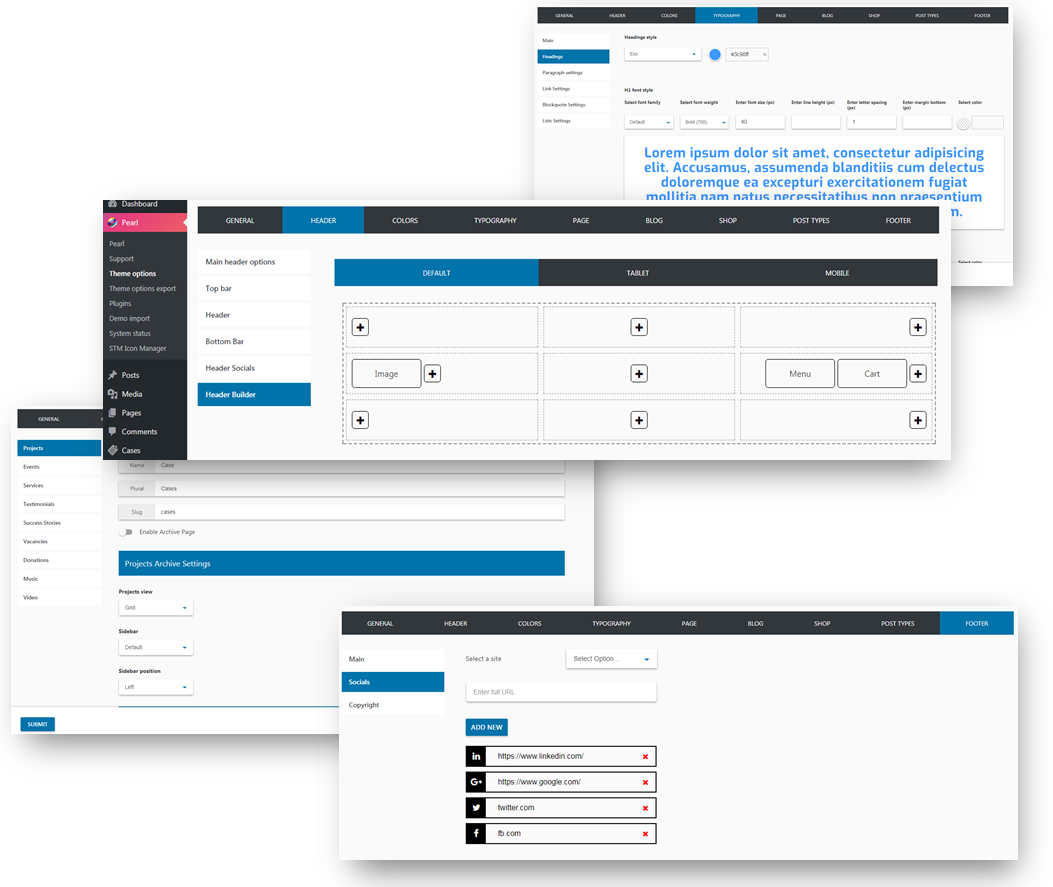
Build your own header, set up headers, footers, and sidebars for your website.
Choose your own color scheme and typography options.
Type in the address and other information about your organization.
Design and add widgets to your website.
Set up the menus of the website.
Change the main language of the site (if your main language is not English).

General Theme Options
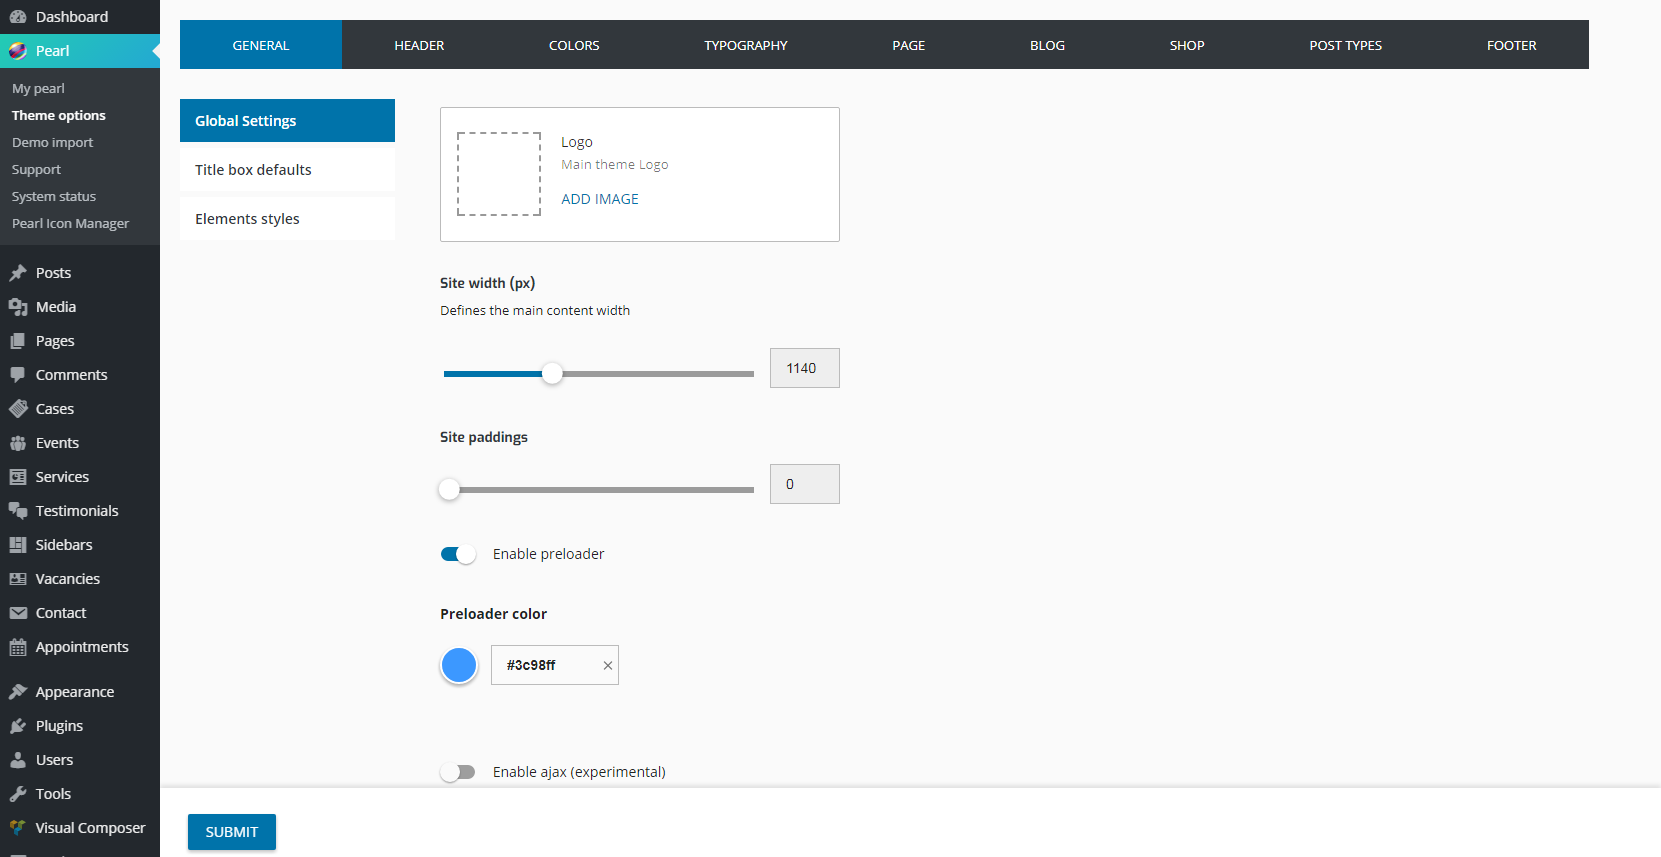
Here you can set up global website settings such as site logo/icon, view types for basic modules, site width and site layout options, default settings for page Title Box, Google and PayPal API settings.

Typography settings
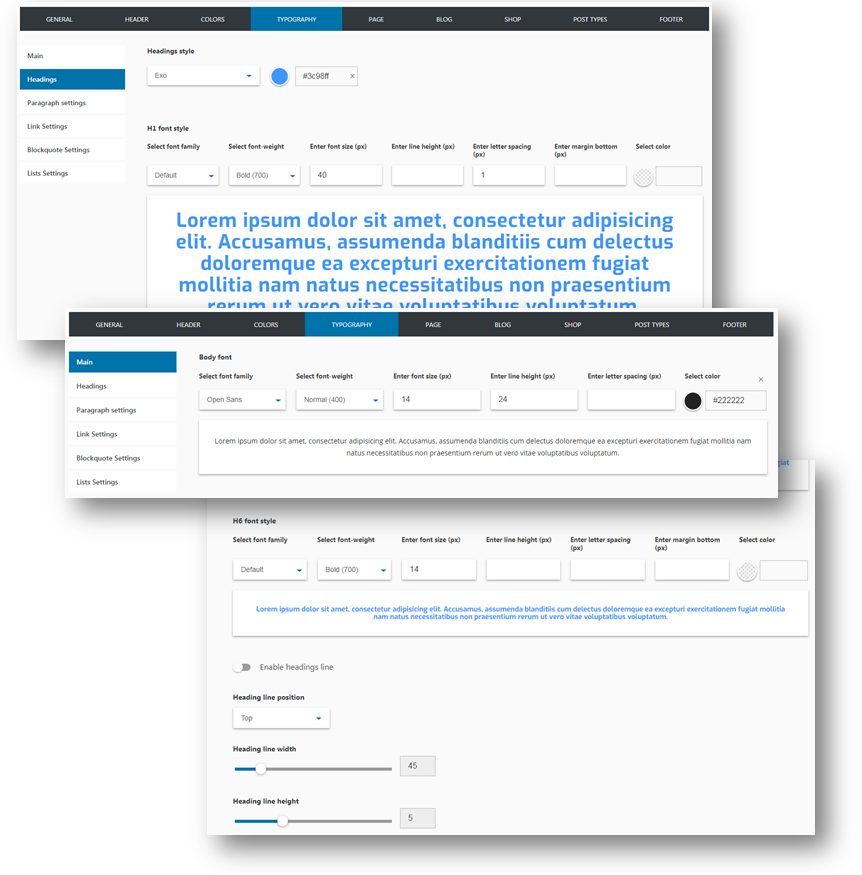
If you want to change your website typography settings, you need to go Pearl > Theme Options > Typography. It’s possible to change typography options for Main (body) and Headings, also Paragraphs, Link, Blockquote and List settings.

Setting the General Color Scheme for your Website
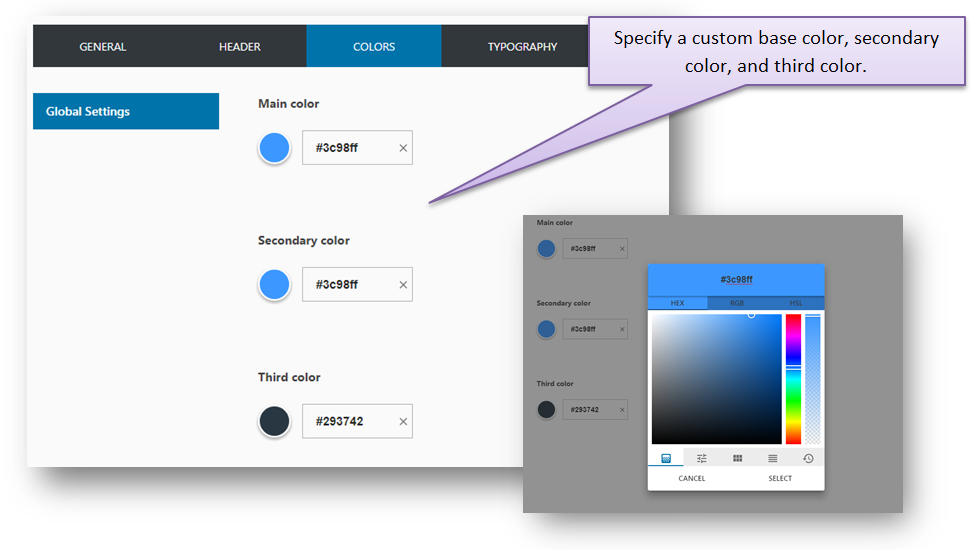
With the Pearl theme, you can specify a basic color scheme for your website. You can select from between three pre-defined schemes or create your own custom scheme by defining a base color, a secondary color, and a third color.
To specify the Color Scheme:
1. Click on Pearl > Them Options > Colors in the WordPress menu.

2. Click on the Submit button to save your settings.
Single Post Share
Apply share buttons to any single post.
Follow to Theme Options > Blog > Single Post and under the Show Post Share option select Show and choose the social networks you want to display.

Last updated
Was this helpful?

