MasterStudy App Documentation
App PageChangelog
  • Introduction
  • MasterStudy LMS API Plugin Setup
  • Flutter Environment
  • Android App Build on macOS
    • Flutter Setup for the macOS system
    • Android Studio Setup on mac
    • Android Studio Emulator on mac
    • Null safety setup
    • Installing Flutter Packages on mac
    • Setting the Site URL on mac
    • Adding App Icon on mac
    • Setting App Name on mac
    • Firebase on mac
    • Firebase Project Setup
    • Change Package Name
    • Test Your App on mac
    • App Release on mac
  • iOS App Build
    • Building App for iOS
    • Firebase for iOS
  • Google And Facebook Sign-In
    • Google Sign-In
    • Facebook Sign-In
  • Android App Build on Windows OS
    • Flutter Setup for Windows System
    • Android studio Setup on Windows
    • Android Studio Emulator on Windows
    • Null safety setup
    • Installing Flutter Packages on Windows
    • Setting the Site URL on Windows
    • Adding App Icon on Windows
    • Firebase on Windows
    • Firebase Project Setup
    • Change Package Name
    • Setting App Name on Windows
    • Test Your App on Windows
    • App Release on Windows
  • Extra Materials
    • Item Page
    • Changelog
  • stylemixthemes
  • Themes
  • Plugins
Powered by GitBook
On this page

Was this helpful?

  1. Android App Build on macOS

App Release on mac

PreviousTest Your App on macNextBuilding App for iOS

Last updated 4 years ago

Was this helpful?

After you tested your app, you can sign the app for release to Google Play.

This manual aims to display all the key steps for generating a signed app bundle. Please follow this link for the more detailed guide:

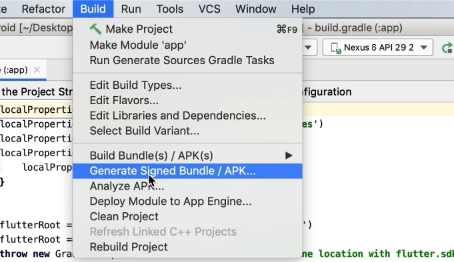
For this, you need to open Build > Generate Signed Bundle / APK…

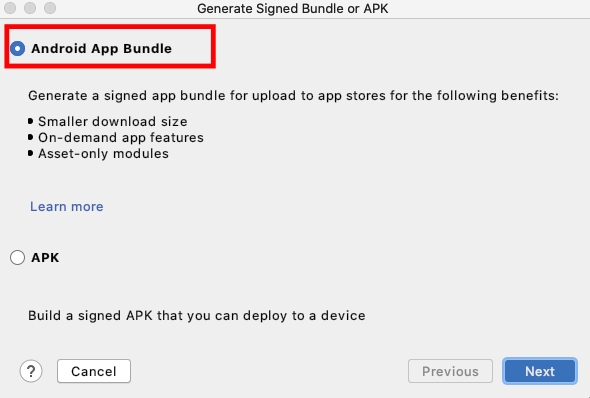
In the new window select Android App Bundle.

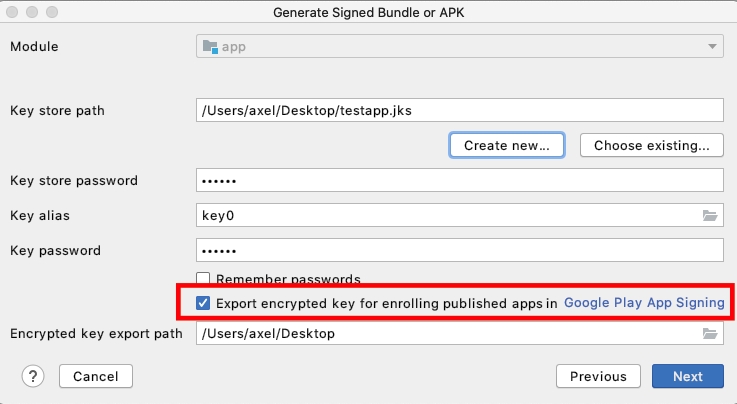
After that, in a newly opened window select the Key or create a new one.

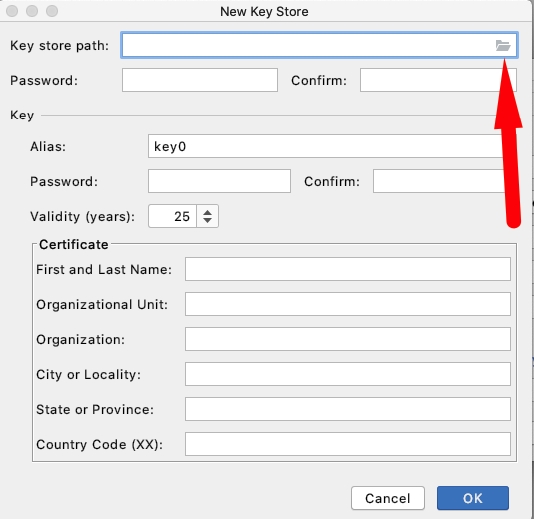
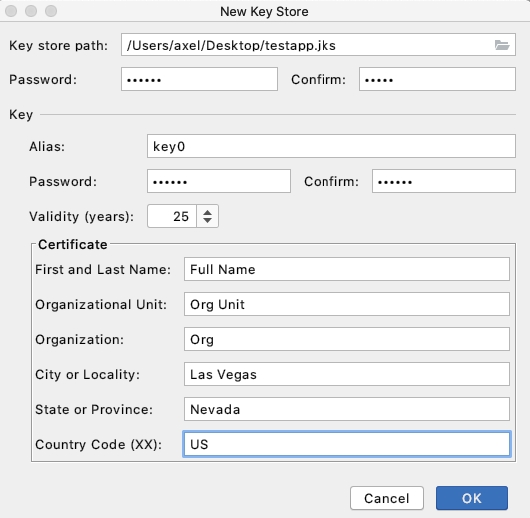
Here is an instruction on how to create a new Key. Click on the Create new. You will see the new window opened. Click on the folder icon in the right top corner.

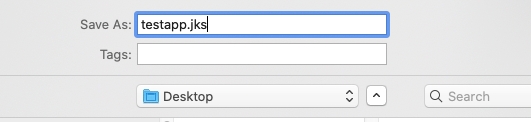
Select the folder where the Key will be stored, create new jks

Fill in the information (all fields).

Next, check the Export encrypted key, if it is the update of the already uploaded app to the Google Play.

Now you need to select Release option and launch app building process.

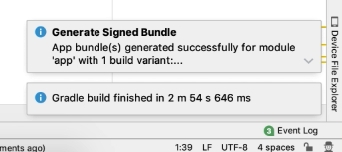
After that, Android Studio will notify you that app building process is finished (see the notification in the right bottom corner).

By clicking on the Locate you will be redirected to the folder where the file is stored. Also, the app bundle can be found here: Project folder > Android > App > Release

Please find more information here:

The full guide describing how to upload the app to the Google Play Console can be found here:

https://developer.android.com/studio/publish/app-signing#enroll_existing
https://developer.android.com/studio/publish/upload-bundle
https://developer.android.com/studio/publish/app-signing#sign-apk