
Building App for iOS
Last updated
Was this helpful?
Last updated
Was this helpful?
You can review the tutorial for a more detailed overview.
Watch the video tutorial showing the steps of how to build iOS app on macOS.
Or follow the instructions and steps presented in this manual.
Please note that for building an iOS app you need to go through these steps first:
1. 2. 3. 4.
These steps are required for the proper installation of Flutter packages and smooth further work.
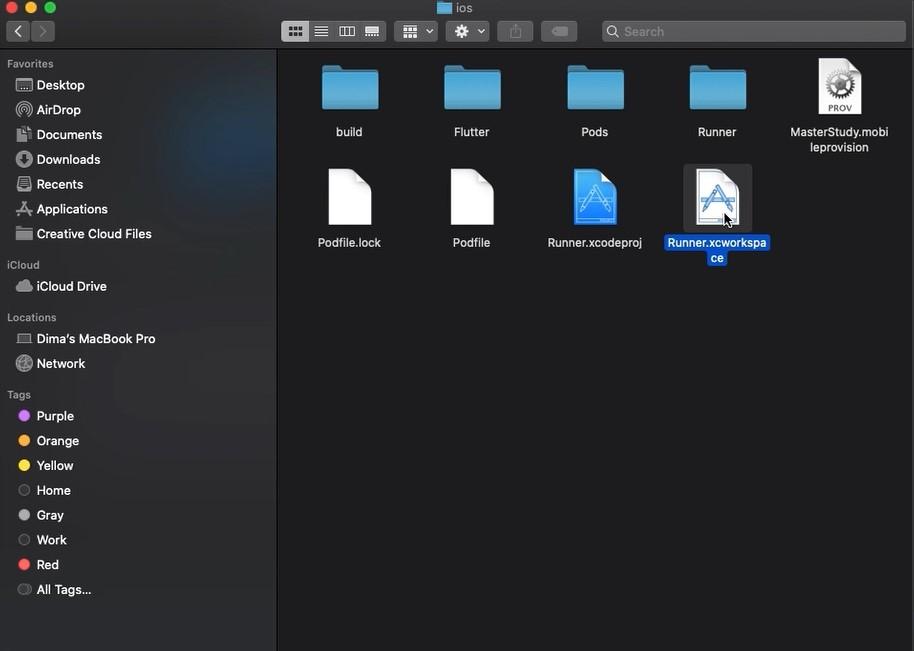
Launch Xcode and open the file Runner.xcworkspace which is located in the ios folder.
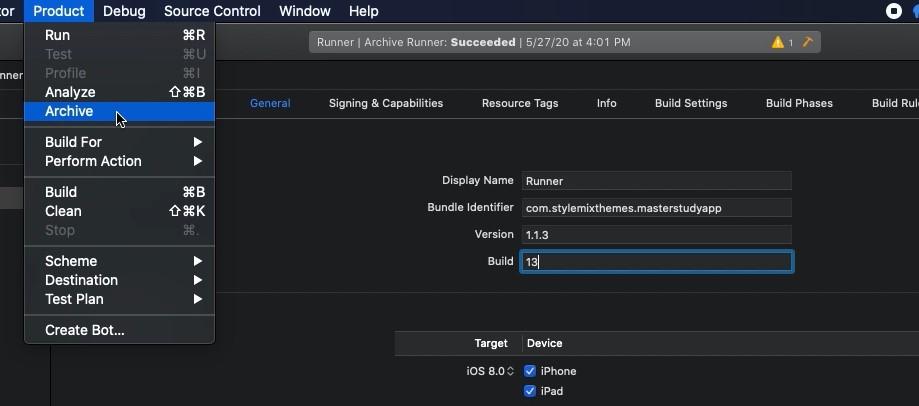
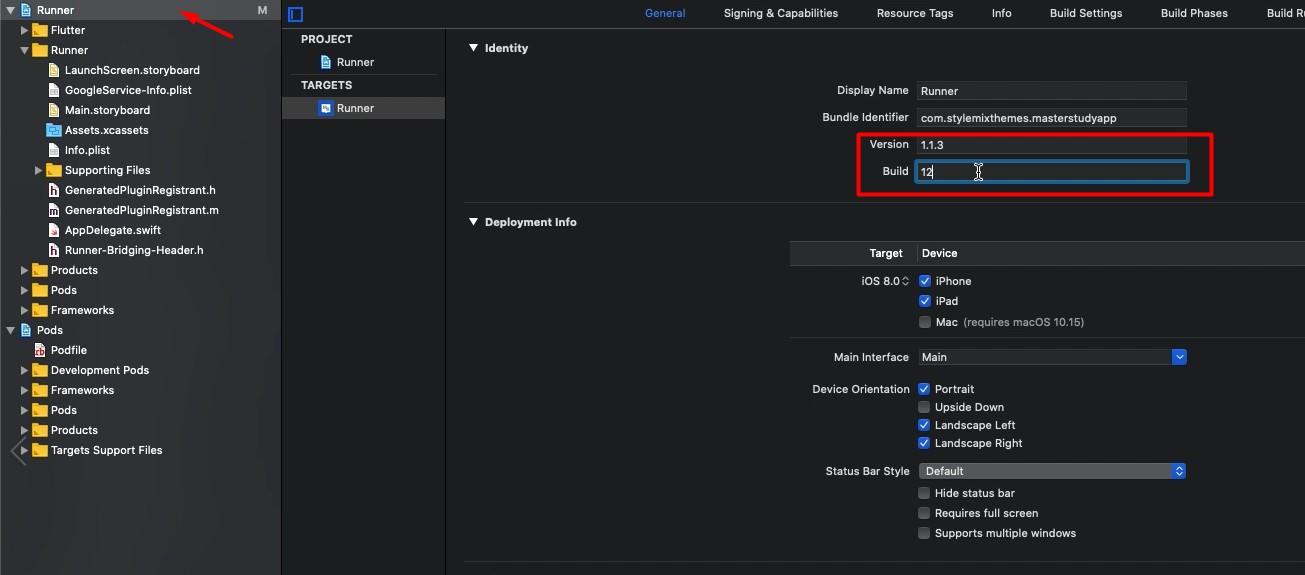
Go to File > Runner and enter the Version and Build in the specified fields.
In the Display Name enter the name of the app.
You can add icons to your app in the App Icons and Launch Images section of the Xcode General panel. To add icons click on the arrow icon and open the asset catalog
In the Finder, drag variations of your app icon to the wells in the detail area match their resolutions
Finally, review the icon set has been applied by running your app using Xcode device simulator
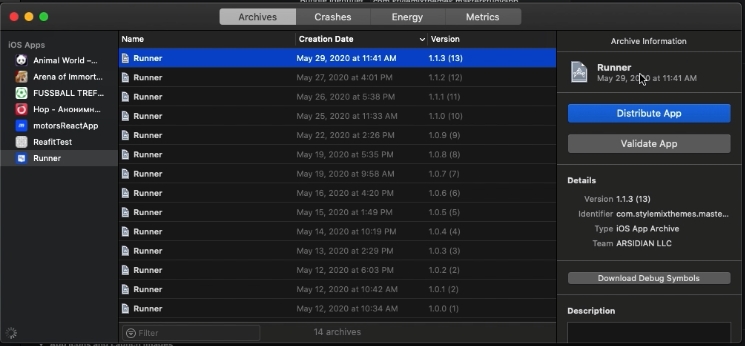
After that, click Product > Archive and wait while the runner is archiving.
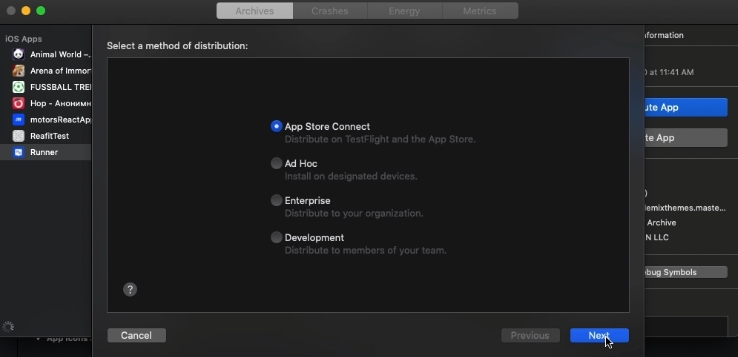
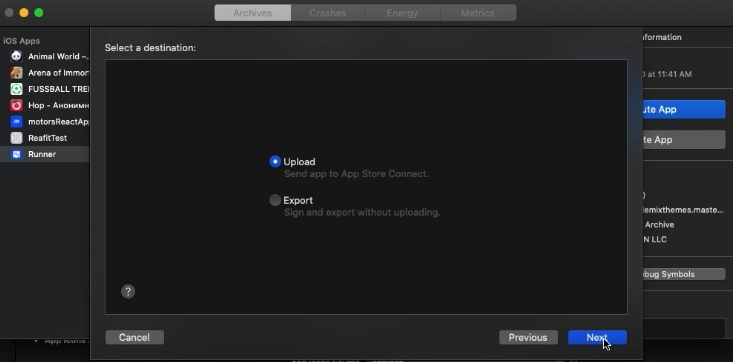
When the process is finished, in the popup window click Distribute App.
Select upload option to Send app to App Store Connect.
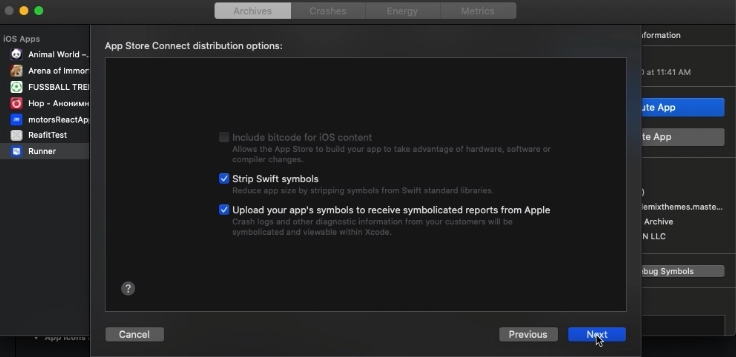
Next, select profile and continue. Once the process is finished, click on Upload.
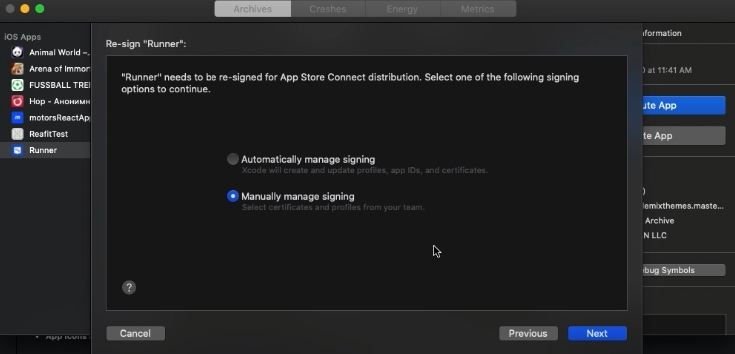
After that, select the option Manually manage signing.
The select Profile.
Next, click on the Upload.
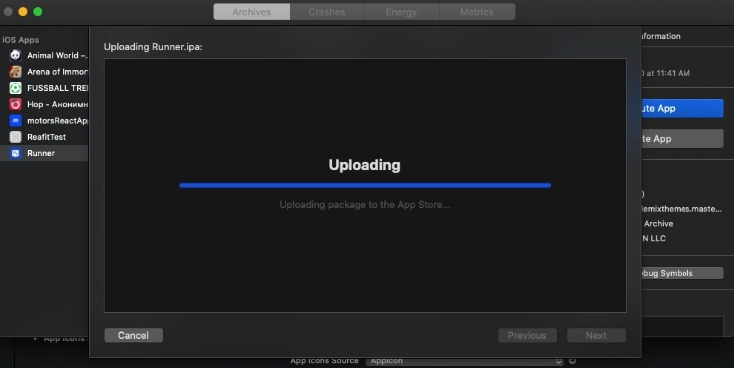
The uploading process will start, wait until it is finished.
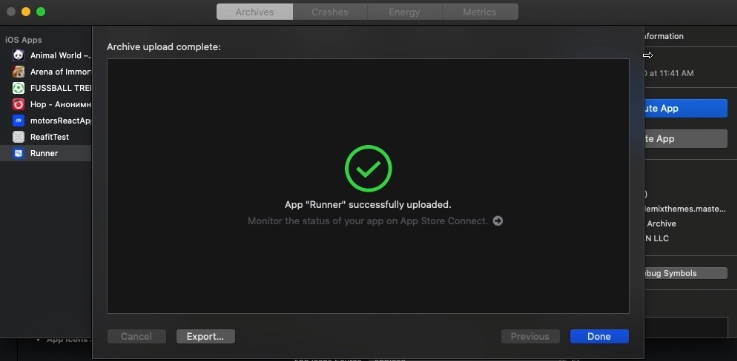
Archive upload successfully completed.
Tip: Follow the when creating the app icon. You can use the tool.
Alternatively, select the asset catalog containing your app icon set in the and drag variations to the wells.
Tip: For a detailed overview of using simulator, see the .
.png)
![]()


.png)