MasterStudy App Documentatioin
App Page
Video Tutorials
Changelog
Search…
Introduction
MasterStudy LMS API Plugin Setup
Flutter Environment
Android App Build on macOS
Flutter Setup for the macOS system
Android Studio Setup on mac
Android Studio Emulator on mac
Installing Flutter Packages on mac
Null safety setup
Setting the Site URL on mac
Adding App Icon on mac
Setting App Name on mac
Firebase on mac
Change Package Name
Test Your App on mac
App Release on mac
iOS App Build
Building App for iOS
Firebase for iOS
Android App Build on Windows OS
Flutter Setup for Windows System
Android studio Setup on Windows
Android Studio Emulator on Windows
Installing Flutter Packages on Windows
Setting the Site URL on Windows
Adding App Icon on Windows
Firebase on Windows
Change Package Name
Setting App Name on Windows
Test Your App on Windows
App Release on Windows
Extra Materials
Item Page
Video Tutorials
Changelog
stylemixthemes
Themes
Plugins
Powered By
GitBook
Adding App Icon on Windows
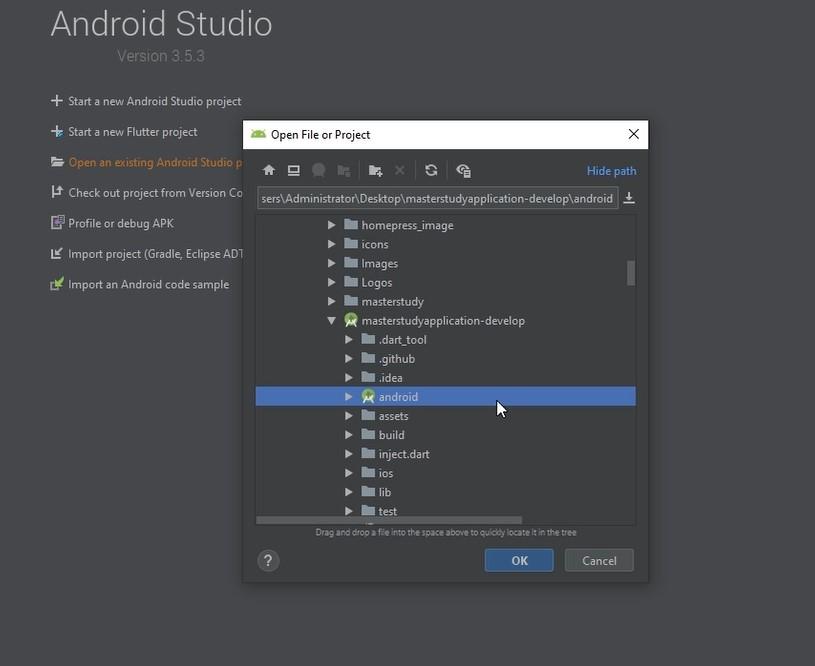
Your next step is to return to
Android Studio
. Go to
Open an existing AS project
, find your app project and open the
android
folder there.
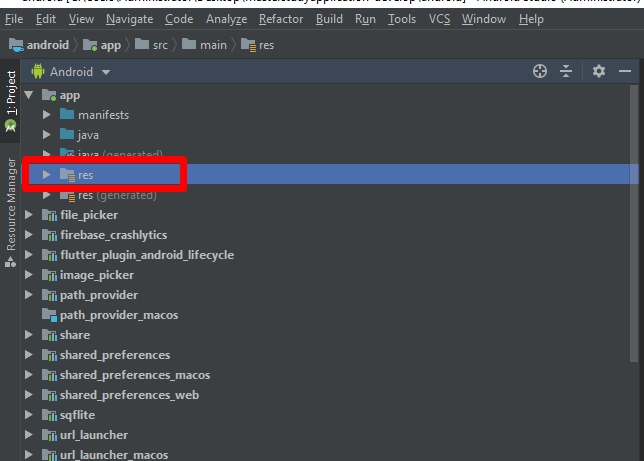
Open the following folder:
…/app/src/main/res
and double click on the folder
res.
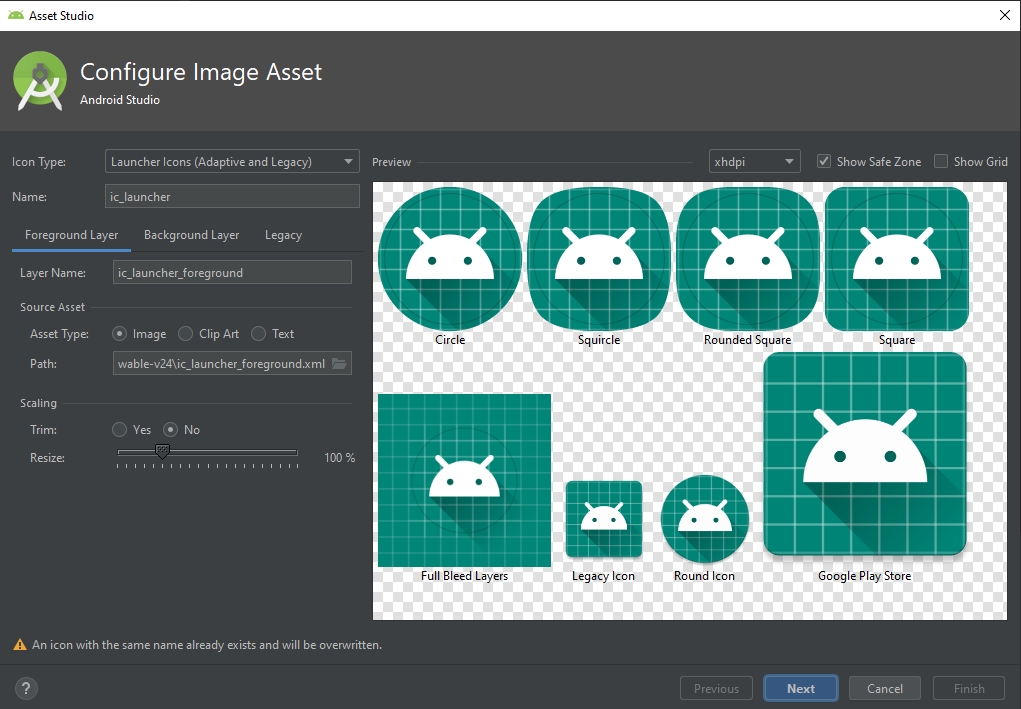
There will be the menu, where you need to hover over the
New
line and select from the submenu
Image Asset
.
Select your icon from your PC or device and set it up.
The more detailed documentation about Image Asset work you can find here:
https://developer.android.com/studio/write/image-asset-studio
Android App Build on Windows OS - Previous
Setting the Site URL on Windows
Next - Android App Build on Windows OS
Firebase on Windows
Last modified
1yr ago
Copy link