Step 4 – Setting up the project
In order to set display name, Bundle identifier, version, build, etc. of your app, you need to install the Xcode tool. You can download the Xcode here .
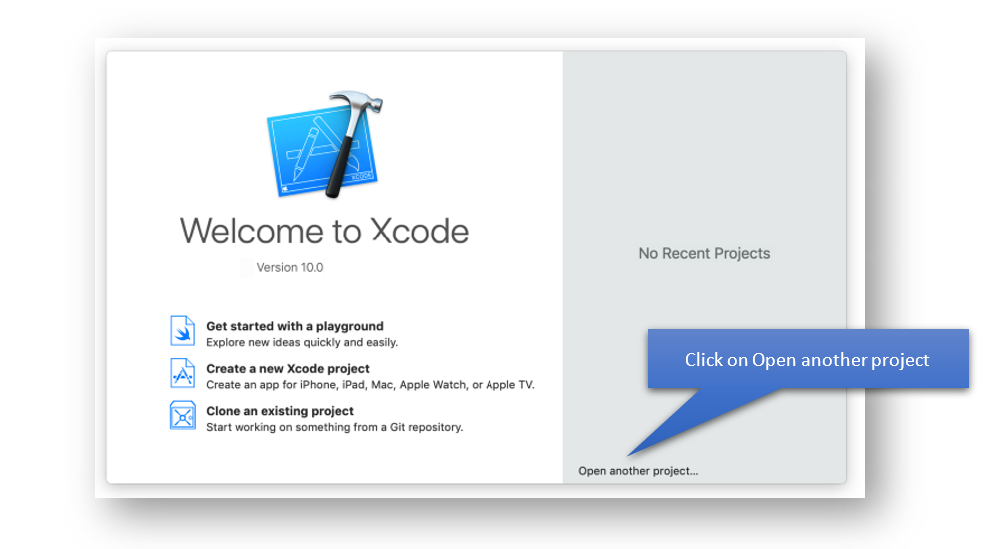
After, run the Xcode and click on “Open another project…” option in the welcome window.

In the popup window, select and open the “motors-app/iOS” folder.

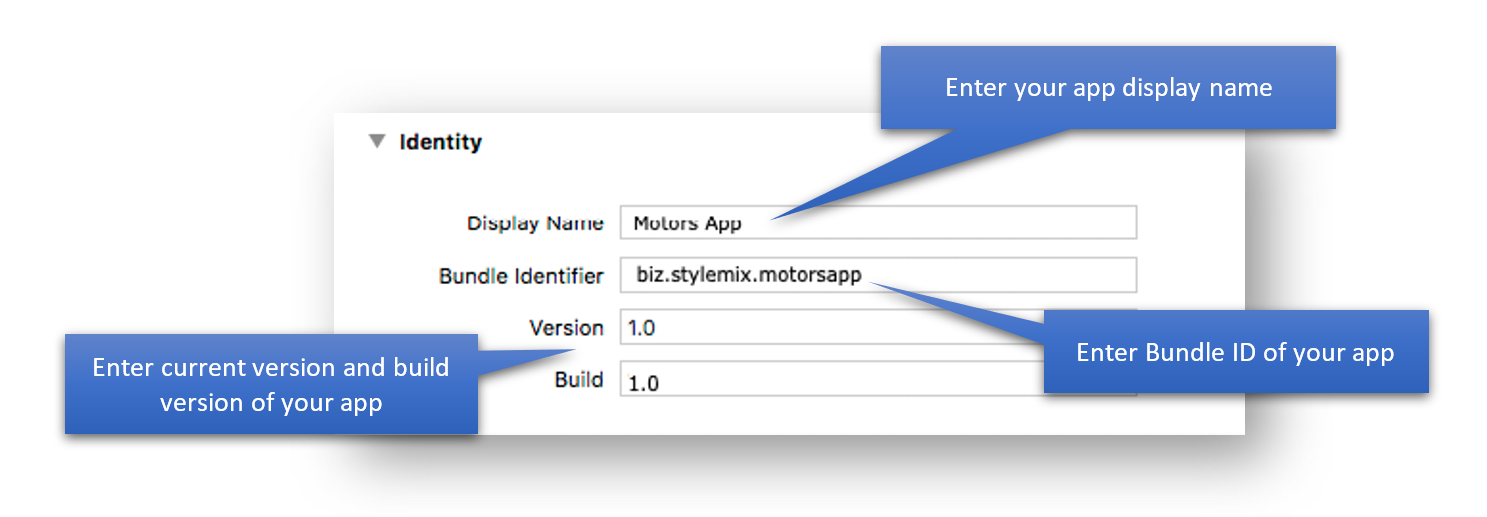
Go to File > Runner and enter the Version and Build in the specified fields.

Display name: the name of your app which will be displayed on the home screen/elsewhere;
Bundle Identifier: the Bundle ID registered on App Store Connect (com.yourcompanydomain.appname);
Version: – the current version of your app;
Build: – the build version of your app.

In the Signing section, you need to select your team which connected to your Apple Developer account.
Note. Automatically manage signing option is active by default. This option allows Xcode automatically managing app signing and supplying.

Tip: For detailed overview of app signing, have a look at the Create, export, and delete signing certificates.
The next section is the Deployment Info section where you need to set the minimum iOS version your app will support iOS 12.0 and later.

Last updated
Was this helpful?