uListing Subscription
Here you can watch a video tutorial about uListing Subscription Addon:
uListing Subscription is a paid add-on of uListing plugin that allows to Create and Sell Subscription plans. Subscriptions allow a business to drive more revenue and reduce the gaps in billing cycles and enable more flexible billing options. This allows customers to pay for only the services that they consume on-demand at lower prices. Your customers use listings to cut down on their overall cost hence it is better for the user experience than a one-type payment service.
If you have installed our powerful plugin uListing, it is clear that you can create a professional business listing site in a few minutes, with subscription addon you will get more flexibility on creating payment plans.

How to Install Subscription Addon
First, go to Plugins -> Add New. Then click the upload plugin button to choose your plugin file from your local folders.

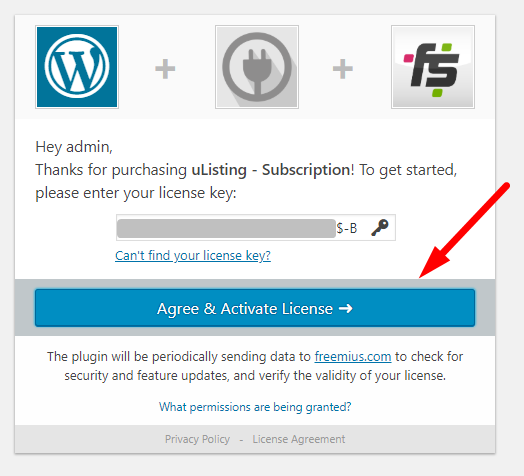
After you have purchased our add-ons, you will get the following message below from freemius.com:

After choosing the proper file, click the Install Now button to install it:

Click the Activate Plugin button after installation.

Here, after activation, enter your license key to activate the license.
Before adding an uListing subscription add-on, when we tried to add a new pricing plan, we had this screen where you can create only a one-time payment pricing plan.

But now, after activating the pro subscription addon, this function is unlocked. Below you can use the listing limit, feature limit, duration and etc.
uListing Subscription Addon allows adding feature limit for the pricing plans.
With a free version of the plugin, you can add only a listing limit.

uListing Subscription Addon allows adding a Paypal method for Subscription Pricing Plan Payments
If you go to the Ulisting > Settings > Payment, here one more setting for PayPal has appeared. Create flexible plans with payments in PayPal or in Stripe. You can also combine one-time payment plans with a subscription to give your users a greater choice. Let them choose if they want to pay a big sum once, or a little but regularly.

Click the Install button to enable Subscription Pricing Plan Payments in PayPal.

Click the Settings button to set up PayPal subscriptions.

Here you need to specify your Paypal account and your created app credentials. If you don't know, see these examples.

First, create an app for your settings.
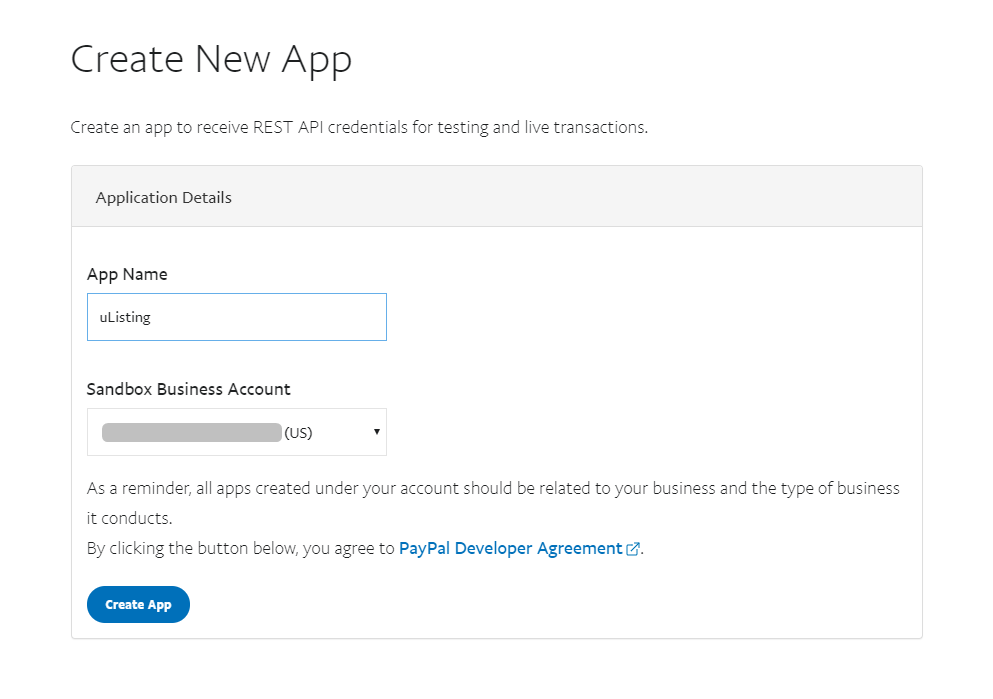
Here enter the name for your application and select your business account. Paypal will create a Client ID and Client secret for you.
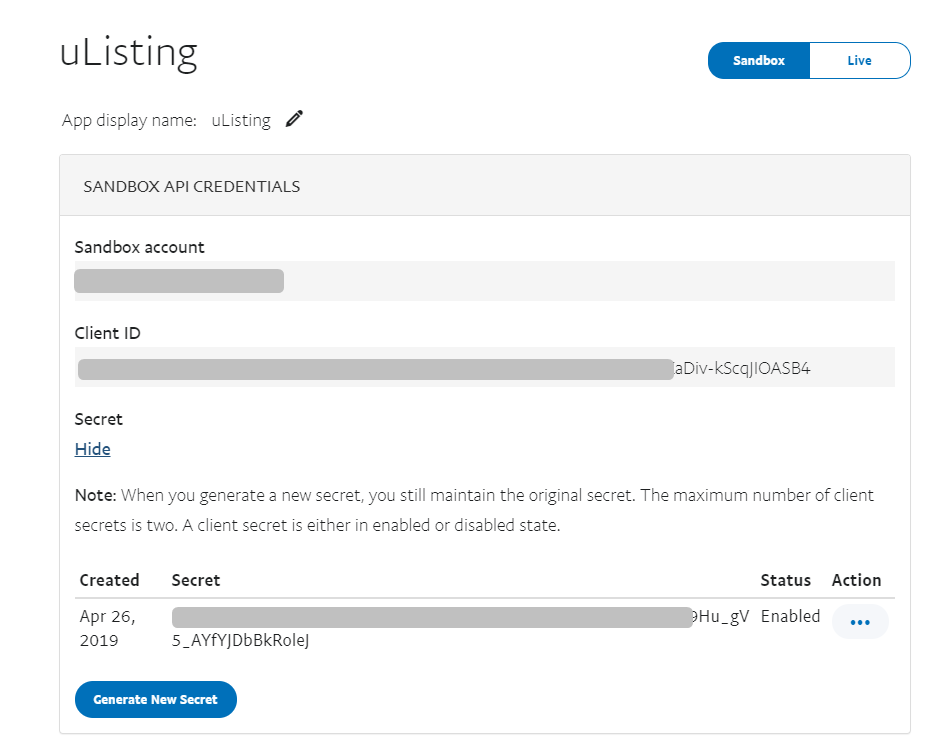
Copy them and paste them into Paypal settings.

To get a webhook ID, copy this webhook URL and go to your PayPal account. Click on the Add Webhook button.
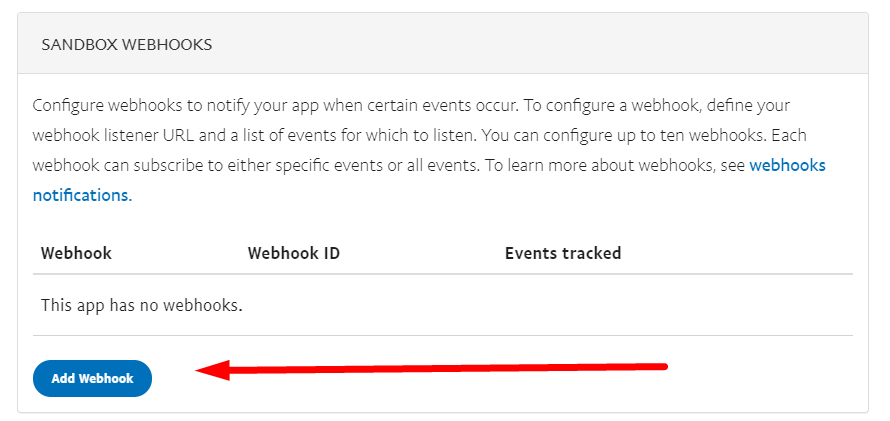
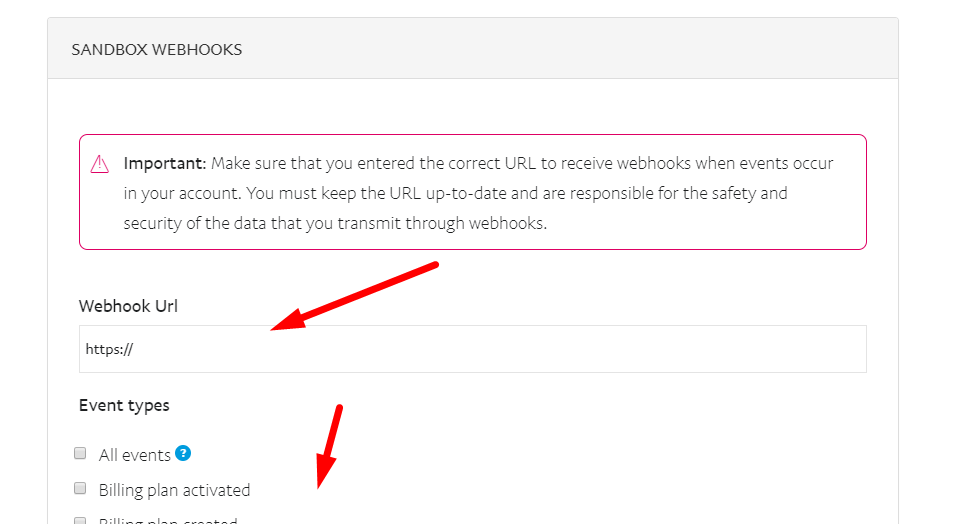
After that paste your webhook URL there and check your event types and click Save button.

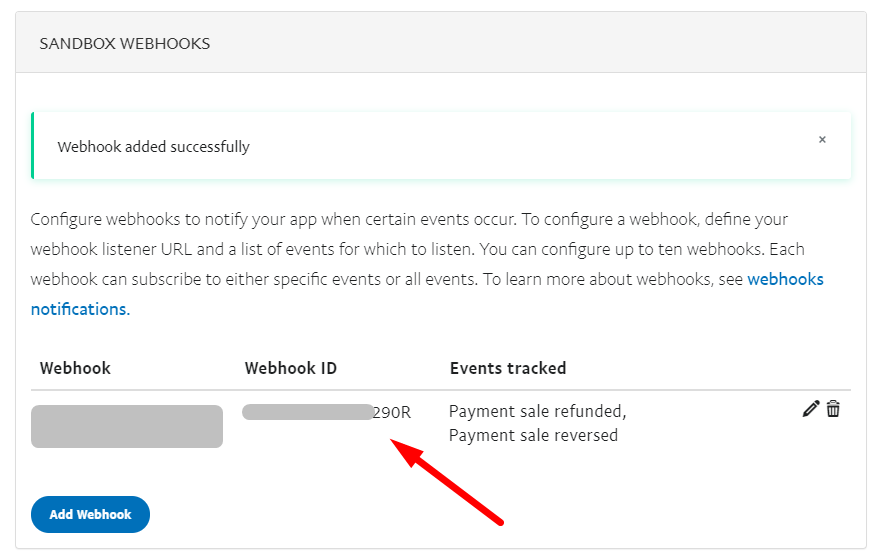
Copy this webhook ID and paste it into your Paypal settings. That’s it.
Now you can create subscription plans, and your users can buy these subscription plans with a Paypal account.
Last updated
Was this helpful?

