> For the complete documentation index, see [llms.txt](https://docs.stylemixthemes.com/llms.txt). Markdown versions of documentation pages are available by appending `.md` to page URLs; this page is available as [Markdown](https://docs.stylemixthemes.com/masterstudy-theme-documentation/woocommerce/woocommerce-products.md).
# WooCommerce Products
Create your own online shop on your educational platform. With the WooCommerce plugin you can do this in no minutes. You will be able to sell various products including teaching and studying materials such as paper books, merch and much more.
## Enable Shop
Go to **Theme Options** from your dashboard and open the **General** section.\
Scroll down to the bottom of the page. There you can find an option called **Enable Shop**. Enable it to activate an online shop on your website.
> When activating this option the functionality with offline courses will be disabled automatically allowing you to use WooCommerce products as intended.

WooCommerce is the most popular e-commerce plugin for WordPress. Before you start adding products, please go through the WooCommerce plugin settings and specify everything you need for your site.
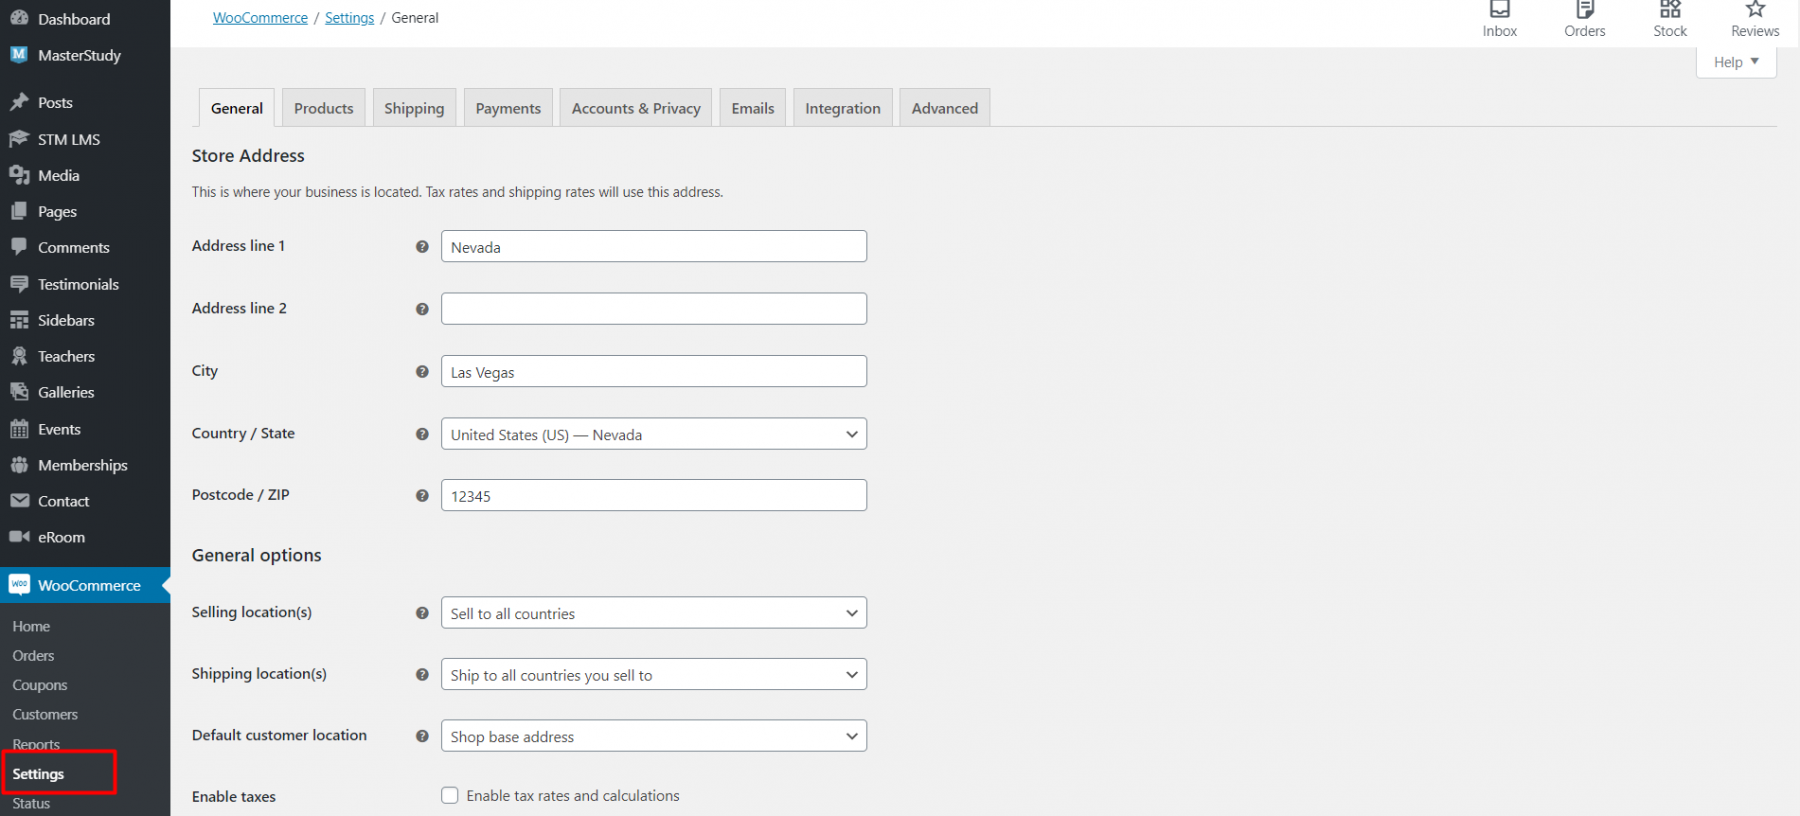
Go to **WooCommerce > Settings** and set up basic things.\
The settings page includes different sections that you can switch using the tabs: General, Products, Shipping, Payments, Accounts & Privacy, Emails, Integration, Advanced.
> Follow the link for the full WooCommerce documentation: \
> WooCommerce settings:
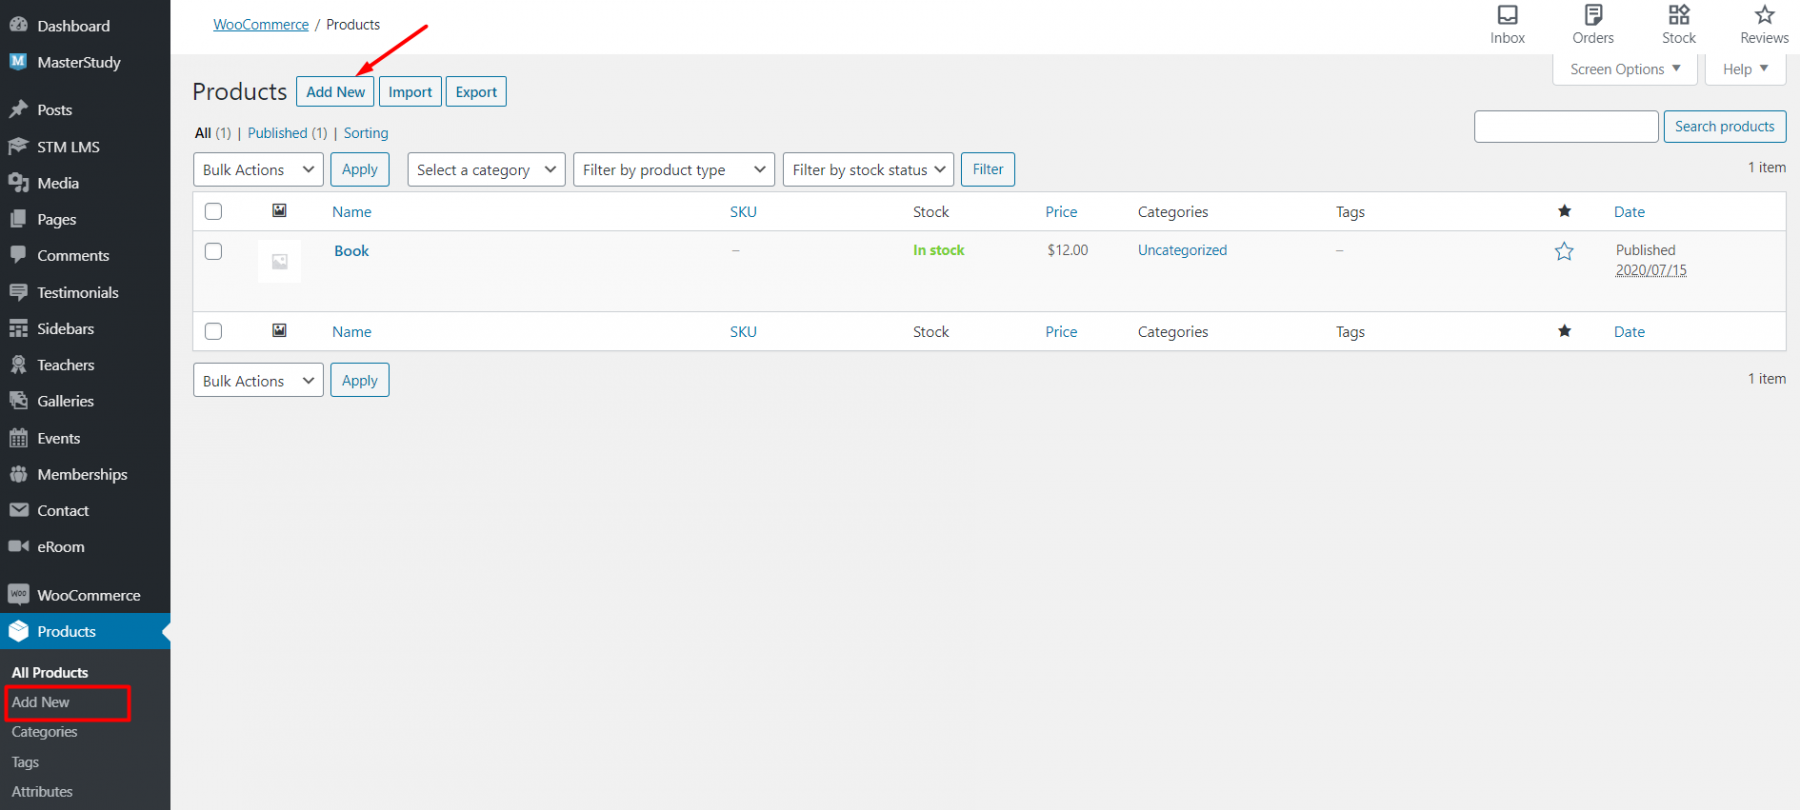
## Adding new product
After this, you can create your first products.
Follow to **Products > Add new**
Enter a product **Title** and **Description**.
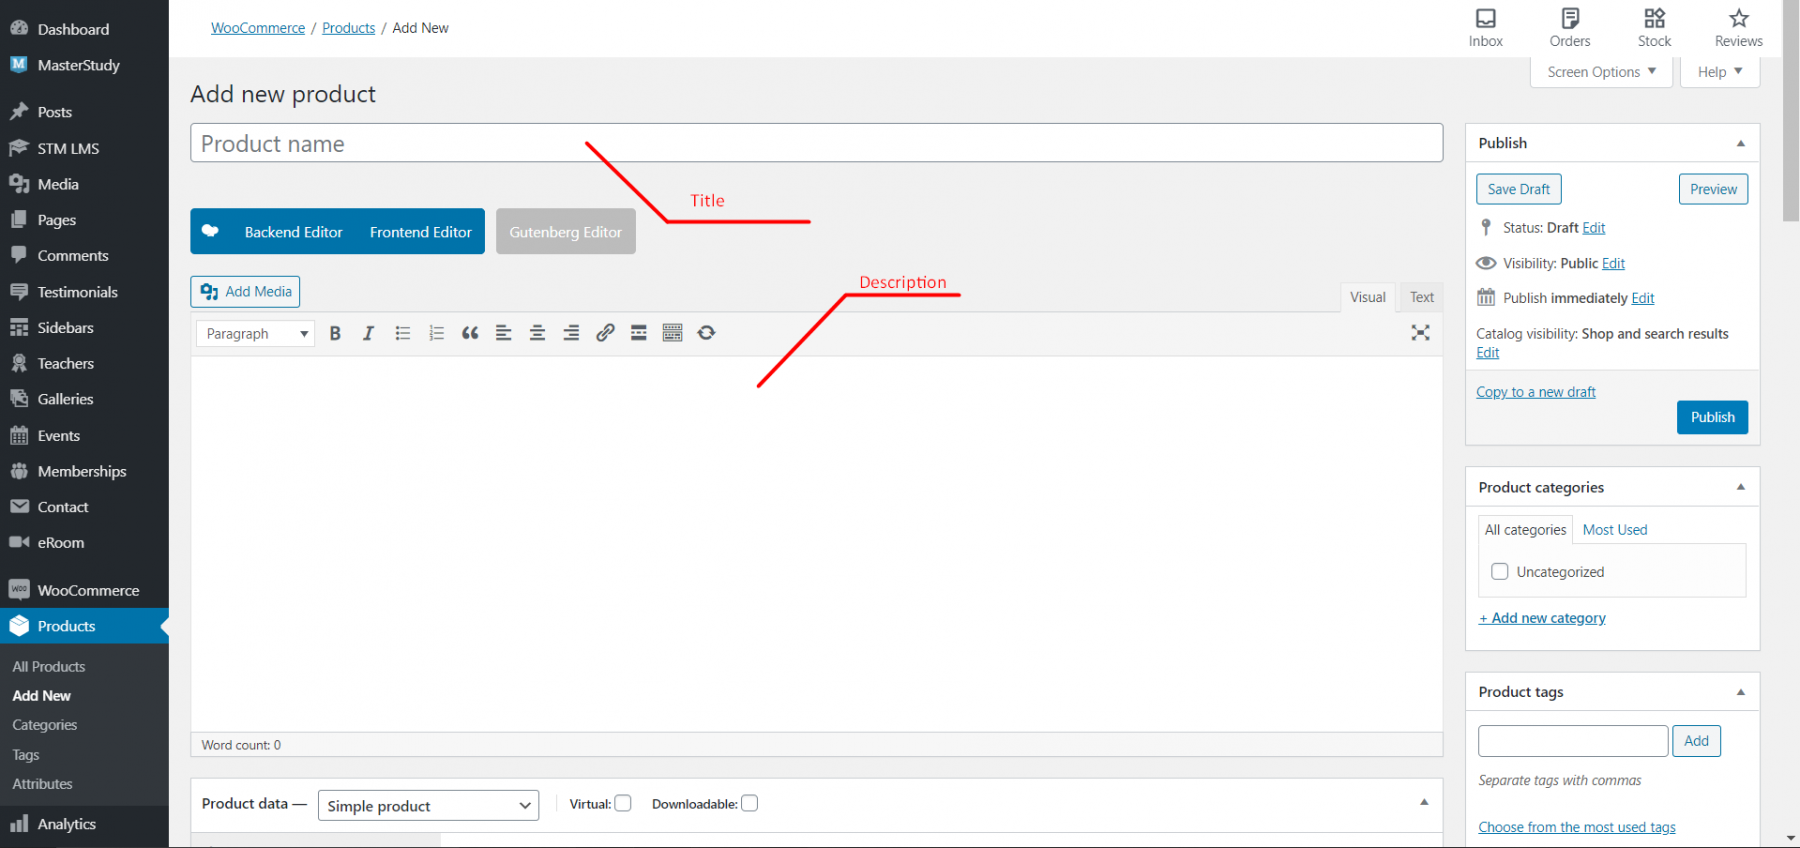
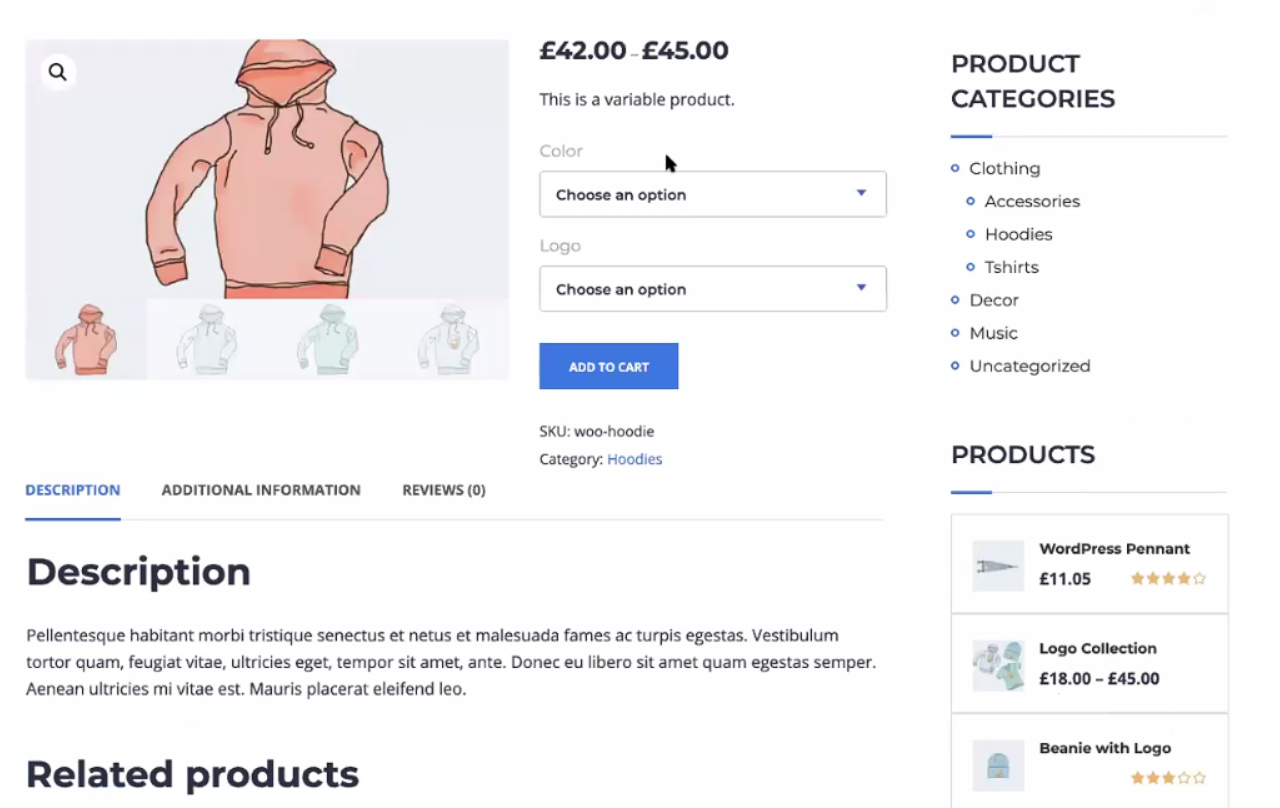
Go to the Product Data panel, and select downloadable (digital) or virtual (service) if applicable.
In the **Product Data** section, you can find the majority of your product settings.
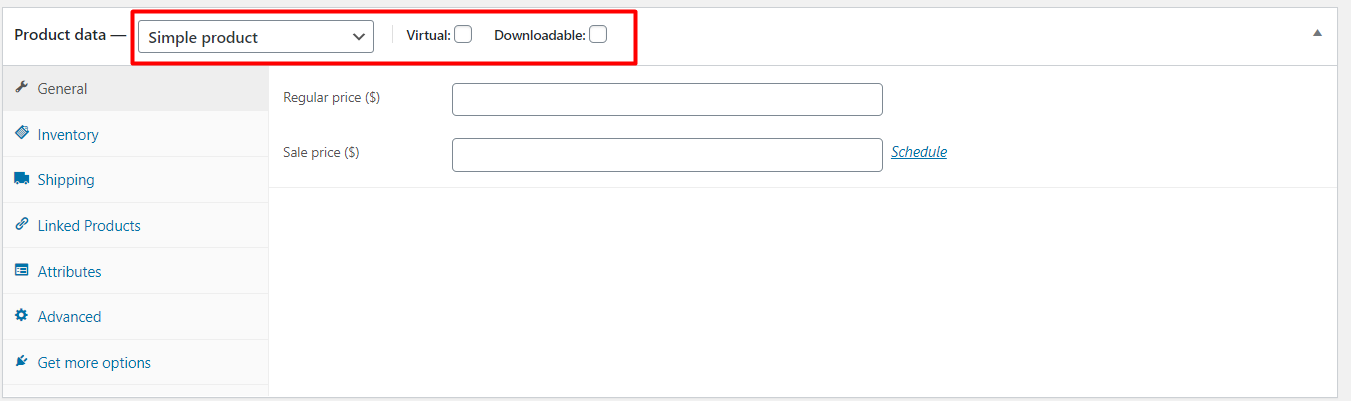
### **General section**
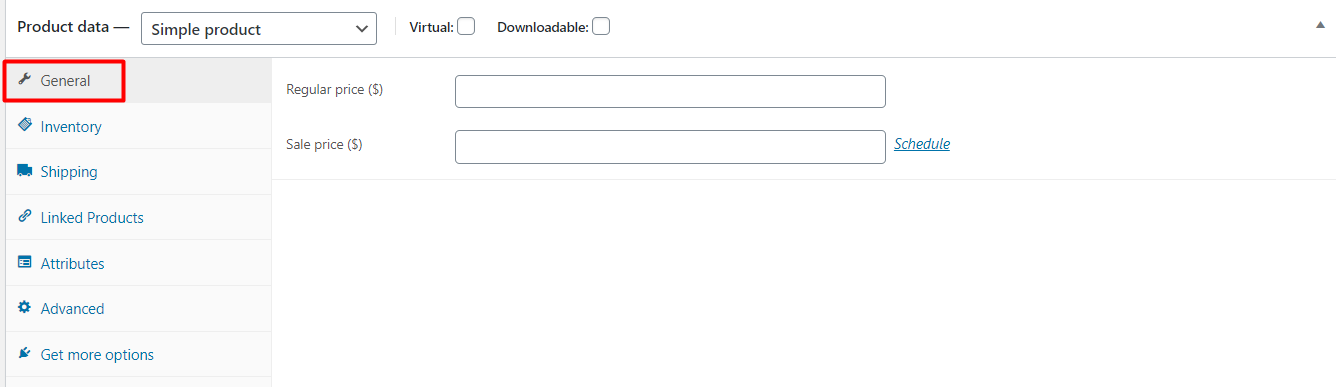
In **General** you can enter the product’s **Regular price** and **Sale price** (discount price)
\
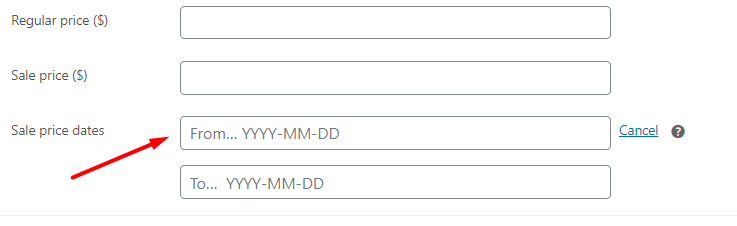
For sale price you can use the Schedule option and specify the dates when the sale will be active.
### **Inventory section**
**Inventory section** allows managing stock for the product individually, changing stock status, enabling to sell products.

Enable Stock Management must be selected in Products Inventory Settings; otherwise, only the ‘Stock status’ option is visible in the Product Data Inventory box.
* Enter the Stock Quantity, and WooCommerce auto-manages inventory and auto-updates Stock Status as Stock, Out of Stock or On Backorder.
* Select whether to Allow Backorders.
* Low stock threshold – Enter a number upon which you are notified.
* Check the Sold Individually box to limit the product to one per order.

### **Shipping section**
In the shipping section the following options are available:
* Weight – Weight of the item.
* Dimensions – Length, width and height for the item.
* Shipping Class – Shipping classes are used by certain shipping methods to group similar products.

### **Linked Products**

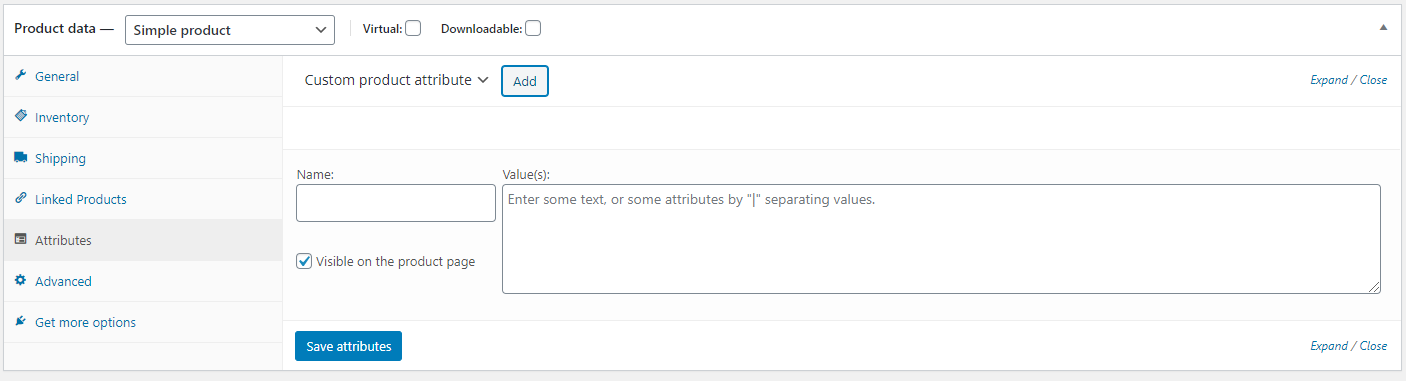
### **Attributes**
Select attributes from the select box and click Add. Once you have chosen an attribute from the select box, click add and apply the terms attached to that attribute to the product.

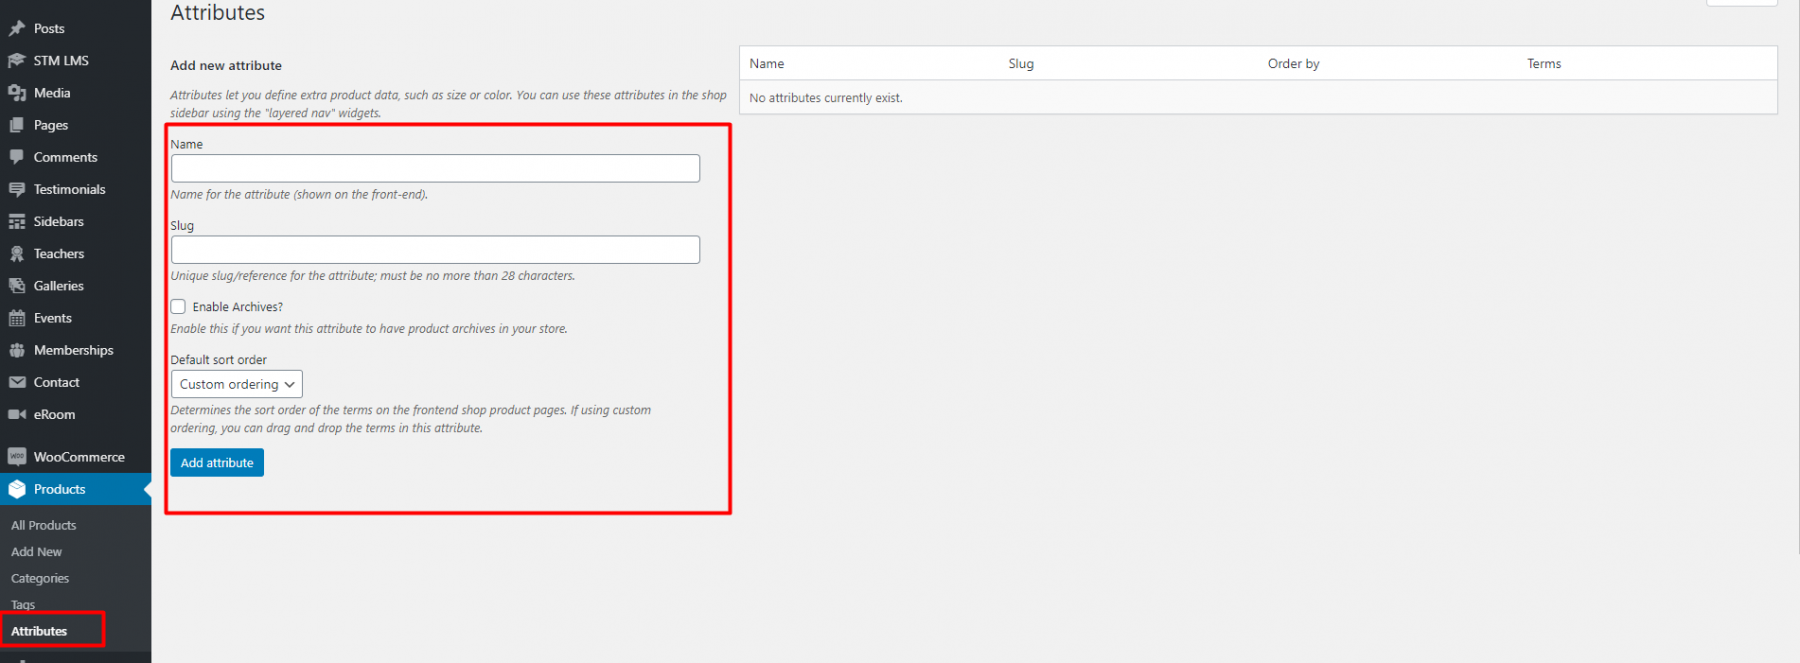
You can also add a new attribute in **Products > Attribute**. Enter the name and slug and click Add attribute.
You can hide the attribute on the frontend by leaving the Visible checkbox unchecked.
### **Advanced**
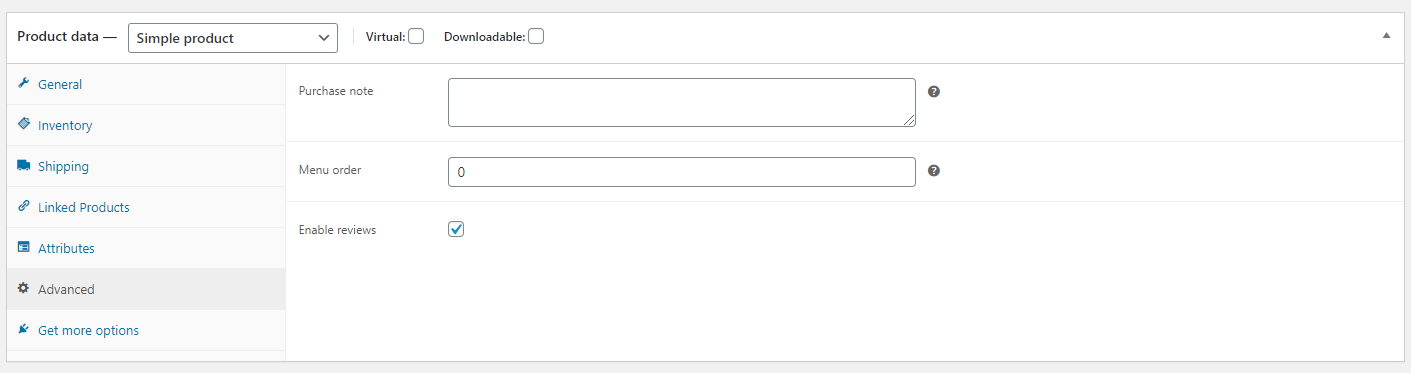
* Purchase note – Enter an optional note to send the customer after they purchase the product.
* Menu order – Custom ordering position for this item.
* Enable Reviews – Enable/Disable customer reviews for this item.
> Follow the link to learn more about WooCommerce products:
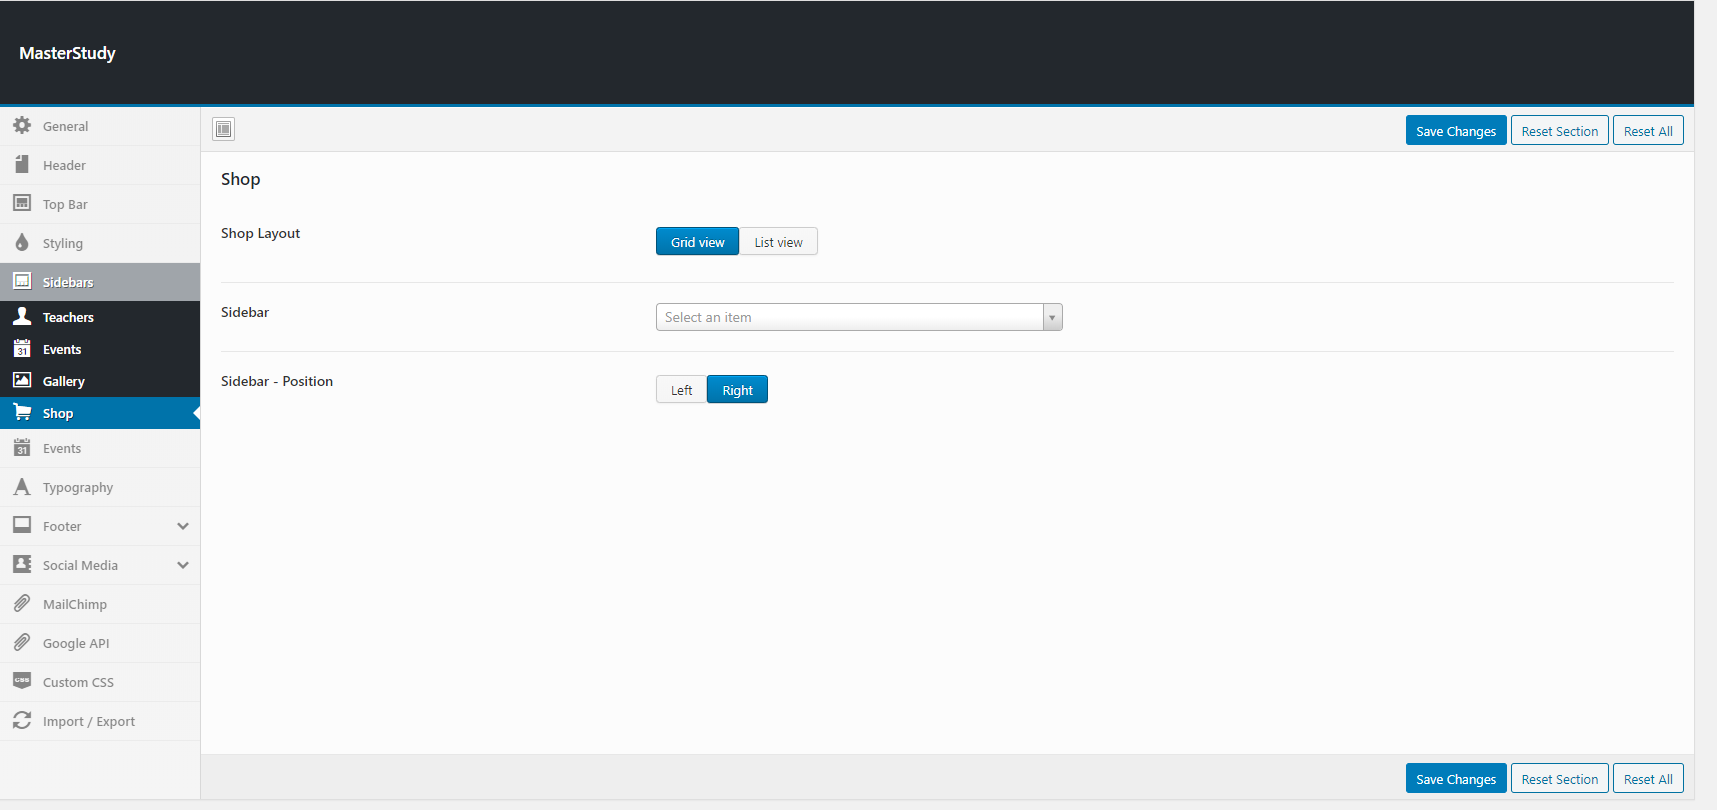
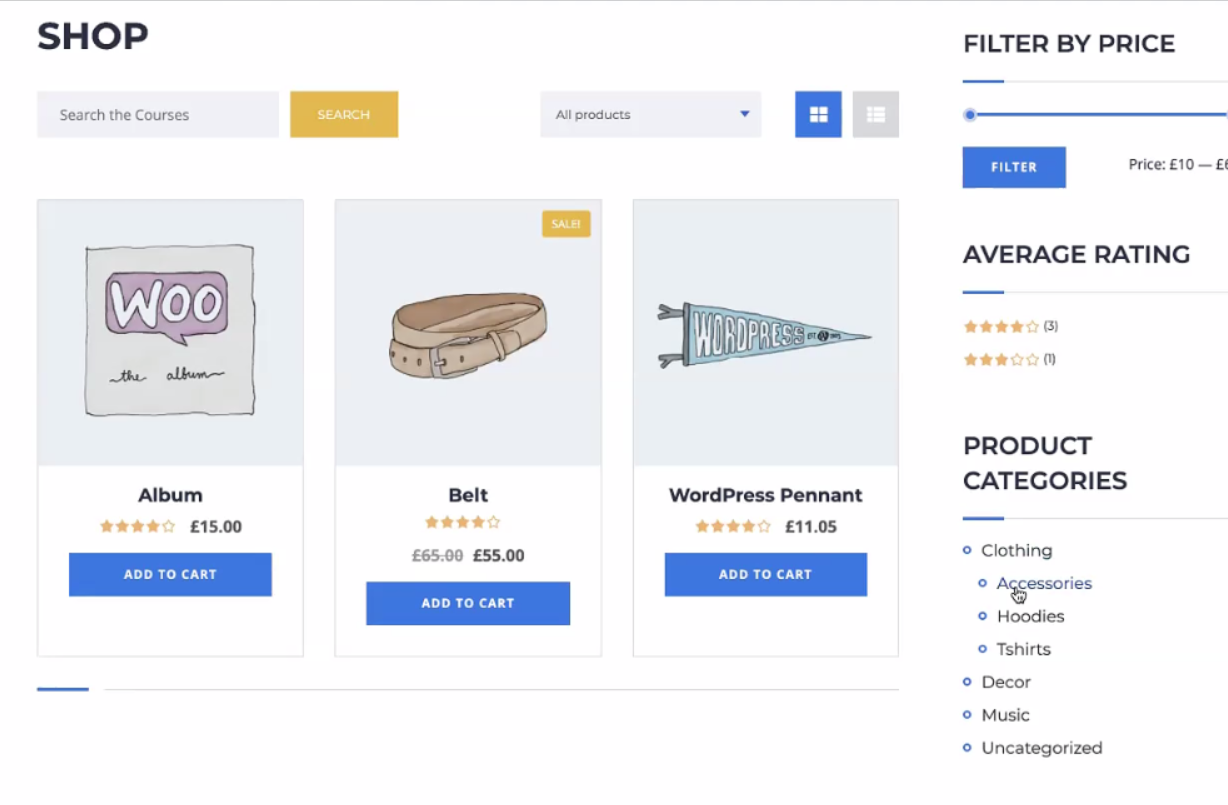
## Shop Sidebar with filters
On the Shop page, you can add the sidebar with filters to help users navigate and manage the display of the products.
Go to **Theme Options > Sidebars** section here choose Right Sidebar or Left Sidebar and select the Shop sidebar to enable sidebar in Shop Page.
Add appropriate widgets to the Shop sidebar in the **Appearance > Widgets** section.
Just click on the widget, select the Shop option, and Add Widget or drag and drop the widget to the Shop.
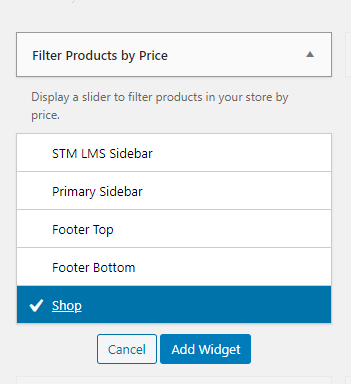 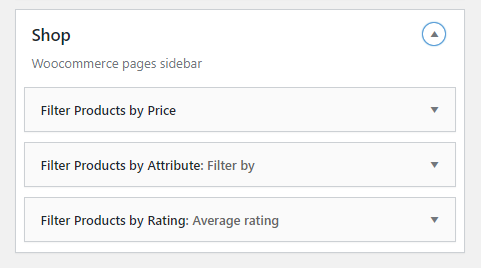
You can add the following widgets for the convenient Shop Sidebar: Filter Products by Price, Filter Products by Rating, Product Categories, Filter Products by Attribute.
At the end, you will get a complete online shop with complementary products. You can sell merch, teaching, and study materials such as paper books and anything else.
---
# Agent Instructions
This documentation is published with GitBook. GitBook is the documentation platform designed so that both humans and AI agents can read, navigate, and reason over technical content effectively. Learn more at gitbook.com.
## Querying This Documentation
If you need additional information that is not directly available in this page, you can query the documentation dynamically by asking a question.
Perform an HTTP GET request on the current page URL with the `ask` query parameter, and the optional `goal` query parameter:
```
GET https://docs.stylemixthemes.com/masterstudy-theme-documentation/woocommerce/woocommerce-products.md?ask=&goal=
```
`ask` is the immediate question: it should be specific, self-contained, and written in natural language.
`goal` is optional and describes the broader end goal you are ultimately trying to accomplish on behalf of the user. GitBook uses it to tailor the answer towards what is most useful for that goal.
The response will contain a direct answer to the question and relevant excerpts and sources from the documentation.
Use this mechanism when the answer is not explicitly present in the current page, you need clarification or additional context, or you want to retrieve related documentation sections.